


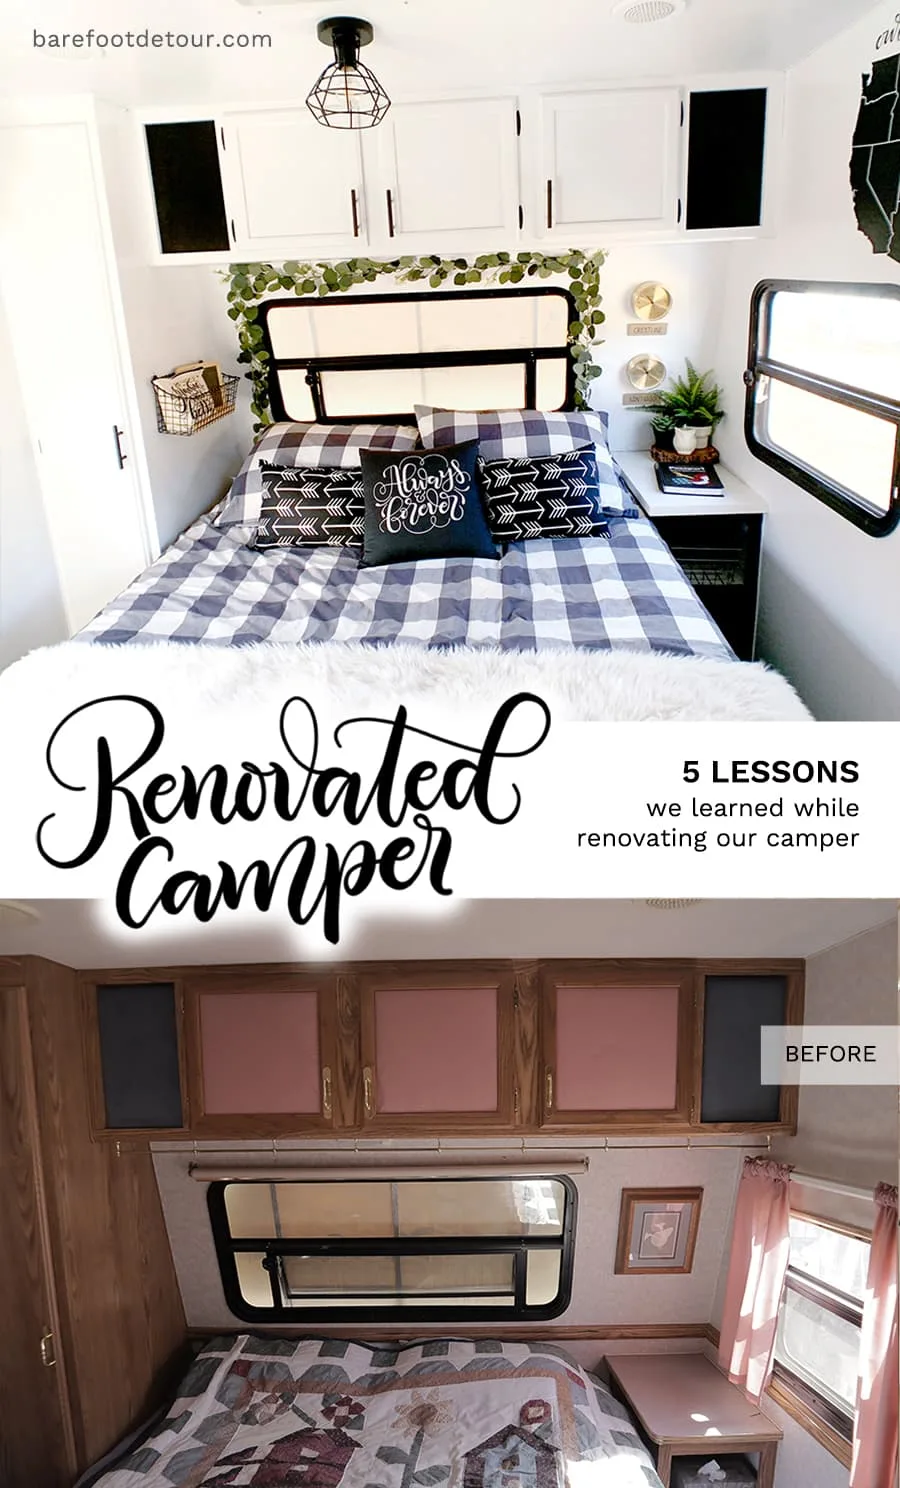
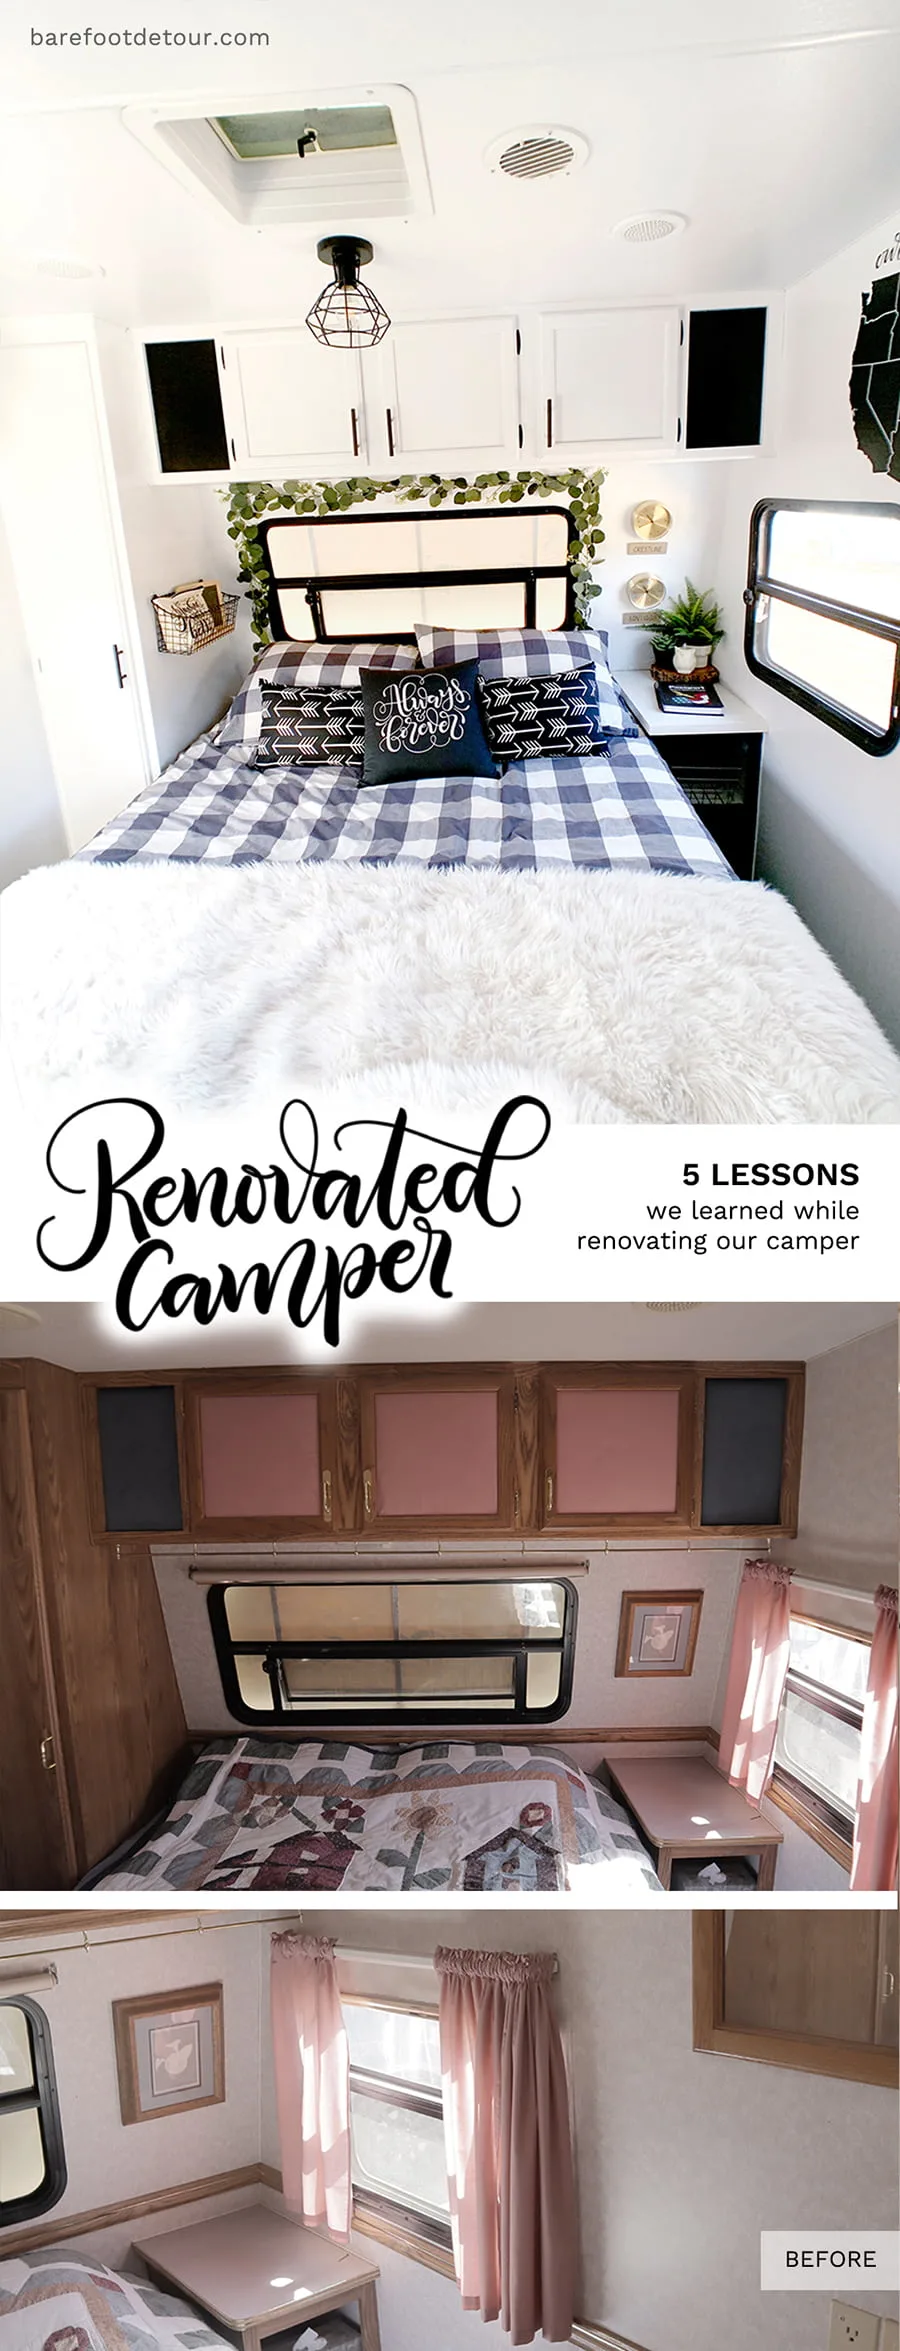
Five of the most important Camper remodel lessons we learned while renovating our very old (but new to us) camper in one month. Learn from us, so you don’t make the same newbie mistakes we made when renovating our camper.

Renovating an RV can be a super exciting but also a very intimidating project.
When we first started, we were a little overwhelmed, and while we did our planning in just one day, I had been saving inspiration for months ahead, dreaming of the day we could “afford” to buy a new RV.
The chance to get our camper from a family friend came as fast as we jumped into it, we got a great deal one day, planned the next day, started our shopping list, ordered things online, and we picked it up the following day.
But, while our renovation seemed a little rushed, I was secretly planning how I would decorate our future camper for months and months.
And I had been showing Ken all my ideas for quite some time, so in a way, we did plan it our heads for months before we got our camper and started our renovation.
Once we agreed to get the camper, we decided we were going to start the remodel right away because Ken was starting a six-day off that next day, so we stayed late planning all that night, and we did the most of the shopping the next day, so we could start to work right away!
I know we are crazy!


If we were to do this all over again, I think we would have done a lot more research. There were a lot of things that we learned the hard way and also things that we learned on the process that would have made our work so much easier!
This is why I want to write this post and share some of the most important things we learned just in case you are also in the planning phase.
So here are some of the most important things to consider before starting your renovation, whether that is just a room or your full RV / Camper / 5th Wheel.
Let’s jump into them!

1 Prep work makes all the difference
This camper remodel lesson is kind of an obvious one to anyone that has made any kind of remodel, but I still remember the very first time I painted a cabinet, I didn’t sand, I didn’t wash.
I was all, “look; this color looks so cute!”
And then a couple of weeks after I was “done” the paint started to peel off like a sticker!!
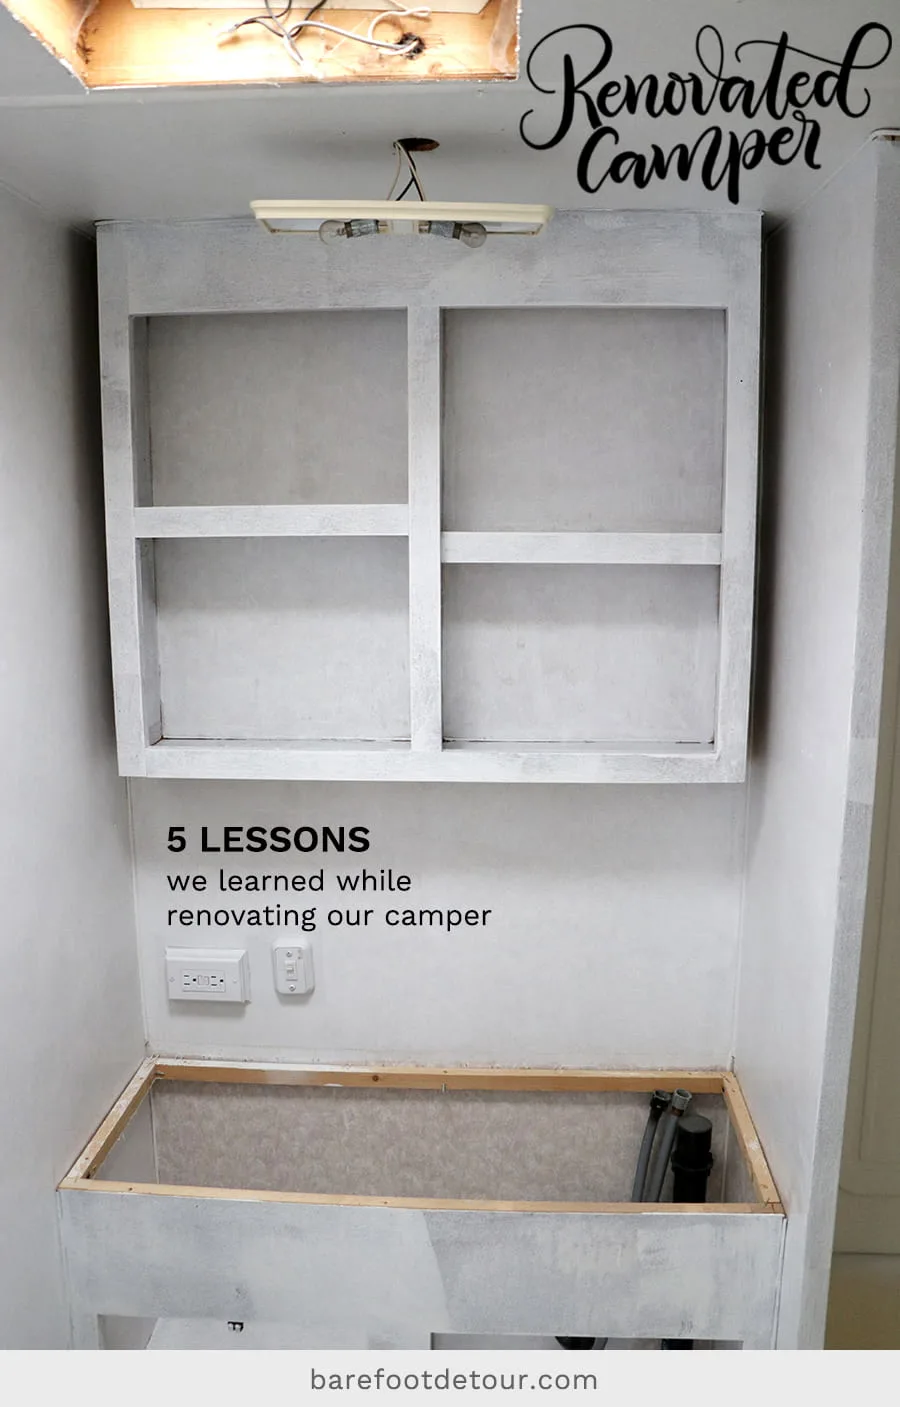
Well, this exact same thing happened to one of the walls of our camper!
I was so excited to see the color on the wall, I didn’t really prep at all, and within a couple of days, the paint started to bubble and peel like crazy!
It was a very good thing that this was our test wall, so we didn’t have to start from scratch on all the rest of the camper.
And when I say peel like crazy, it’s not an exaggeration, just look at this!
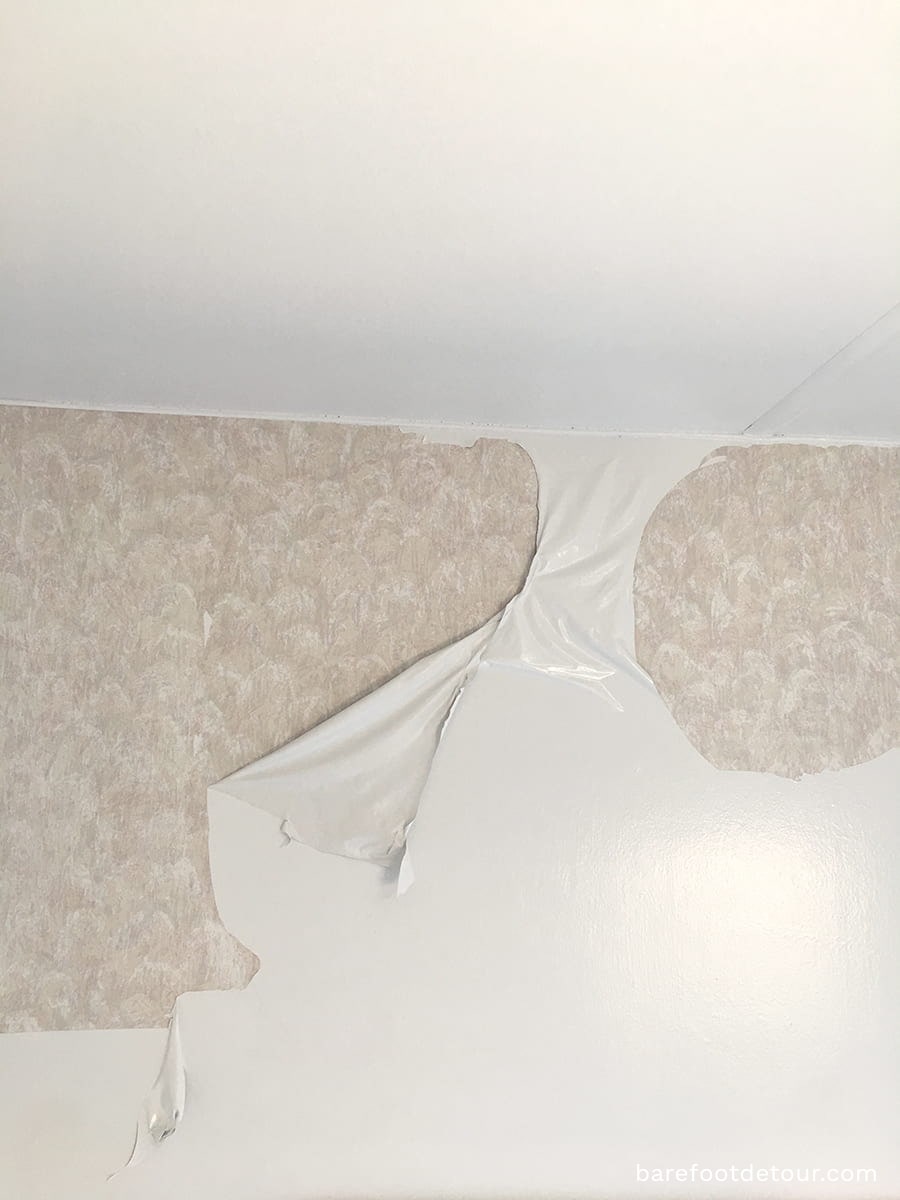
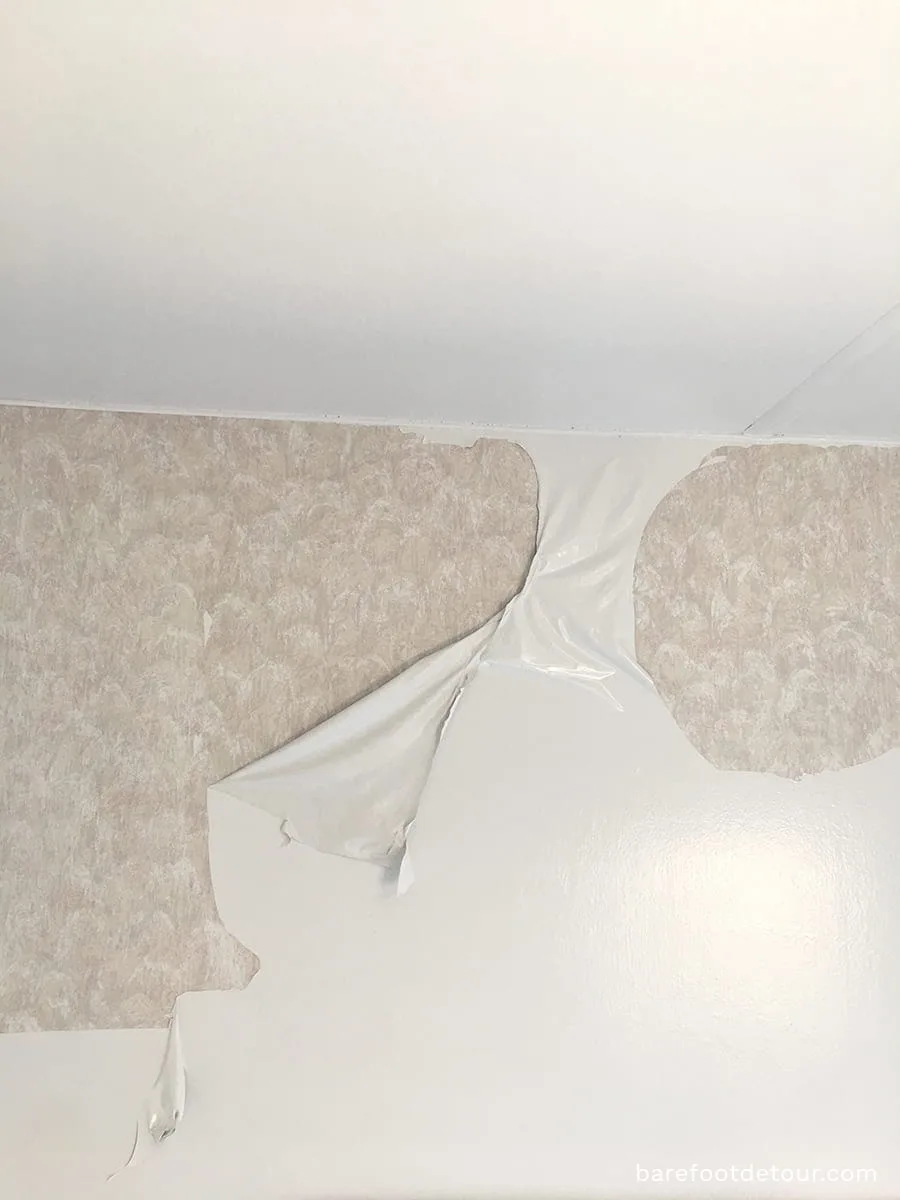
Moral of the story? Prep work is VERY important!
Never skip it!
I’ve seen people that have gotten away with doing minimal prep work, but I would not risk it, after all, painting a full RV is a LOT of work, and you don’t want to have to do it twice!
So now that we agree that you need to prep your surfaces, how do you do it?
Well, here is where things could get confusing and overwhelming.
So, How do you prep and RV for paint?
Short answer, it all depends on the kind of surfaces that you have and the condition of your walls and cabinets.
Most old RV’s have either a mix of particleboard (fake wood), and real wood, wallpaper and some have peel-and-stick surfaces.
For all the real wood parts in our RV since we didn’t want to have to sand like crazy, so we used liquid sand.
As the name hints, it’s a liquid that helps remove all the “gloss” out of your surfaces, we used about two layers of that and then we lightly sanded all the parts that were going to be exposed to a lot of wear just to be safe.
For all the particleboard parts, we sanded a layer off (lightly) so that the primer would have a better surface to adhere to. This is super important to not skip over, because if your primer doesn’t adhere well, the paint will chip with any minor scuff.
We didn’t remove the wallpaper in our walls because it was in very good condition, so removing it would have been more work for pretty much the same result.
So we decided to plain on top of it instead.
If you need to remove your wallpaper, I’ve read good reviews about this wallpaper stripper and also this wallpaper streamer that uses only water, no chemicals.
Just to be safe, I wiped our walls (with wallpaper on) with this TSP substitute, this way, I knew the surface would be super clean and in the best condition so out primer would adhere better.

To Prime our wall and cabinets we used the Rust-Oleum Zinsser Bullseye primer because we’ve had a great experience with it in the past and it’s good for pretty much every surface we’ve worked with (it’s oil-based), I could not recommend it enough, and at Home Depot we got the best price for it.
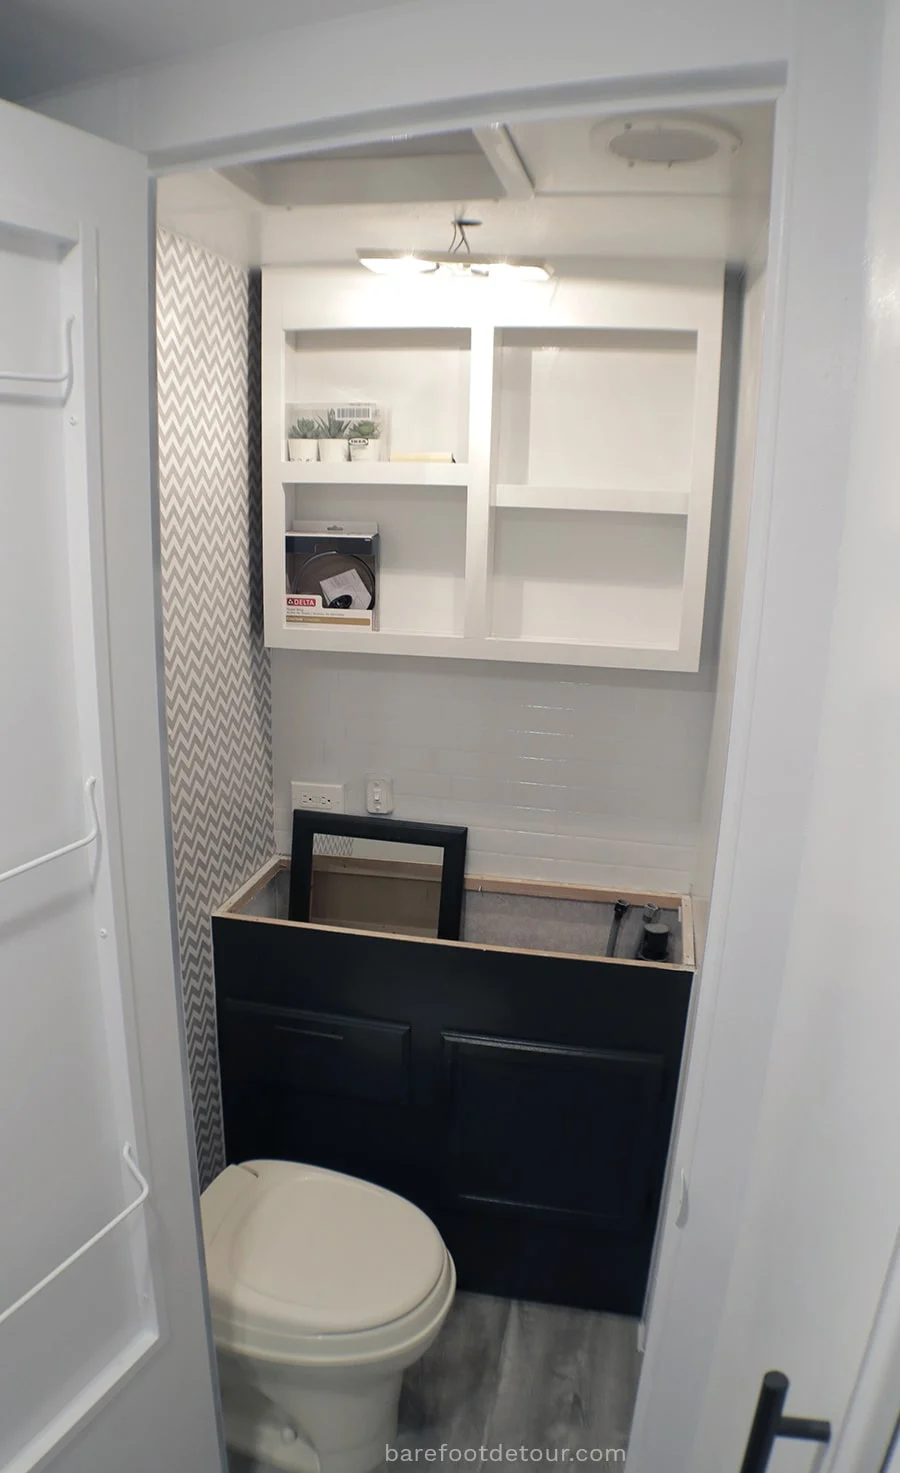
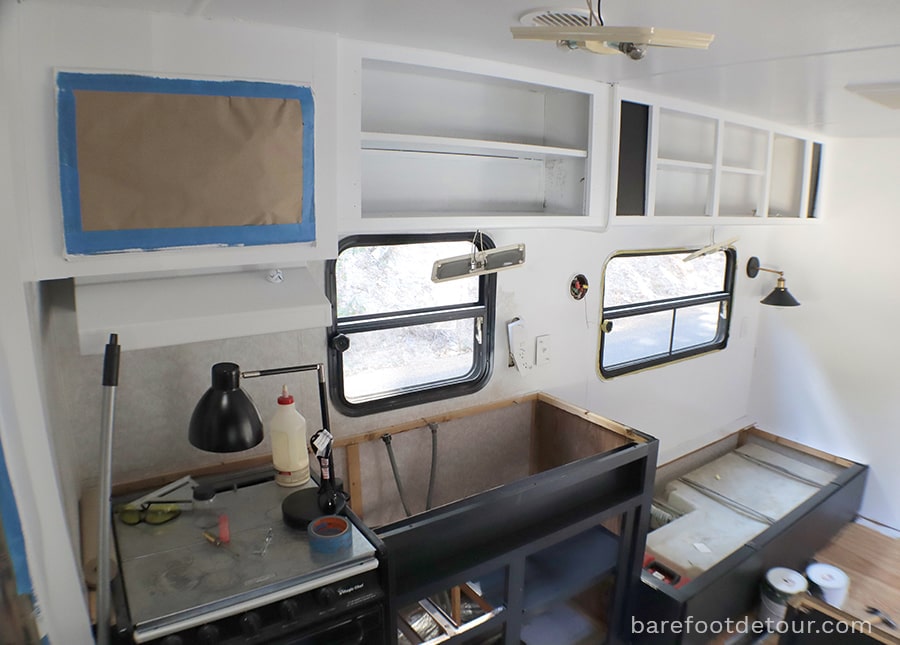
In our camper, the only particleboard parts we had were mainly the cabinet structure, bathroom structure, and countertops.
We removed and replaced all of the countertops, so that helped us eliminate the need to come out with a solution for painting the particleboards used as countertops in the bathroom, kitchen and our bedroom (the nightstand)

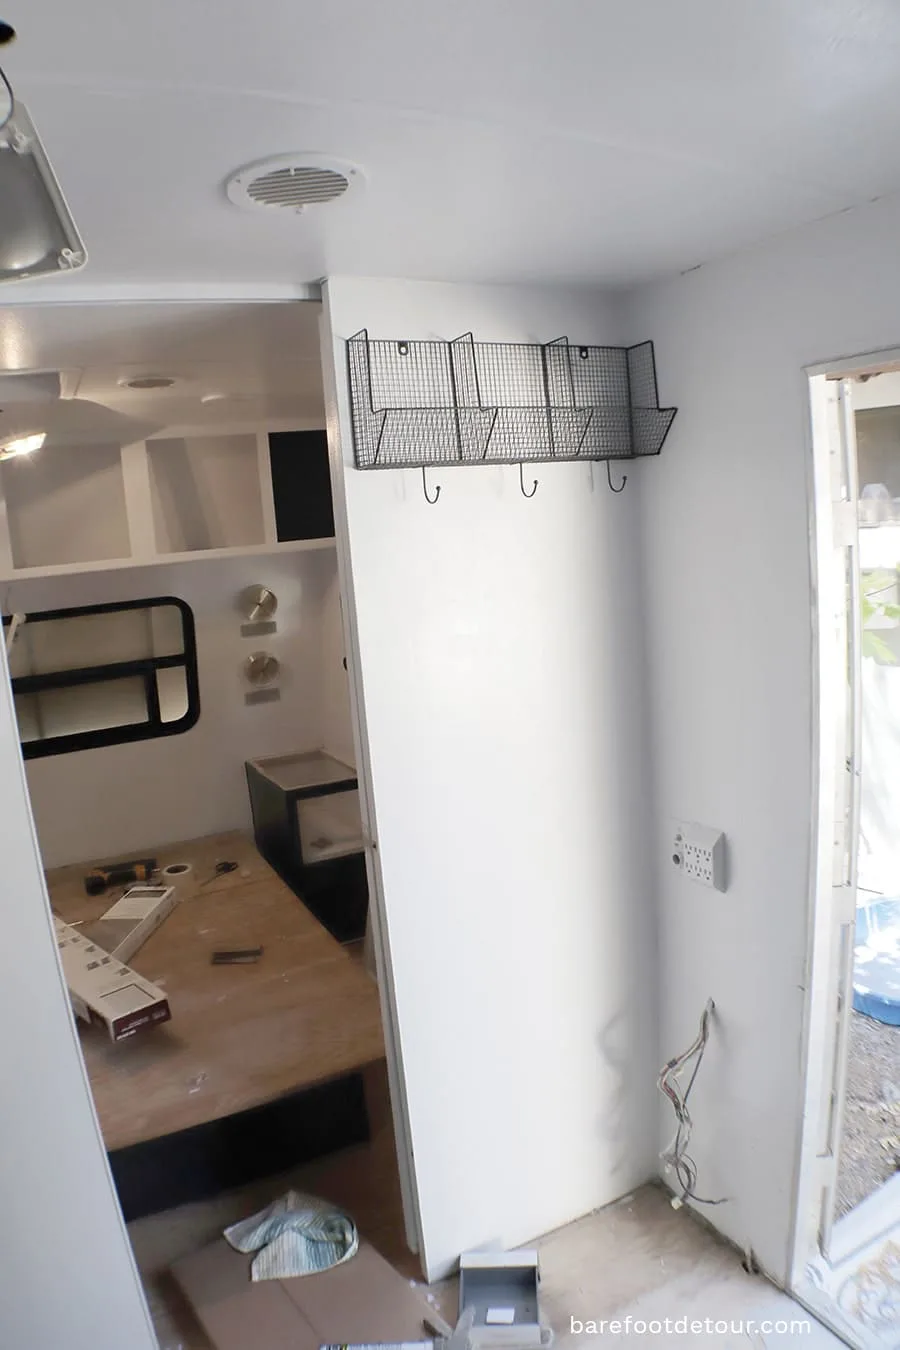
Below you can see the original colors and all the things we removed from the bathroom.
Even though it doesn’t look like much, that little house shelve was about 6 pounds of solid wood!
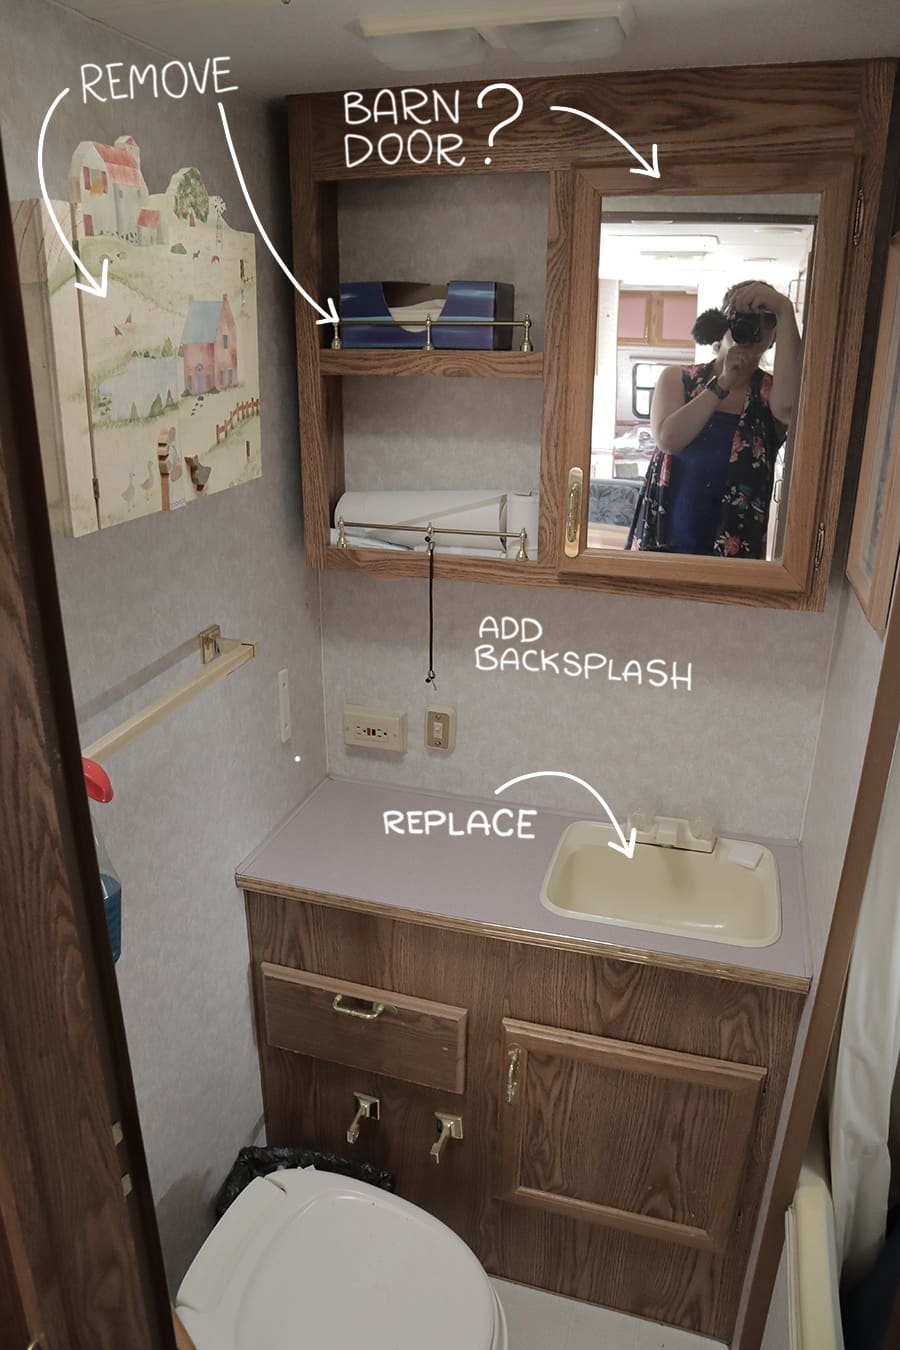

As you will read in the next point, we selected two different colors for our cabinets and walls, because we wanted a contrasting look, we carried the same paints for the bathroom because we just liked it so much!

If you want to read more about ways to prep and tips for paining, my friend Ashley from RV Inspiration also has this post about nine tips for painting RV walls and cabinets that I would definitely recommend you to check out.
2 Get the right paint for each surface
Just as important as selecting your paint is to select the right kind of primer.
As I already mentioned, if you plan to paint over different kinds of surfaces as we did: wallpaper, laminate, etc.
We definitely recommend you select a shellac primer (Zinsser Bullseye by Rust-Oleum is what we use) or good oil-based primer.
Water-based primers can moisten and sometimes lift off a porous substrate, and that can cause the paint to lift or crack.
And if you have any laminate (fake wood), you want to go with an oil-based paint that will “attach” better to the surface.

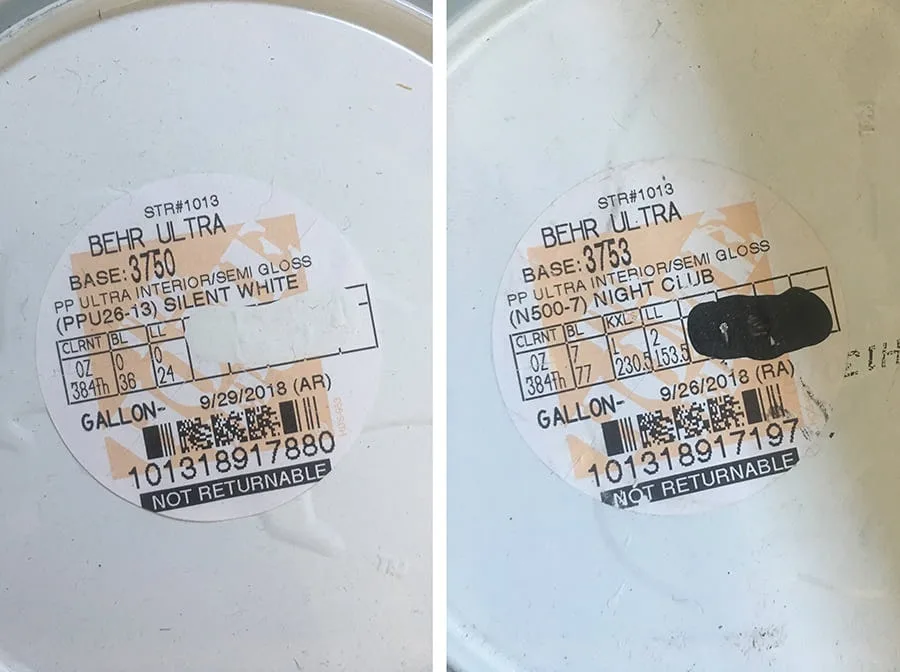
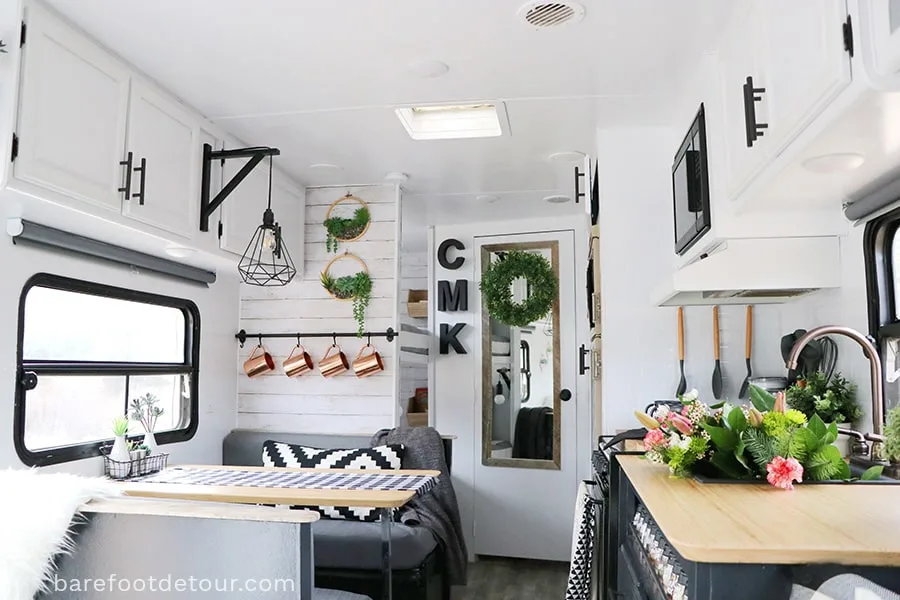
When we selected our colors, I knew we wanted two very contrasting colors. So when looking at swatches, we decided on using BEHR Night club for everything that was dark and BEHR Silent White for everything light.
Even the names are so contrasting! I loved it!
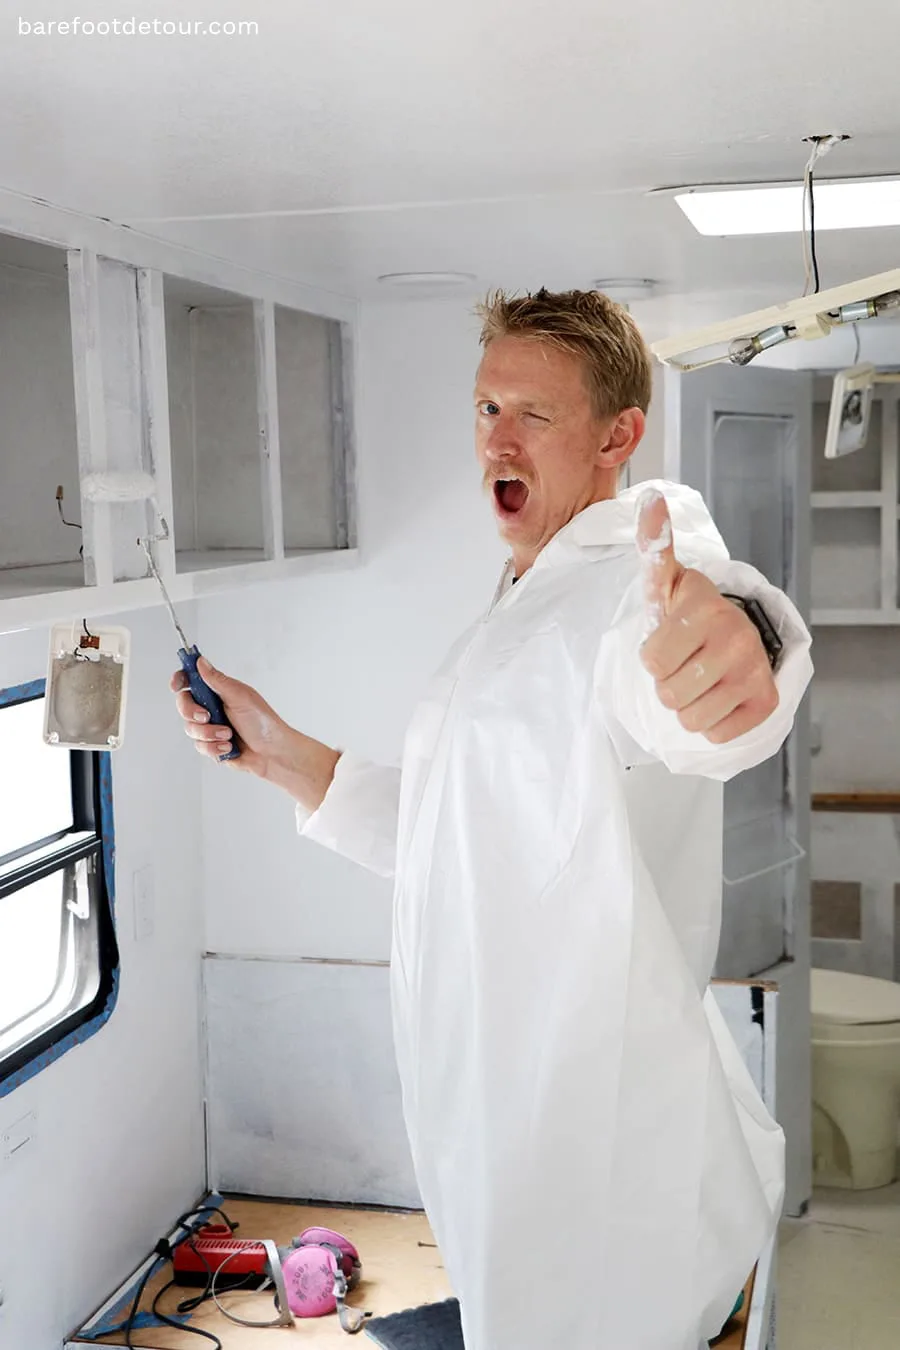
Fo all the plastic pieces that were all over the camper, we used spray paint for plastic, and there were so many little plastic pieces! (all the small pieces that were in the ceiling – I believe they are speakers and the ones by our kitchen)
To make sure the paint would not go all over the place, I masked all around them, spray them with five layers (very light layers work best, so there’s no paint running)
After that, I took the making off, let it dry and make sure to be super careful when painting with our wall paint when going around them.
To restore our shower, we first cleaned it very deeply with this brush set and used this spray primer. After that, we used this restoration kit.
If you want to check another painting post, check out this other one from my friend Ashley from RV Inspiration, it’s all about painting mistakes made by RV owners and how to avoid them.
3 Measure twice when getting furniture
When you are getting furniture for an RV, there’s usually not much wiggle room.
And you wan to be as efficient as possible, because, in a small space, every inch counts!
You want to fit the space as perfect as possible, so you can utilize in a smart way every inch in there for storage, or to fit all the pretty decor pieces.
When we bought this white cabinet that we put in the entrance, I knew I wanted something tall so that we could have three separate areas: one for shoes, another for the dog food storage, and the last one as a changing station/ catch-all.

But I knew I wanted it to be as close as possible to the with and depth that we had available, and it took us A WHILE to find this one at Ikea.
I probably measured every piece they had in store, not to mention that we stopped at Home Depot first and I could NOT find anything that would fit there or at Target, trust me, I looked and measured everything!
I looked like a crazy woman!
But I’m ok with that! hehe
When we finally found something that worked, we were so freaking happy!
And unlike some other things that I bought that didn’t fit the spaces I had assigned for them in my head (even though I measured), with this one, we didn’t have to try to return it!
And that also brings me to another point! RETURNS!
Pretty much every store in the US has awesome return policies, but sometimes it is not about being able to return when it doesn’t fit, but to find the time and also the hassle of having to make a trip just for that, let me explain.
We live in a very remote location, so going shopping is a full-day task, and most times, I have to pick only one or two stores to visit, so scheduling a trip just to return one or two things becomes not only time consuming but also extremely expensive.
This is why I am so thankful to have Amazon Prime, the commodity of shopping online is crazy to me (remember that I am from Chile and up until the year I came to the US, online shopping was not a thing AT ALL)
So, with Amazon Prime, I have the option to return anything that doesn’t fit (not that I don’t measure things, something things are not exactly the size they are descrived!) or if I end up not liking how it looks.
Because sometimes you just HAVE to see it in order to make a decision! Am I right?
Below you can see how it looked when we were still trying to find something that fit the space.

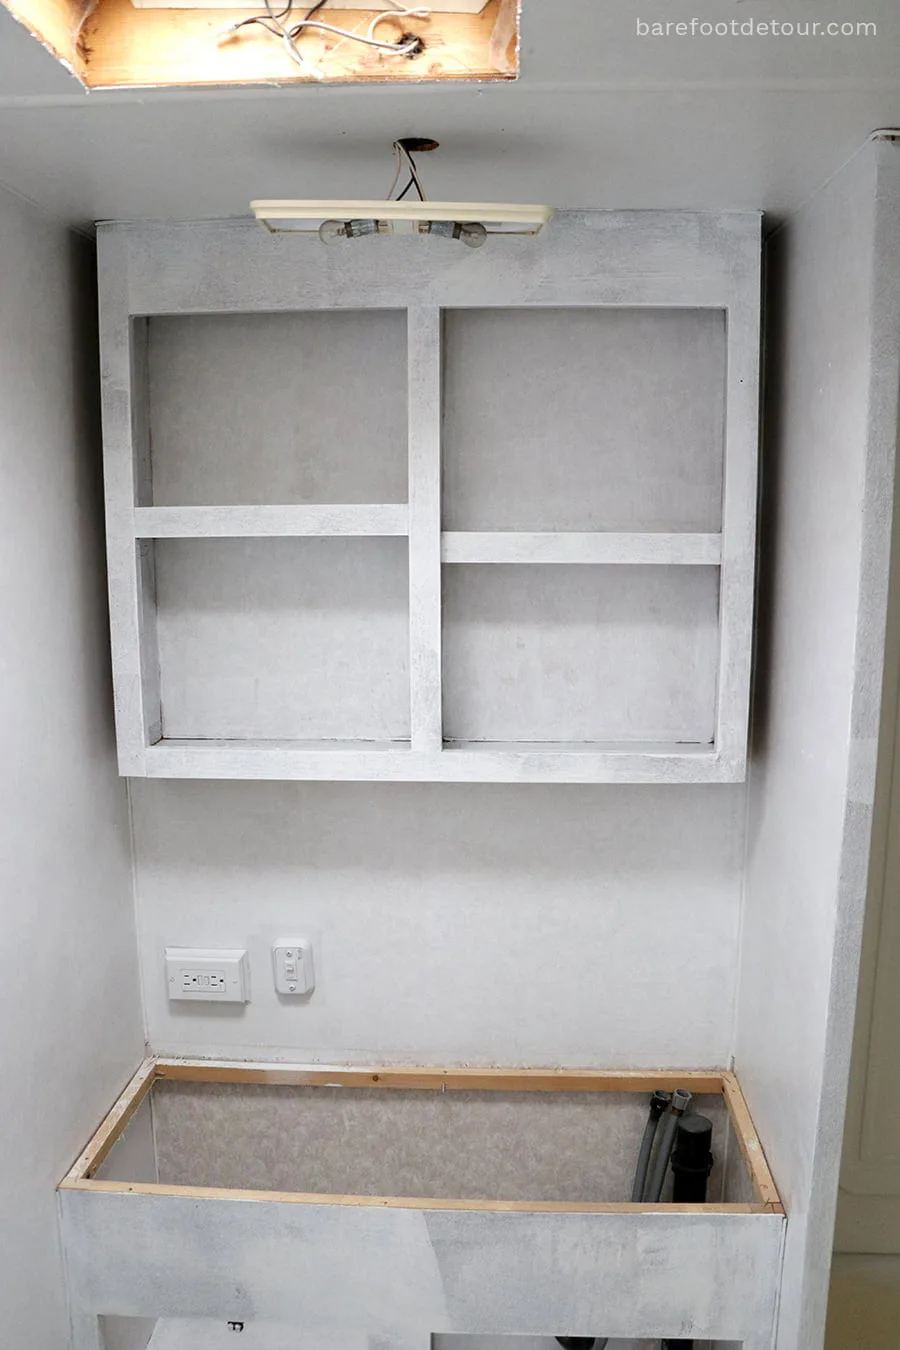
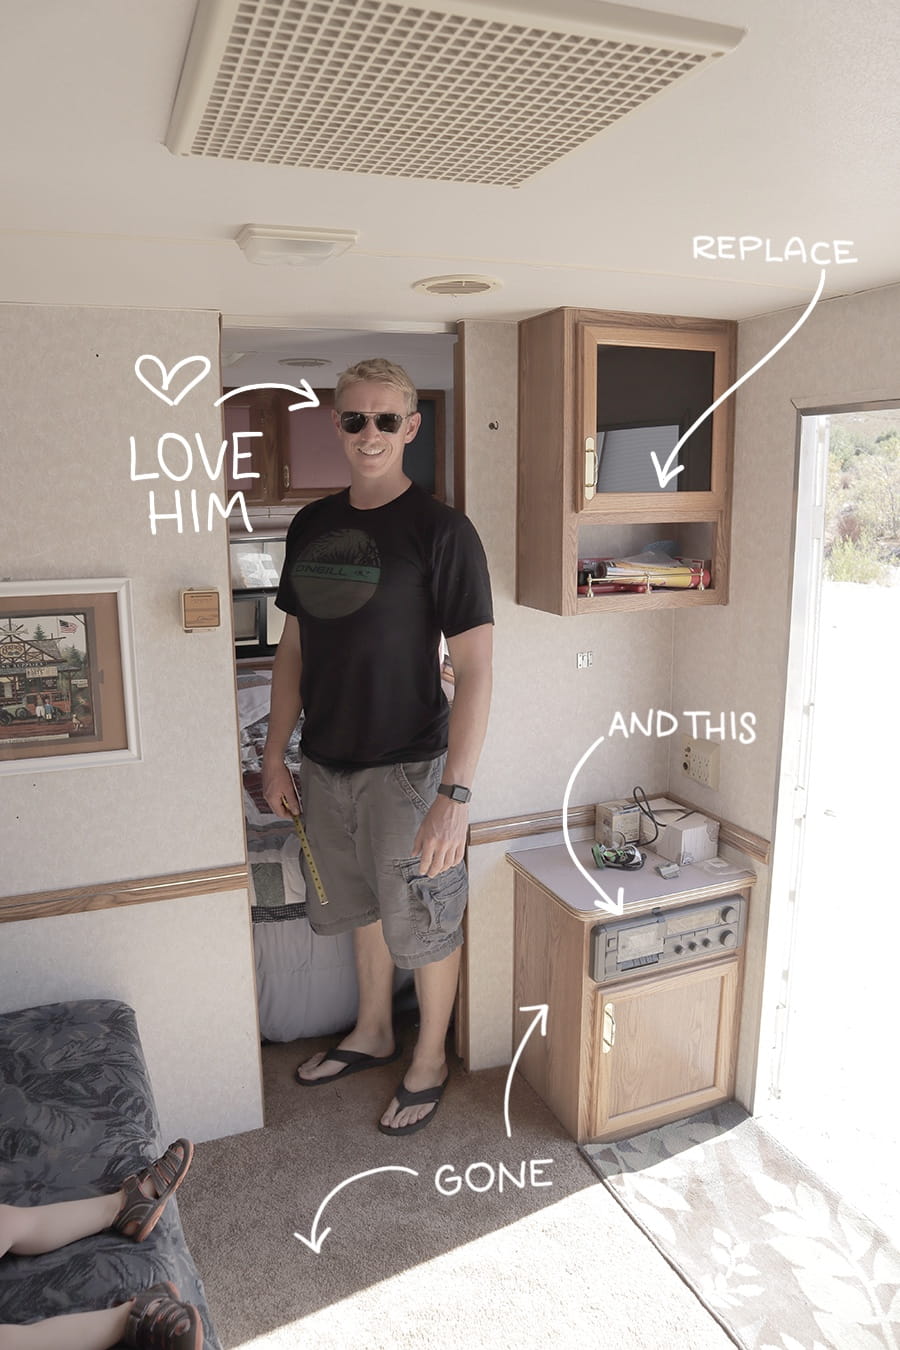
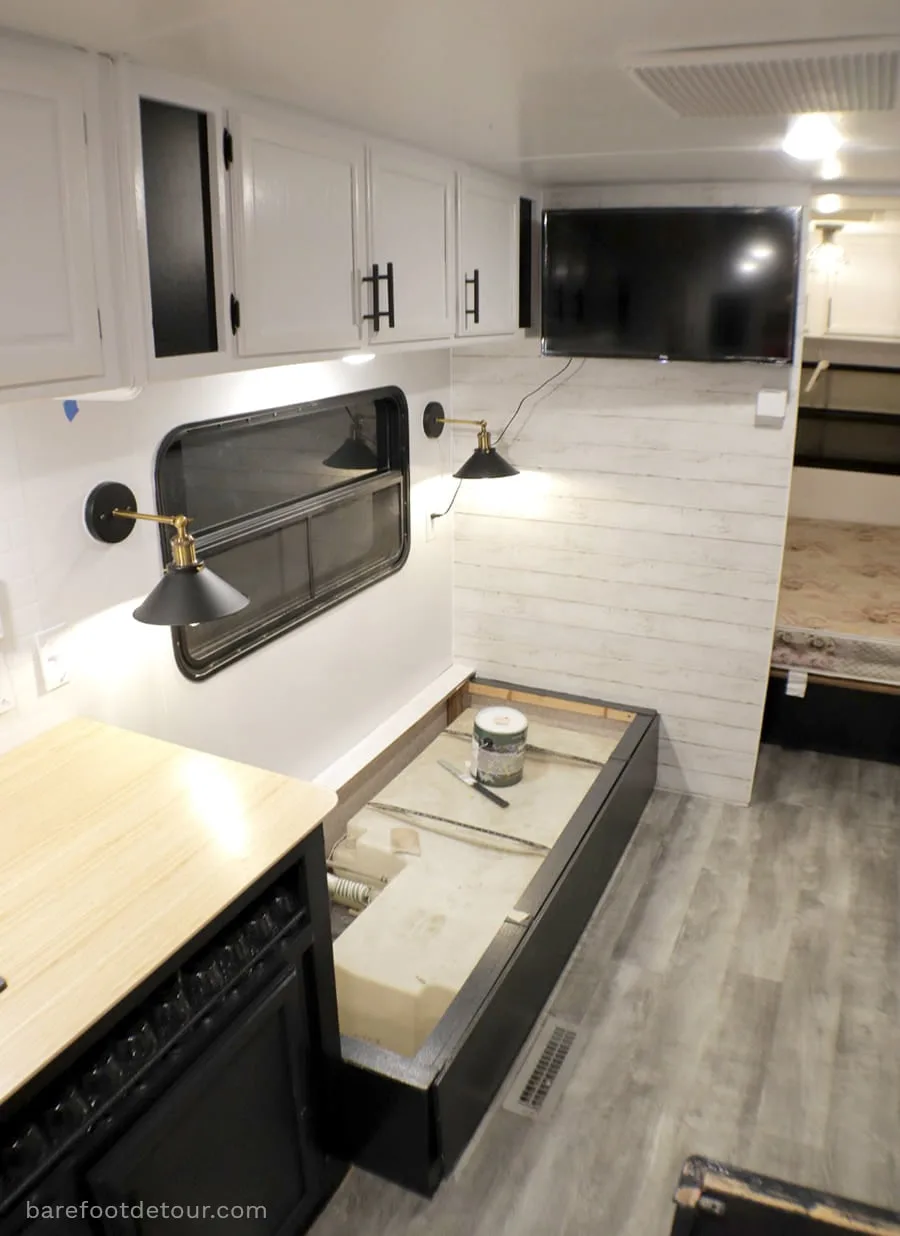
Here is our “in progress” shot with everything ripped out, Ken just made sure to make holes in our cabinet to fit the plugs and everything else inside the cabinet.
Below you can see the before picture. We were so happy and had no idea what we got ourselves into hehe!

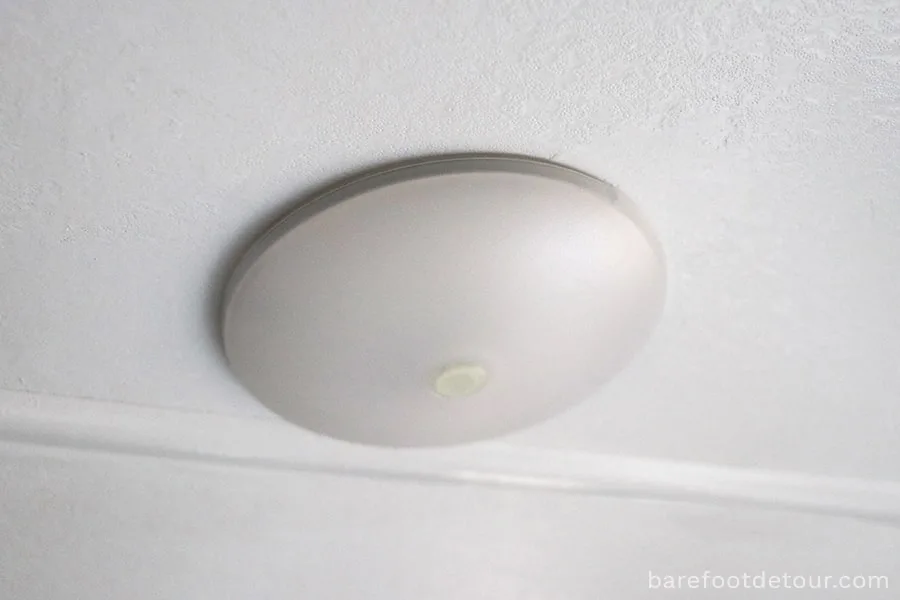
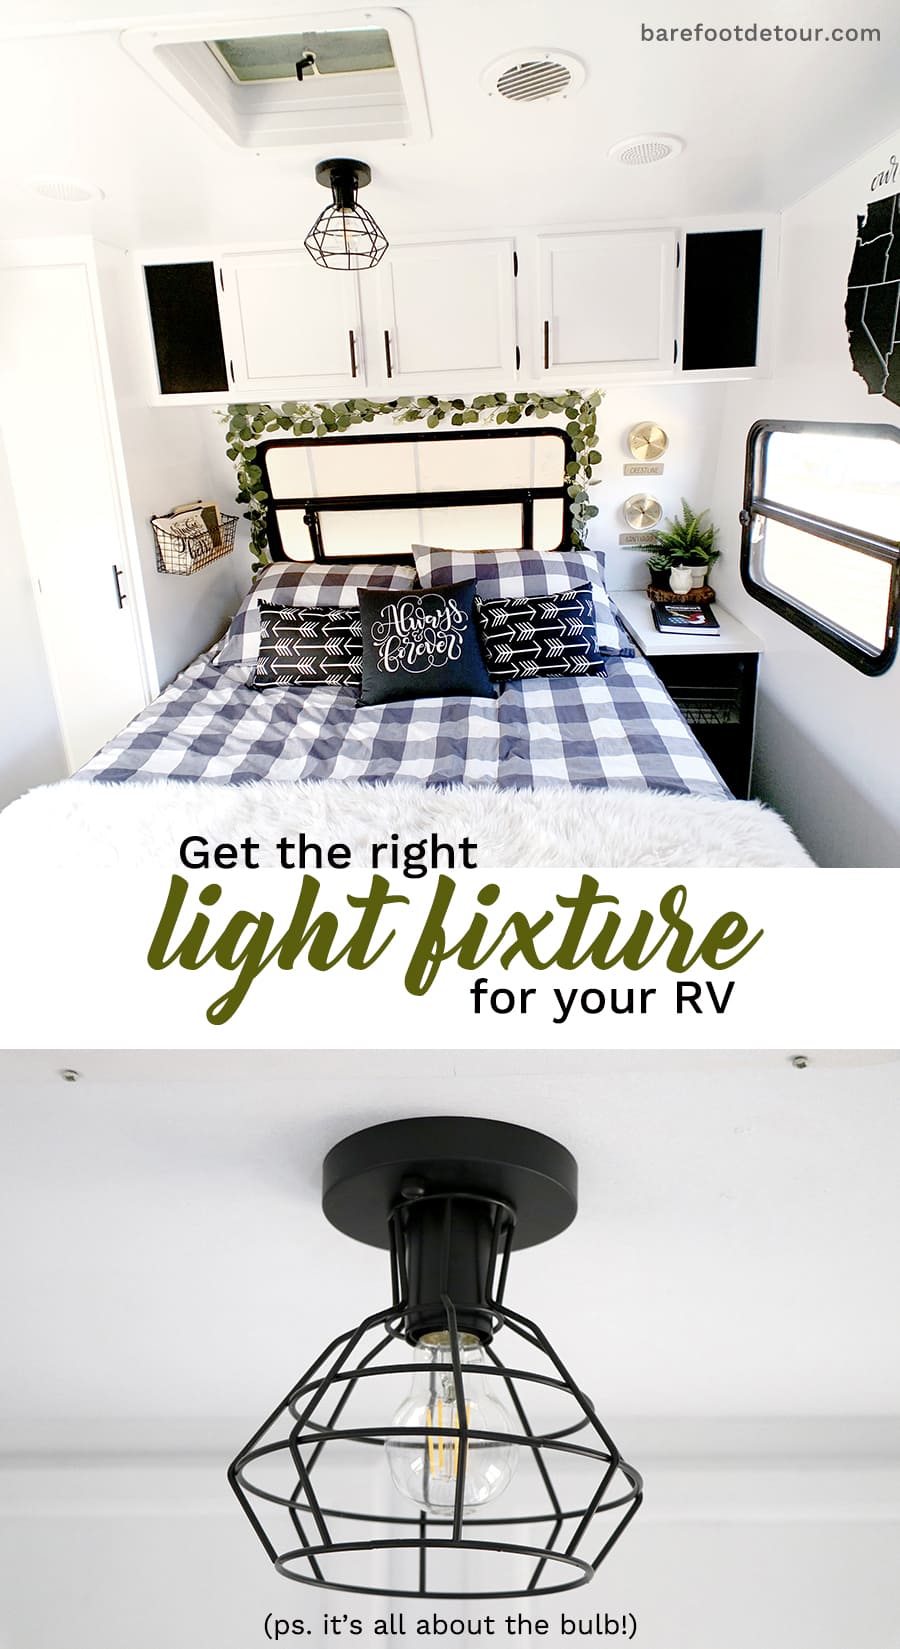
4 Get the right bulbs for your voltage
One thing I was so happy to find out when doing research on light fixtures was that you could use any kind you want for an RV, the only thing is that you need to use low voltage light bulbs, for our camper we used 12V light bulbs for the light fixtures that needed bulbs.
In the picture below, you can see how it looked when we took all the lights from under the cabinet and ceiling.
I knew I wanted something brighter, more efficient, and less dangerous than those lights (I’ve read horror stories of burns with these bulbs!)
So I knew I wanted LED lights there.

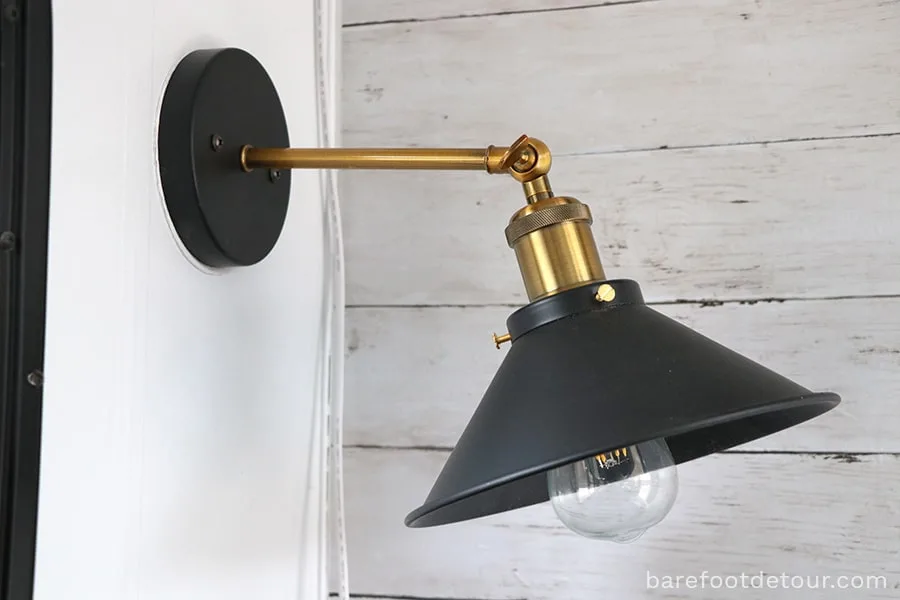
The only downside of the set of scones is that they do not come with switches.
But that can be easily fixed with these little guys, just drill a hole on the side and connect them like you would any other switch.
(if you have done electrical work before, if you don’t know what you are doing, please advise a professional, don’t risk injuries!).
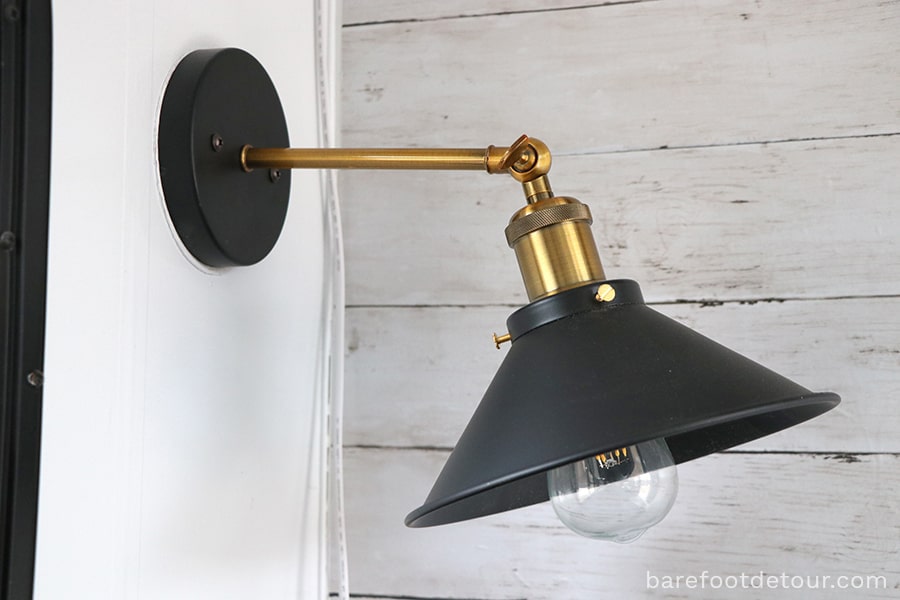
For the light in our bedroom, we pretty much did the same thing; I made sure to select something that was more flush because we are both tall.
I settled for this ceiling light that had just the perfect industrial feel and accompanied it with this bulb. We also added a switch.
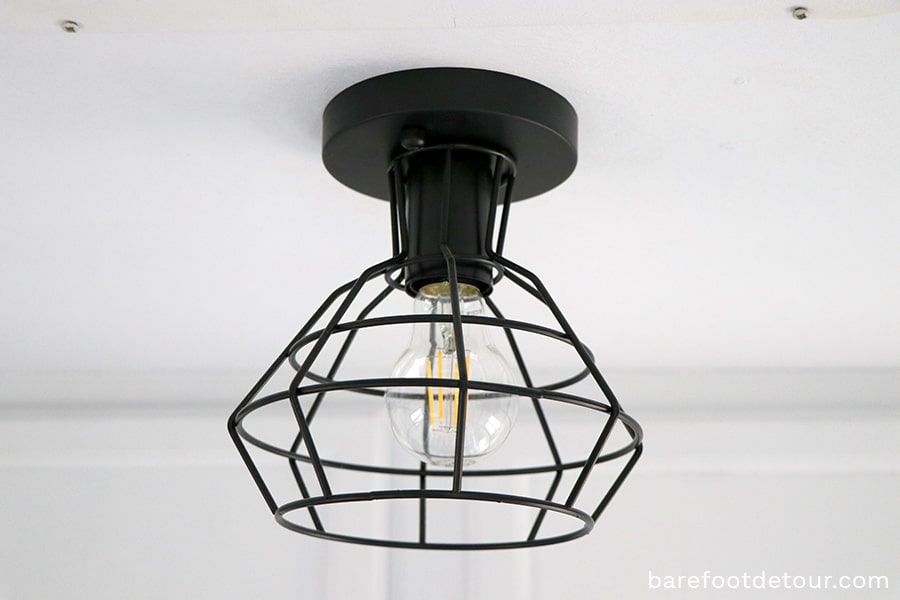
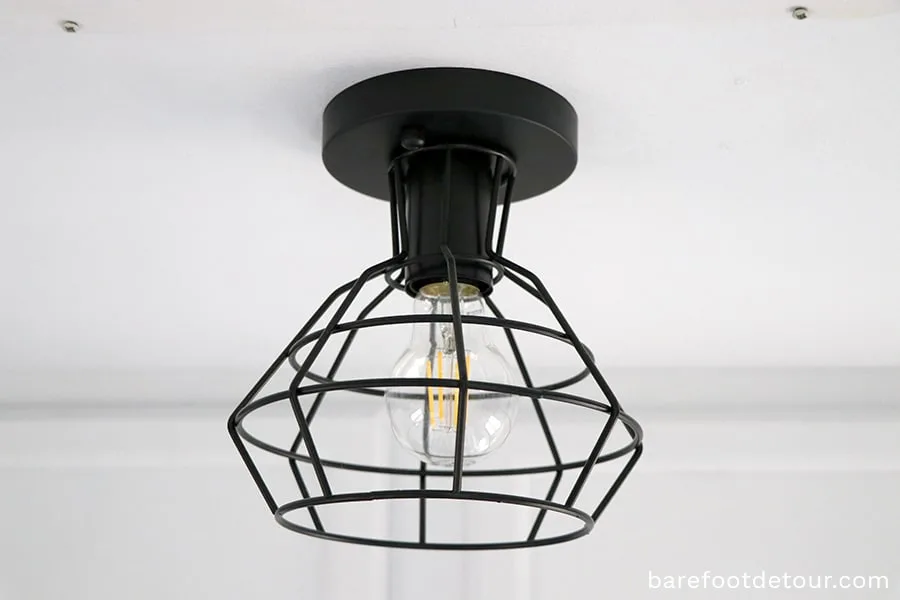
I was planning on using this remote control switch, but it made the bulb look too long (I think they are better suited for bulbs with lampshades that are not see-through, so I’m saving them for our brick and sticks house)
And this is how it looks in our bedroom:


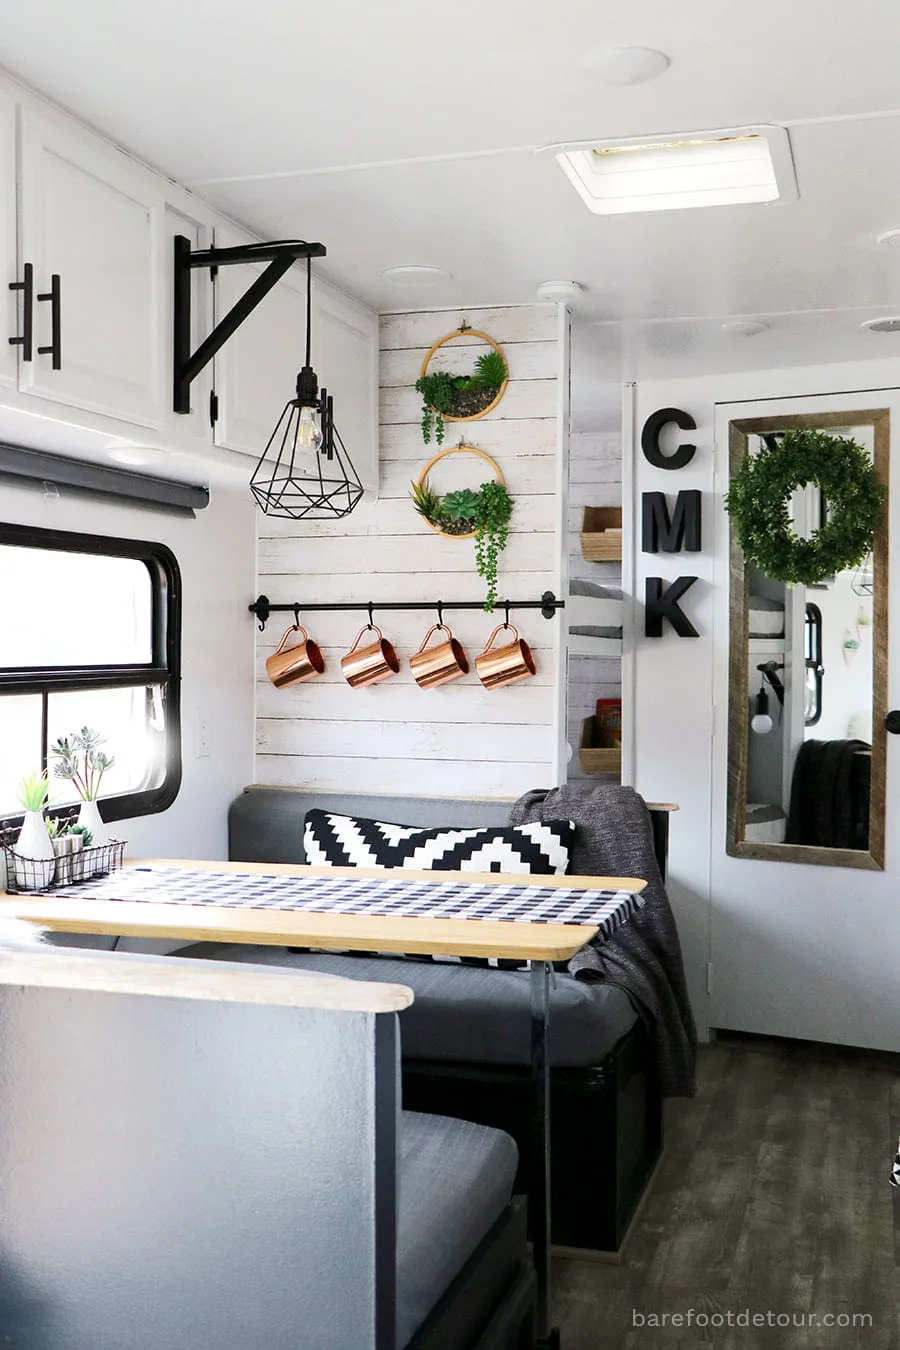
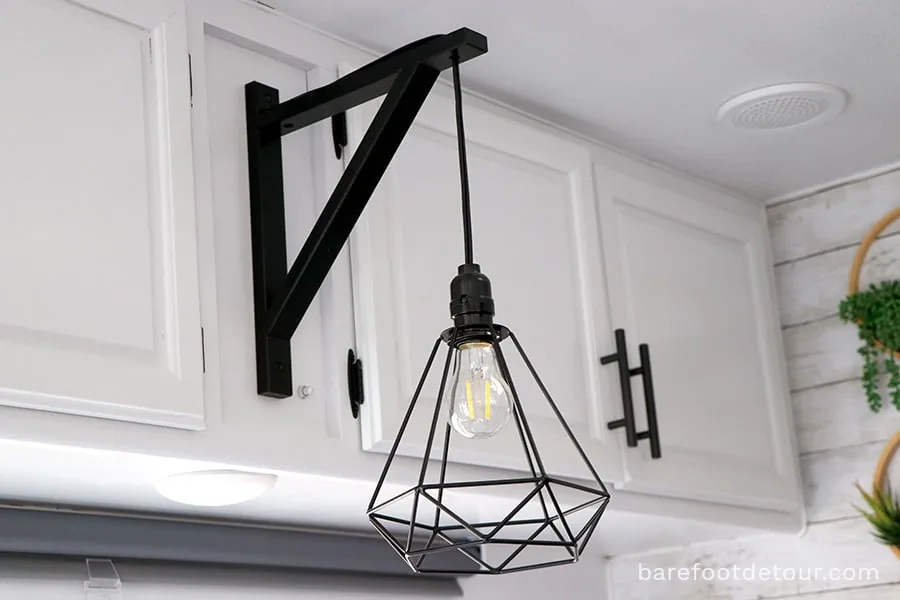
For our dining room, I wanted something special but also budget efficient. So we decided to make our own light using the same bulbs we had for our bedroom, a shelving bracket, a vintage cage lampshade, and a pre-made lamp cord.
Since we wanted to make another for our house, we purchased everything in pairs, it was cheaper, but you can definitely buy everything in singles.
We already had a switch from the old light we had there, so we didn’t need another switch, but if you do, this is the ones we used in all other lights that needed it.

For every other light in the camper, we replaced the old lights with these small round LED lights, why?
- They are smaller.
- They save a ton of energy.
- And look SO MUCH BETTER.
- The light is so much brighter than the yellow low light that our old ones gave.
Let me show you a closer look:

I am so in love with them!
You turn them on and off by pushing in the circle in the middle, and after they are off, that little piece glows in the dark, so they are easy to find!
You can see our new LED lights in action in the picture below, they are in our ceiling and also under the cabinets, we replaced the ones in our bathroom, the boy’s bunk beds and under the cabinet in our bedroom as well.
We used 16 of them to replace all the lights that we had left.

I also wanted to mention that since we got everything on Amazon using my Prime membership, I knew I had the option of returning if I didn’t like what I had ordered.
Because I wanted to be able to test options before buying in bulk (to replace all the rest of the lights in the camper).
I purchased four different alternatives for the remaining lights.
That way, I could see in person the kind of light they give and how they looked in the camper.
Once I was happy with the bulb size and the kind of light that gave (some are warmer than others, so if you want a cooler light the best way to go is by testing)
I purchased the total of lights I needed to replace (and in the case of the bulbs, I purchased extras so we could have in hand in case one broke.)
Also, just a note: I mistakenly bought bulbs that were not 12V, and they pretty much died as soon as I tested them in the camper.
So make sure you read the details carefully! I, of course, could not return those, because it was my fault for not reading the details.
Ps. NOTE OF CAUTION – We are lucky to have my father-in-law that is a licensed building contractor nearby, and Ken has electrical experience as well. BUT if you are not sure, please don’t put yourself in danger when re-doing electrical work, and either consult an electrician or hire one instead.
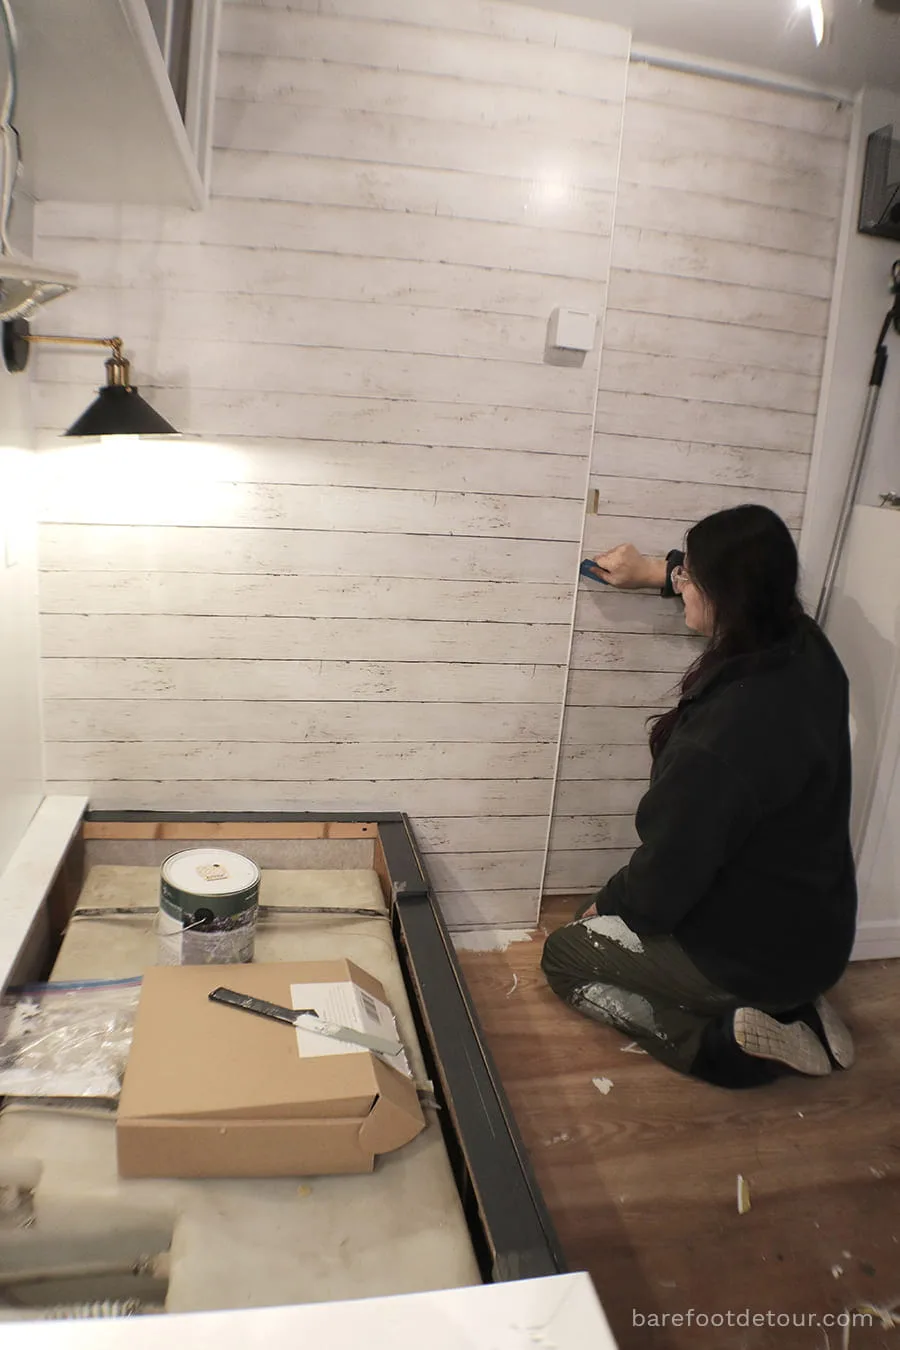
5 Weight matters
One of the biggest challenges when wanting to change things in an RV is that you always need to consider the weight.
If you are going to add something, you always want to make sure you take things out.
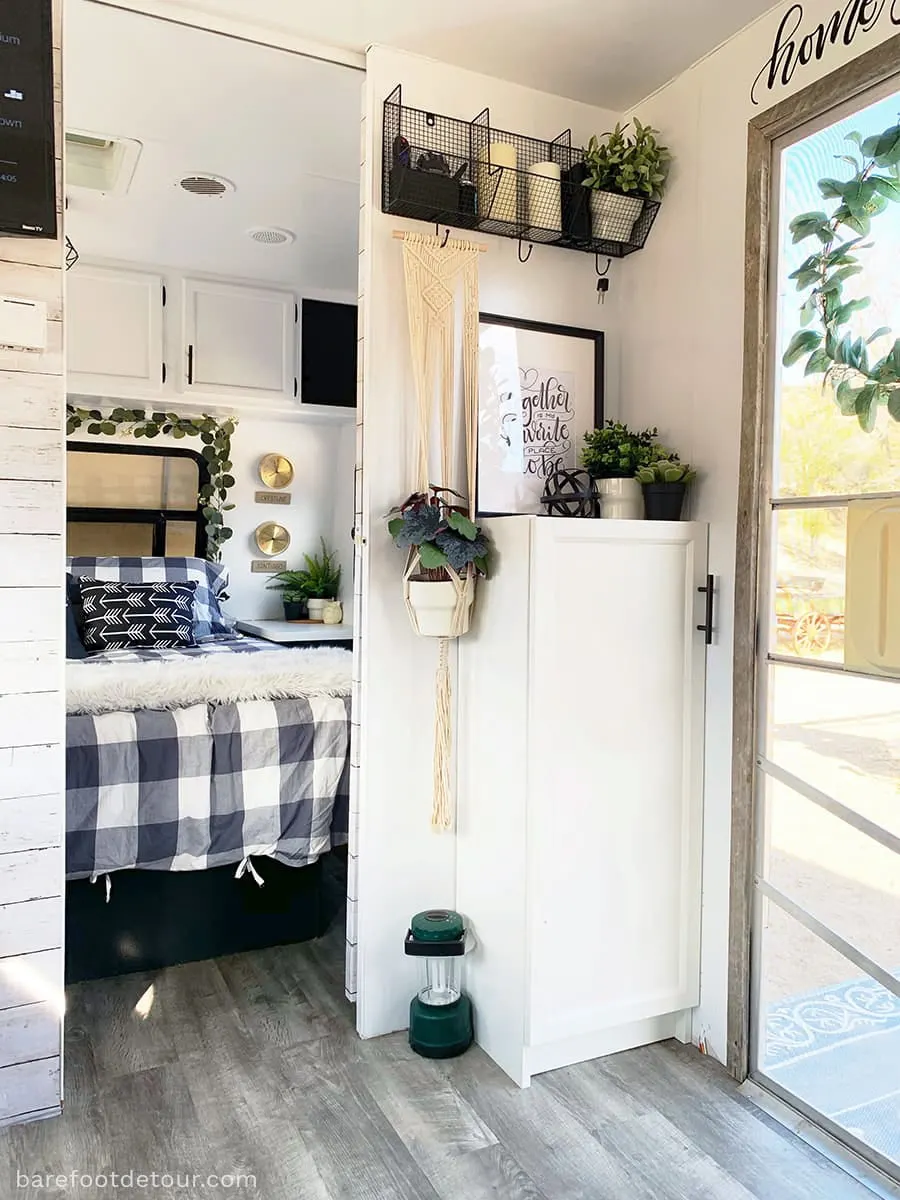
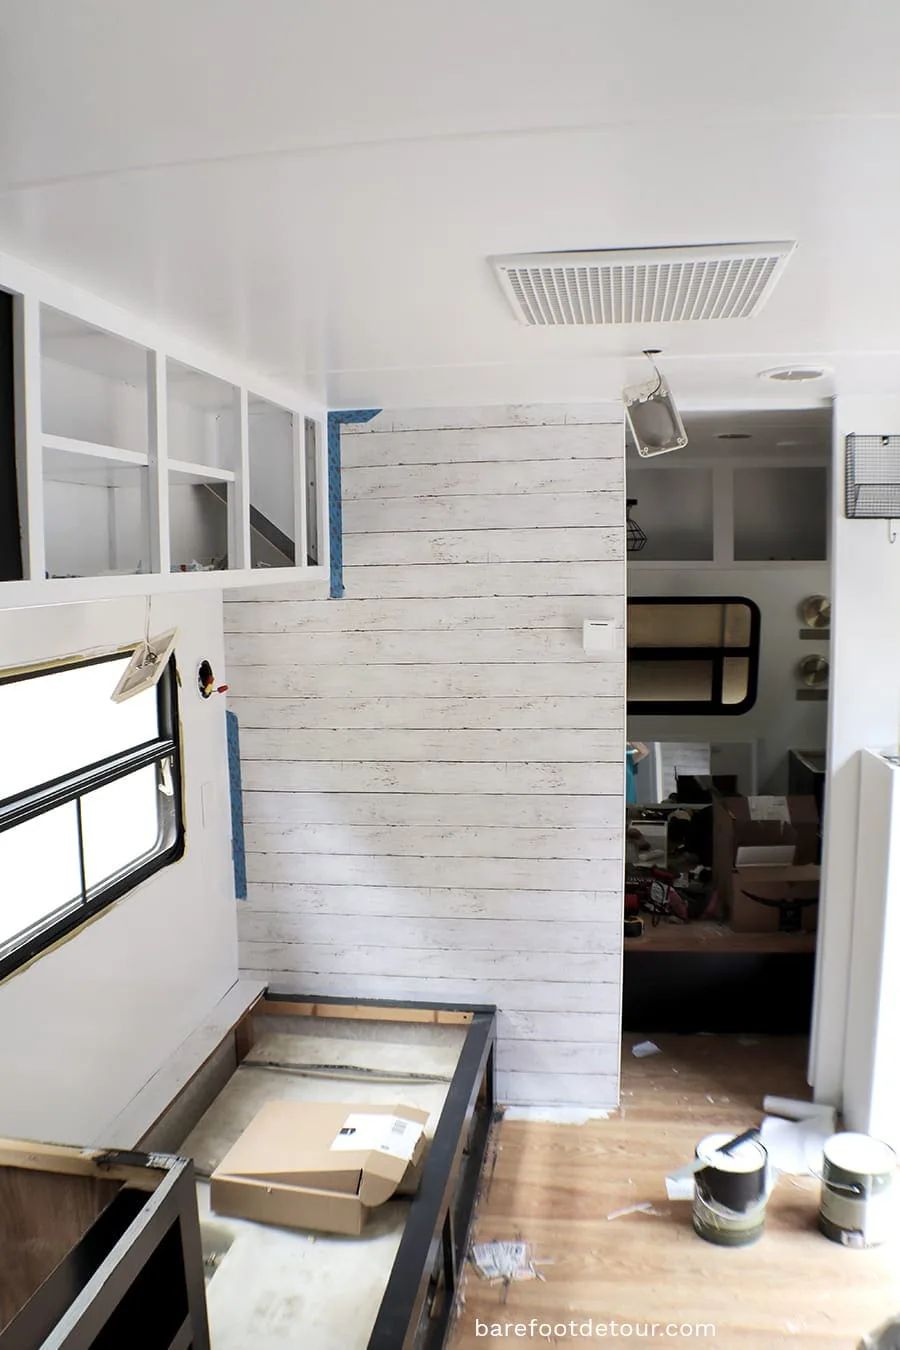
You also don’t want to add weight only in one area of the RV, in our case, we weighted the pieces of furniture we removed and made sure to replace them with way lighter options (like in the picture of our corner entry) that gave us the room (and extra weight we needed) to add a TV on the opposite wall.
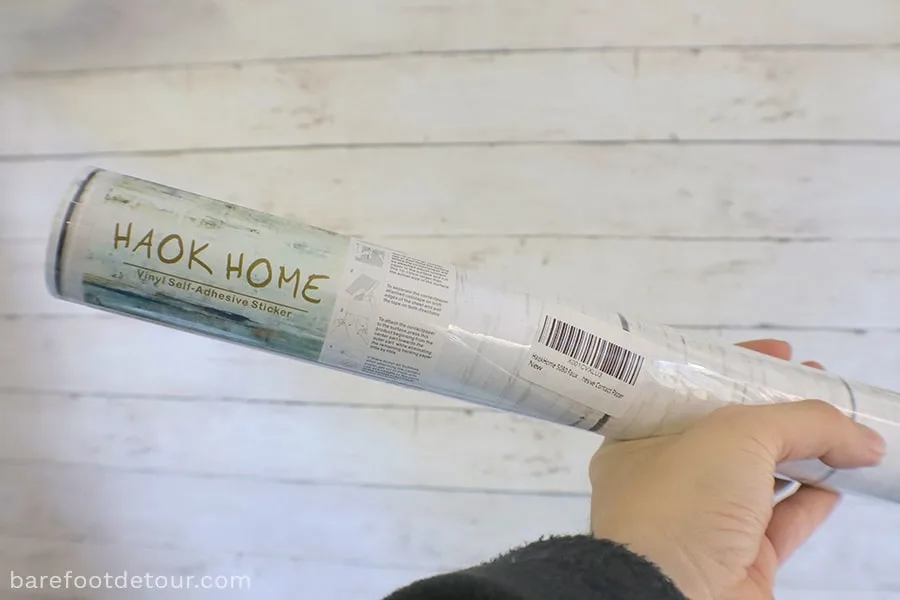
And because I wanted an accent wall, instead of going with MDF Faux shiplap, I used a wallpaper (shelve liner) that looked like wood.

Below you can see the wallpaper and the TV we were able to add thanks to the weight we had left from removing the opposite corners cabinet.
Also, even though the TV itself is super light, the mounting hardware was heavy, so when I say TV, I mean the whole thing =]

Here you can see me in action applying the wallpaper.

And here is another view with better light.

So there you have it!
These are some of the things we learned while doing our remodel!
If you have any additional questions I also invite you to ask on Instagram, I have highlight stories dedicated to frequently asked questions. And if you can’t find it there, you can always message me!
I am always happy to help!
Also, If you want to see the full BEFORE tour of the camper hope over to this post.
Have a wonderful day!


Ps. What to save this post for later?
Just pin this image below!


Shellon
Saturday 1st of October 2022
Hi thanks so much for the very helpful information and taking the time to be very detailed on how you did the work and what you used. Your finished product is so awesome I hope you guys enjoy it. I just put a deposit on a 1989 tioga class C in great shape and cannot wait to get started, thanks again!
Joy Kelley
Tuesday 4th of October 2022
Thank you so much for the sweet words =] So happy that you found it helpful!
Linda
Sunday 4th of September 2022
I love your RV remodel and suggestions! I’m getting ready to tackle this project but one space at a time. I notice that you don’t have window coverings (curtains, blinds, etc) or I just missed that. That wouldn’t be very practical for us, so wondering if you have any suggestions.
Joy Kelley
Saturday 17th of September 2022
Hi Linda, we actually do have window coverings, we used blackout roller shades (gray), and we place them high on the windows so that they are a little hidden, they are also about 3 inches wider than our windows, they work very well. The camper is almost full dark when we have them down =]
Moneca
Wednesday 27th of April 2022
I realize this post is a little old but I'm researching how to's and came across your post. I'm currently remodeling a camper that has the fabric like stuff in certain areas of the cabinets. I see you changed yours to black from blueish color, what did you use to cover that?
Joy Kelley
Monday 2nd of May 2022
Hi Moneca, we took those panels off very carefully, ours had nails and also a bit of glue, but with patience, you can definitely do it. We replaced them with chalkboards (the premade kind) from Home Depot, we used the panels we took off as templates since one of them had a little bit of a weird shape =] I hope that helps!
Misty Watkins
Saturday 1st of January 2022
What suggestions could you give a newbie
Joy Kelley
Tuesday 22nd of February 2022
Hi Misty! I actually wrote a full post explaining everything we did here: https://barefootdetour.com/rv-renovation/
I hope that helps! =]
Jessica
Monday 21st of June 2021
Hi the light you used in the bedroom is 110volt for a house, did You have to buys a converter box ?
Joy Kelley
Wednesday 30th of June 2021
Hi Jessica, you definitely do not need a converter box, you do, however, need to make sure that the bulbs you add to your light fixture are 12V, I've linked to the exact ones we are suing on the post =]
I hope that helps! Joy -