
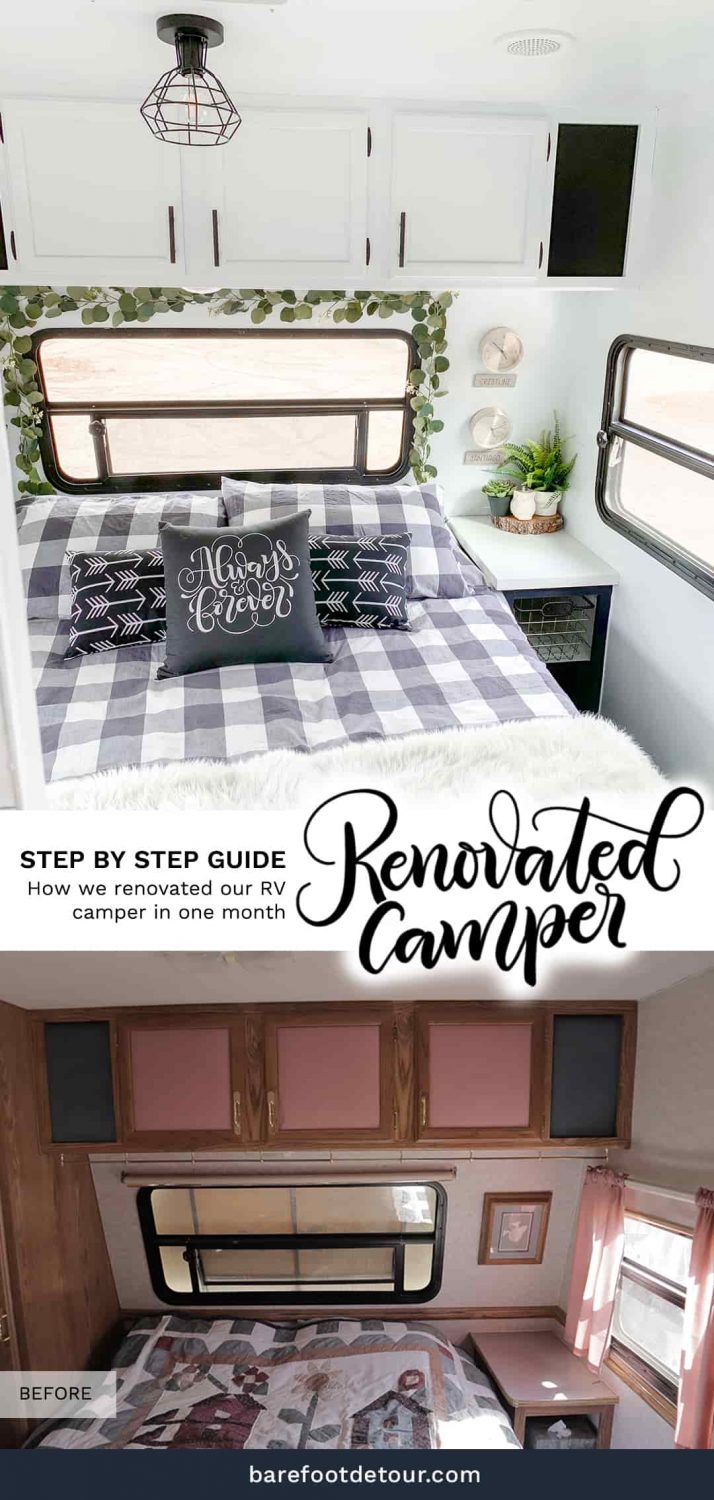

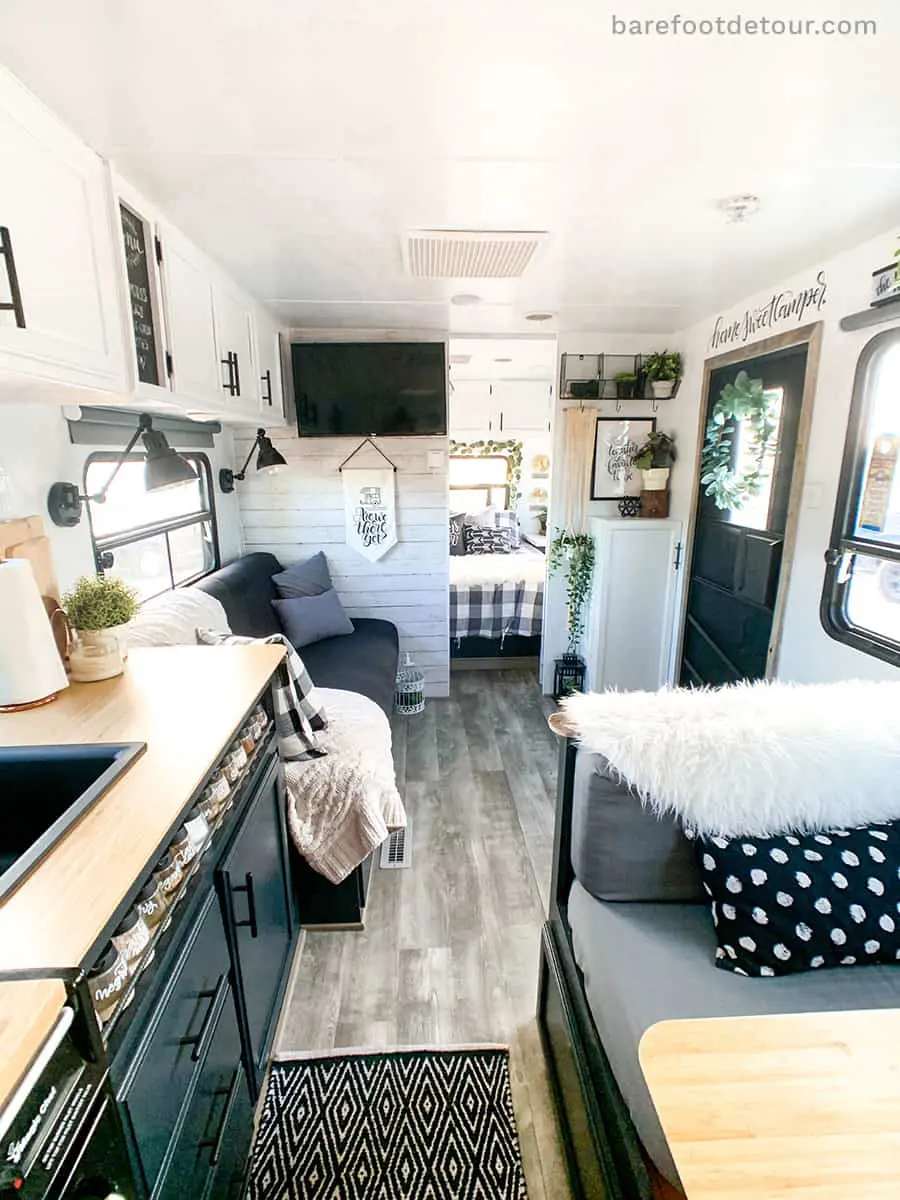
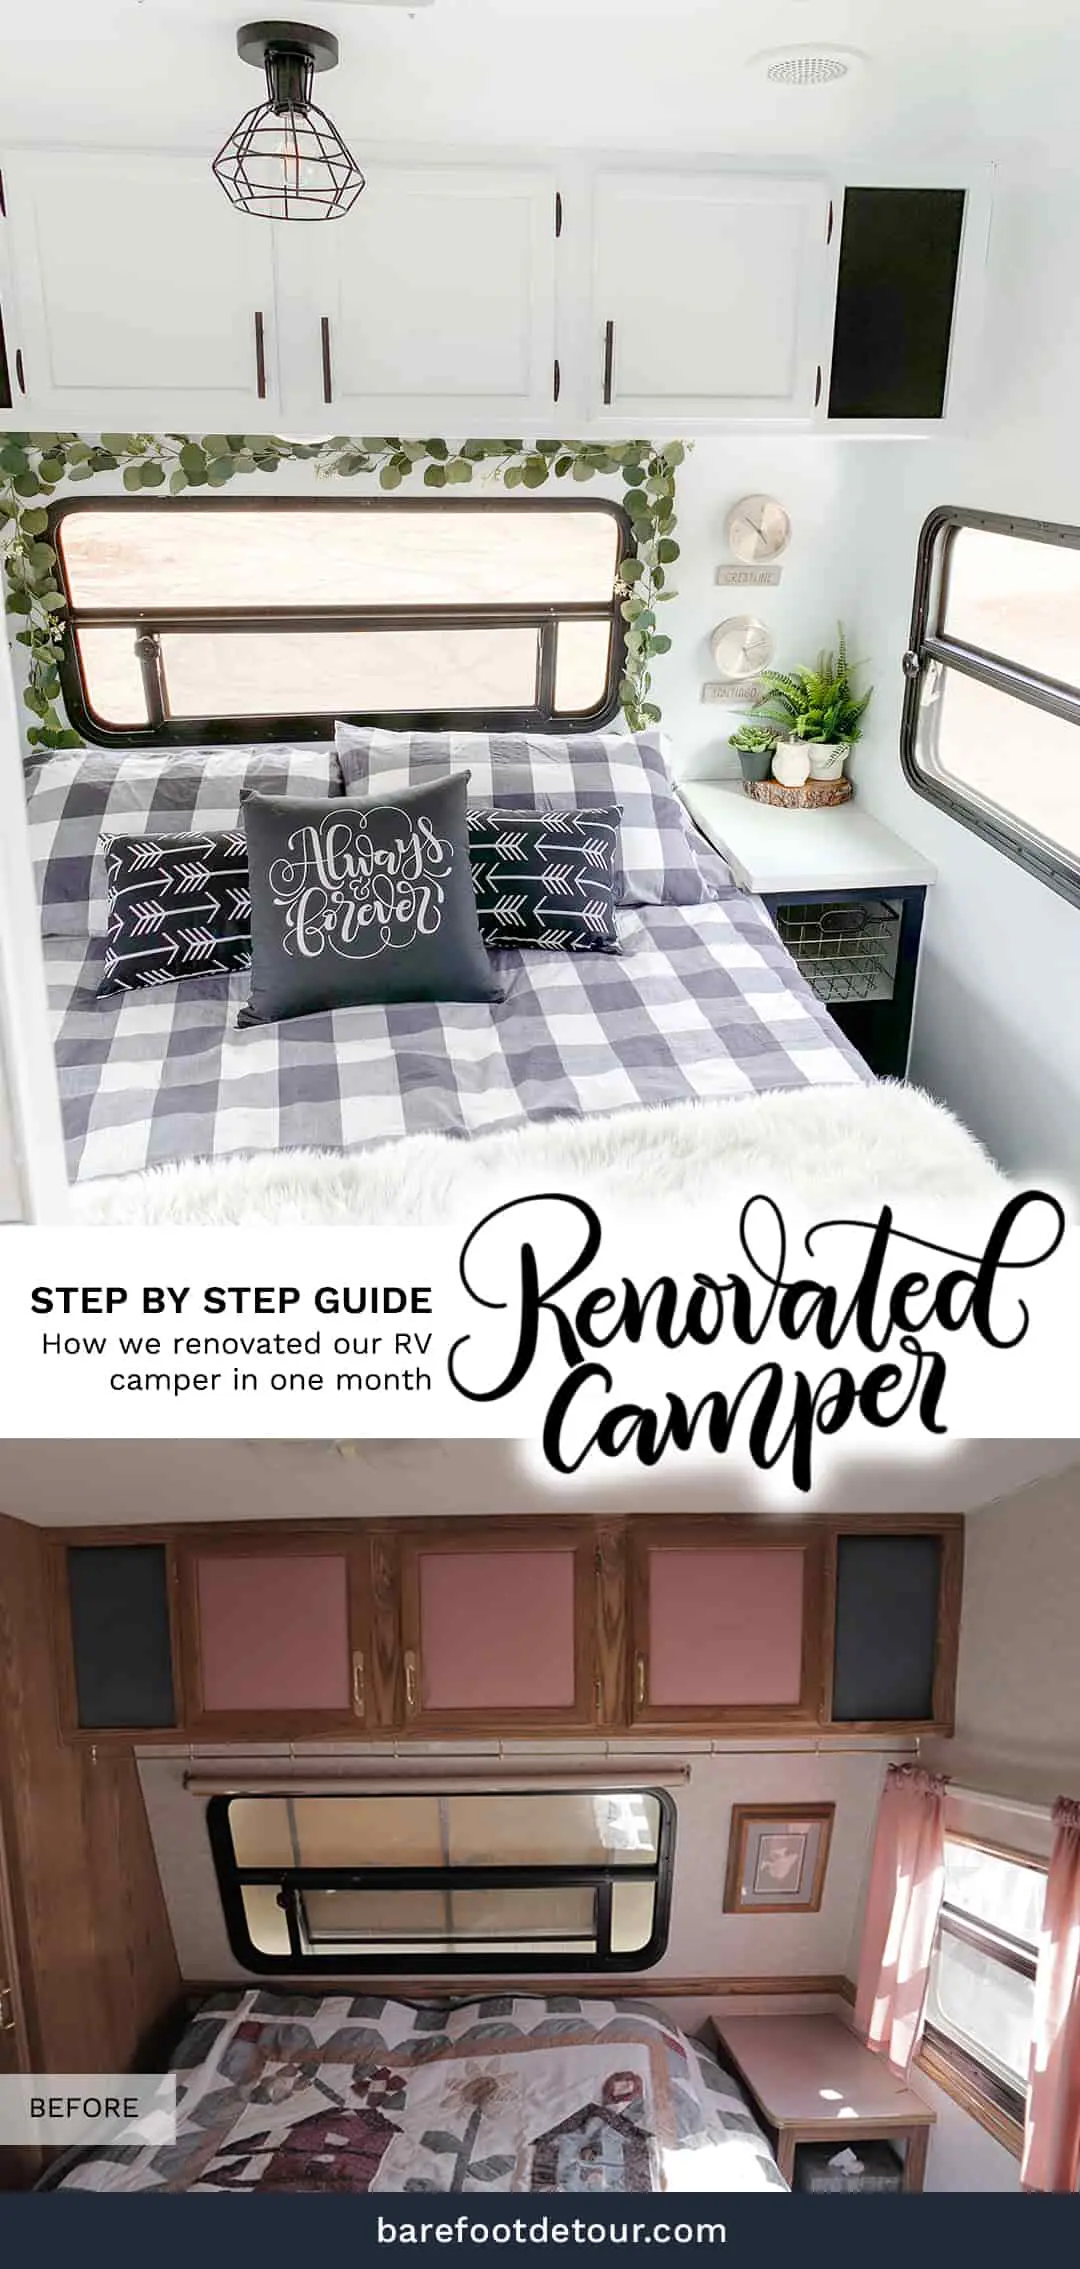
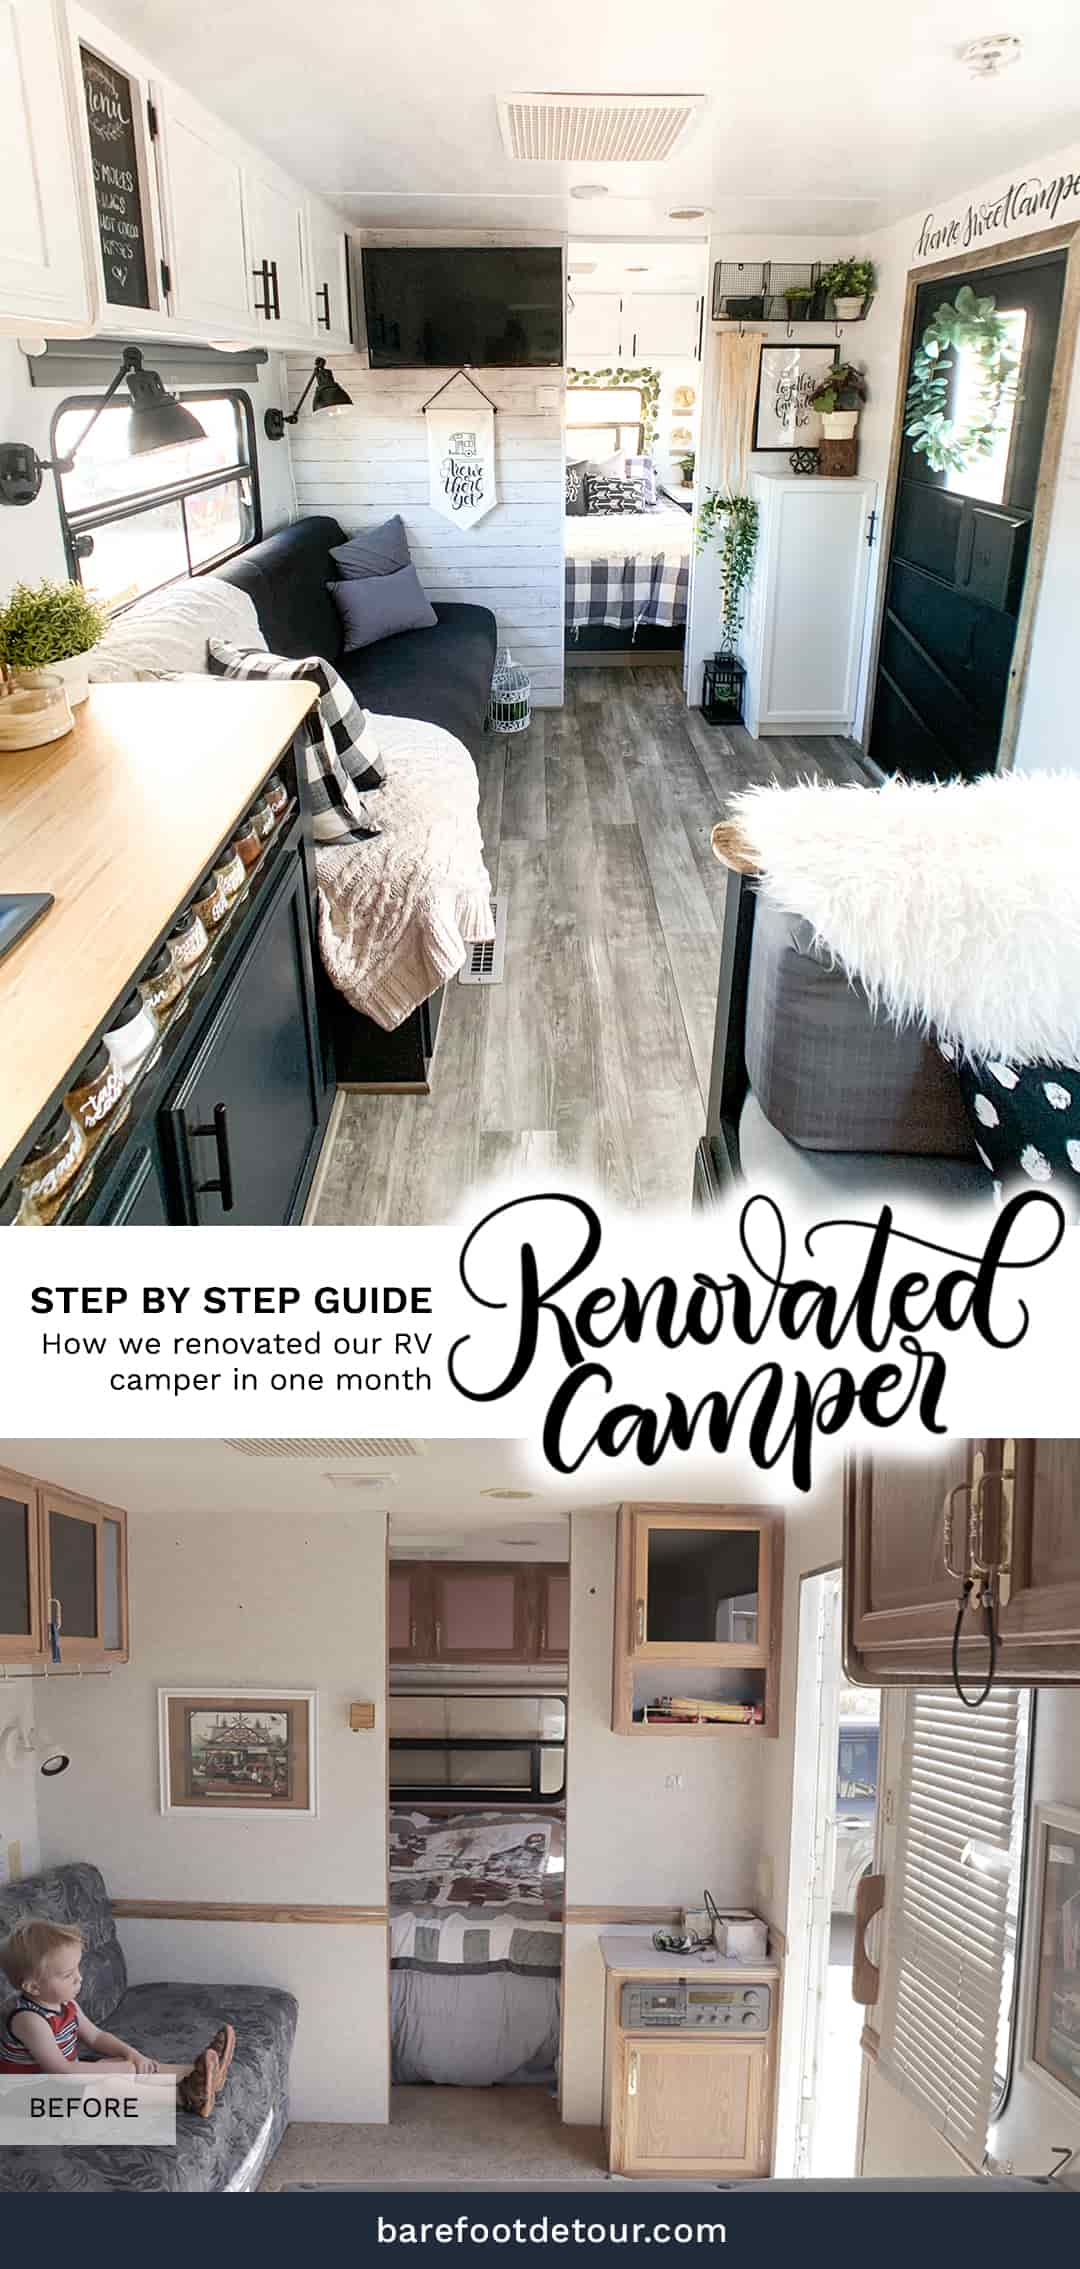
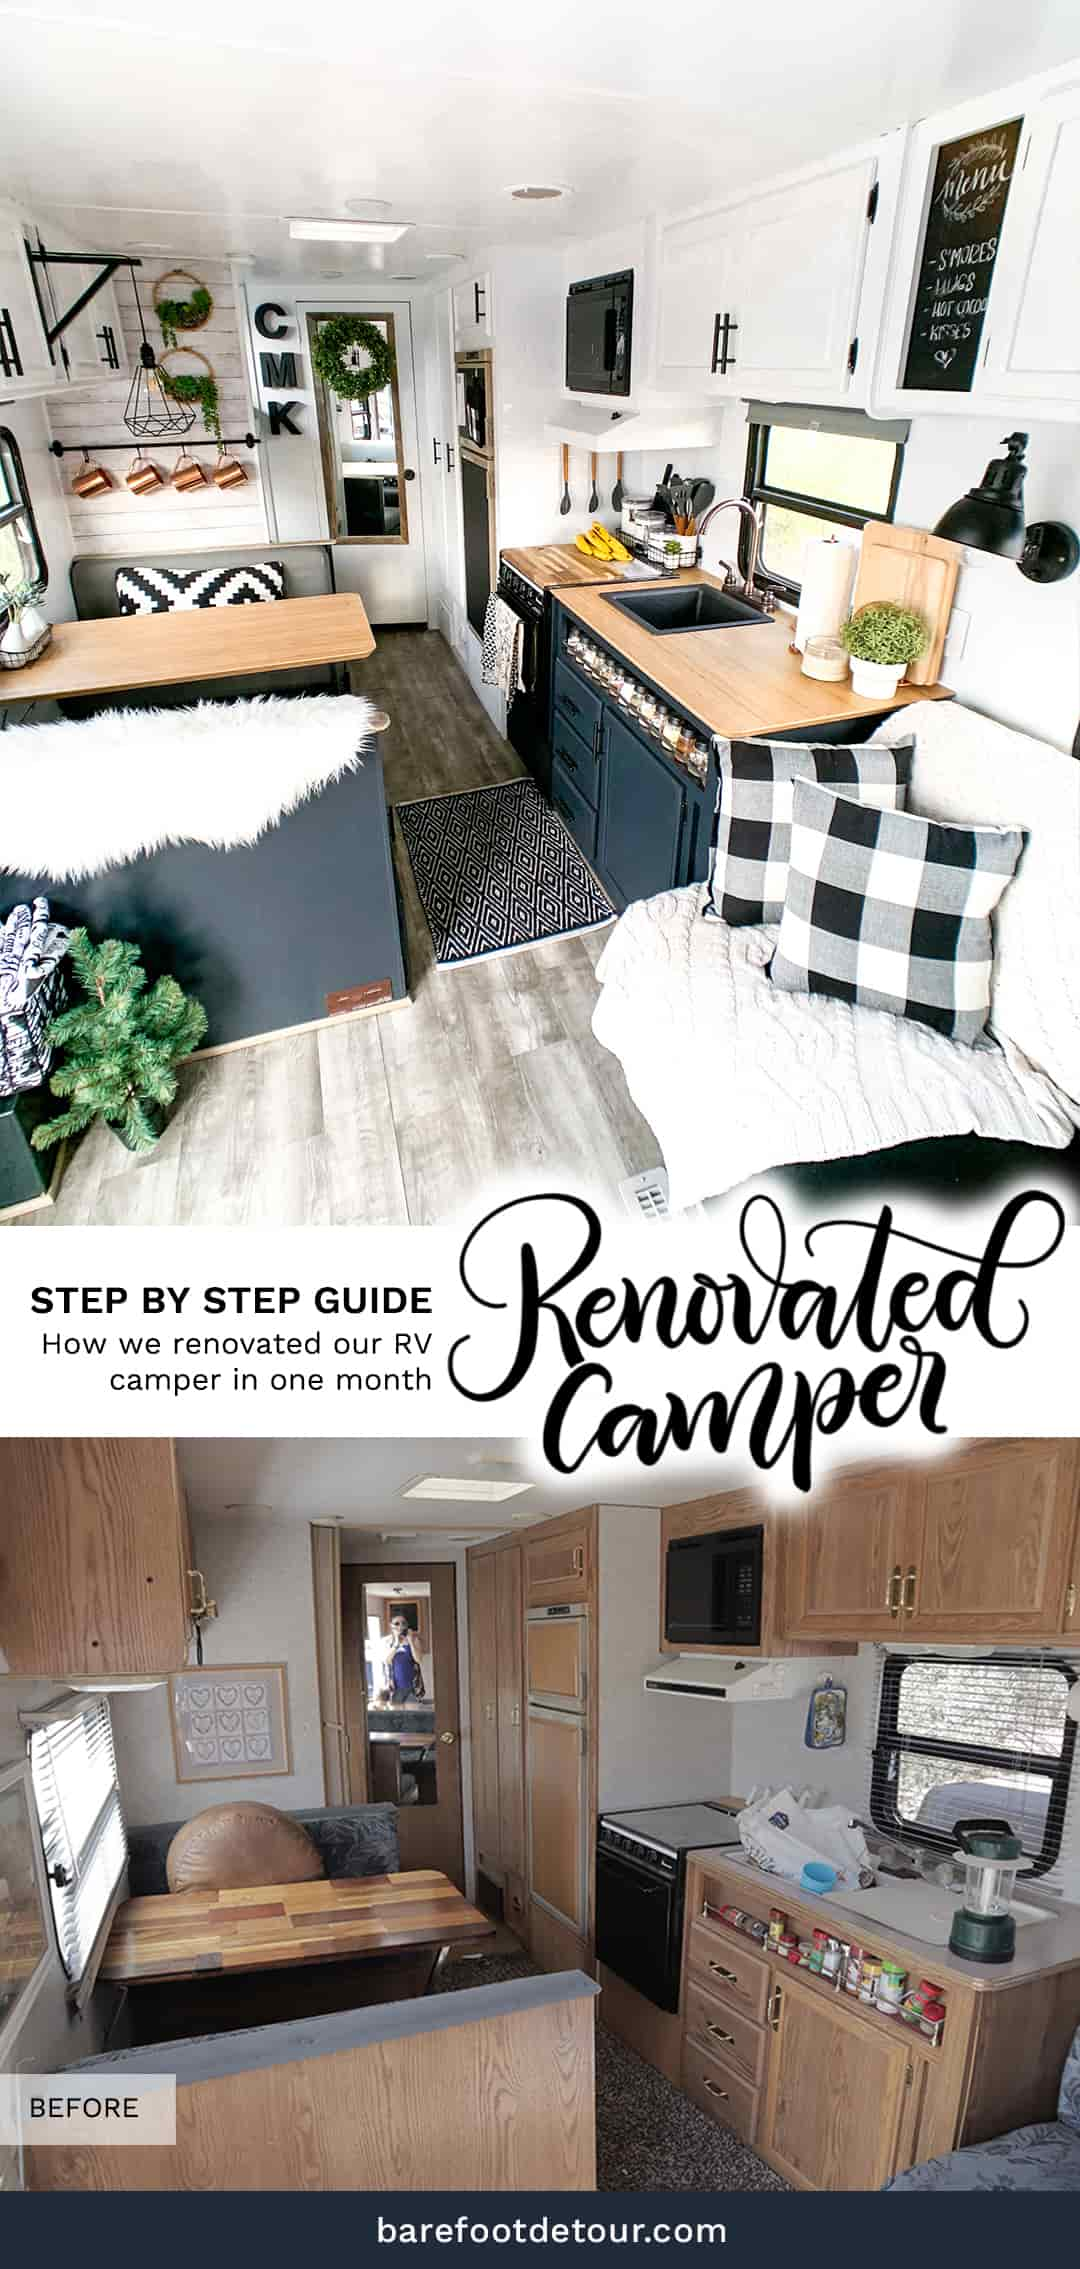
Ever since we posted the first picture of our remodel on social media, there have been so many requests asking to reveal how we did our RV renovation and the details that went into it, so finally here is everything that you should know to conquer a camper remodel!
So today we will be sharing a step-by-step post describing everything we considered and also the steps we took for our RV renovation. From the materials we used, the resources we checked, and some tips we picked along the way in our (one month) Camper remodel on a budget!
I’ve tried to cover as much as possible with this post, but if there’s anything in particular that you would like us to cover, just contact us! We are excited to share about all the things we learned in this process, the good and the bad, and we will also cover a breakdown of the exact cost of this remodel in a future post!
(If you are curious about the source list of all the items in the camper, I have them linked at the bottom)


Now I want to share that in this post, we will be focusing on the interior RV renovation, we are still planning to paint and renovate the outside of our camper, but that is material for a whole different post! If you want to see a full tour of how it looked before, check this post.
I also want to mention that we did this renovation in the middle of 2018, so we have been using and camping on it for a while now. There are some things that we have changed along the way, so I will also cover that at the end of the post.
- 1 – Find an old camper
- 2 – Plan the RV renovation
- 3 – Shop for the RV renovation
- 4 – Repair any damages
- 5 – Demo the inside of the RV
- 6 – Prep the different surfaces
- 7 – Add inner shelves or separations for organization
- 8 – Prime and Paint
- 9 – Renovate countertop and table
- 10 – Add peel-and-stick backplash
- 11 – Replace lights
- 12 – Redo flooring
- 13 – Add furniture
- 14 – Renovate the couch and dinette pillows
- 15 – Select mattresses and bedding
- 16 Select kitchen wares
- 17 Decorate and select different hanging methods
- 18 – Make it homey!
- 19 Updates after two years of use
- 20 – RV renovation Resource list
- Wrapping thing up!
This post outlines the process that we followed in order to renovate our RV, and while my husband has experience in renovation while working with my father-in-law (he is a Licensed Contractor). We are no professionals at this. We just love sharing and hopefully helping others =]
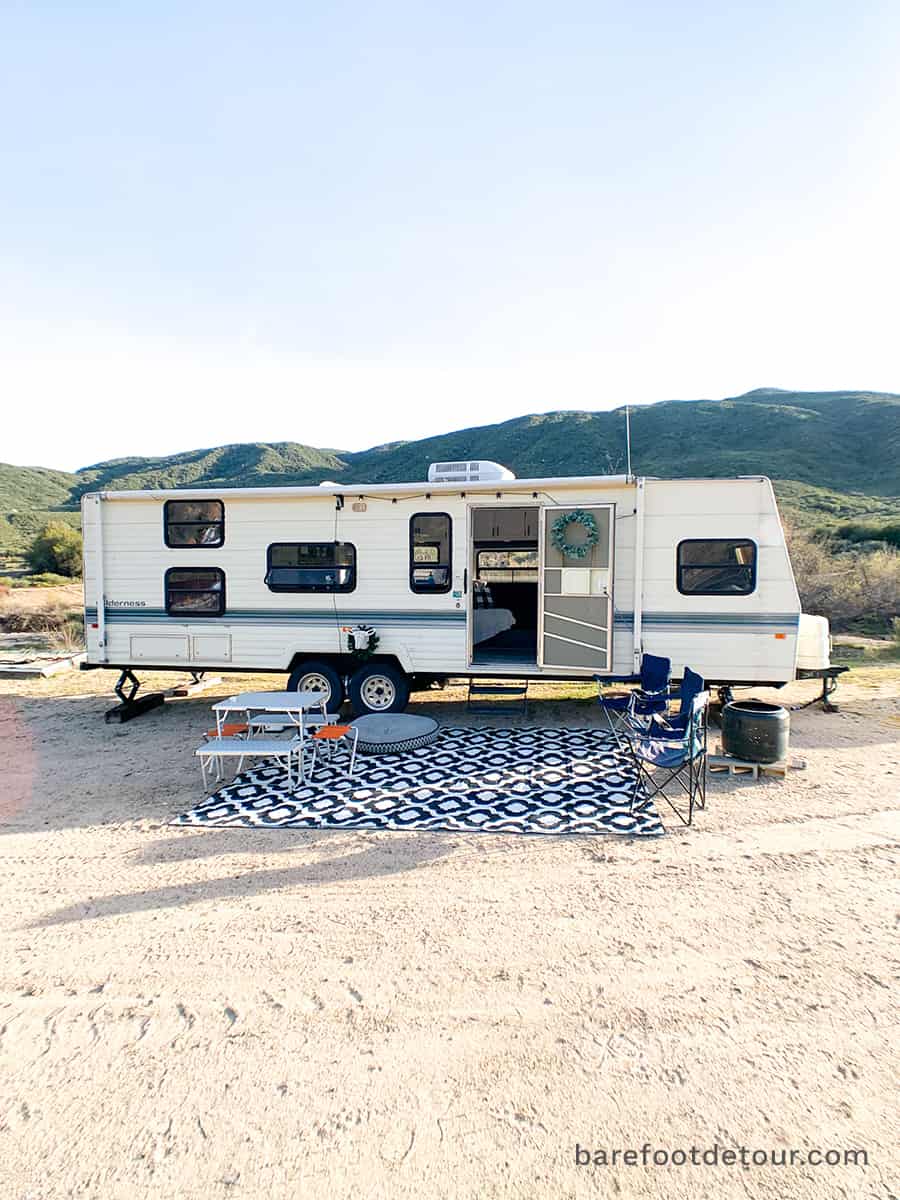
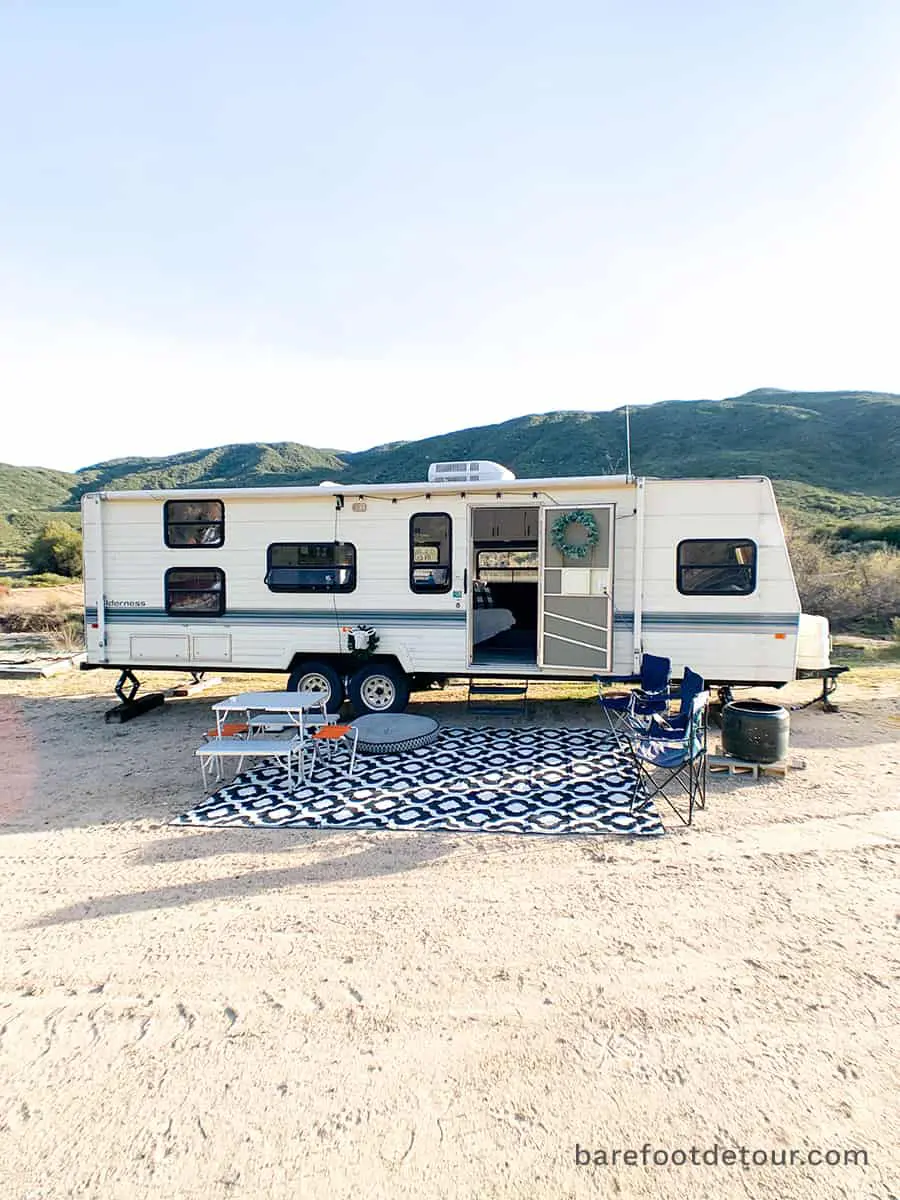
1 – Find an old camper
I already shared how we came across our camper in the before blog post where I share what our plans were when we go it.
We purchased it from a family friend for around $3,000 USA dollars, this is very cheap compared to what is normally available around us in California, so we jumped at the opportunity.
Here are some pictures of how our camper looked before, if you want to see a full tour of the before, check out this post.


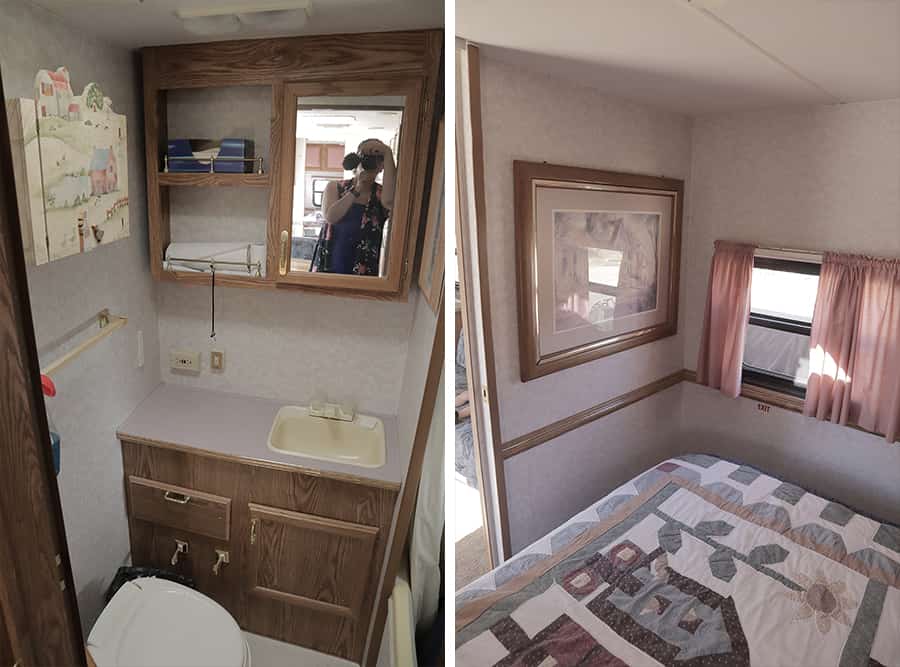

If you are buying an RV from a complete stranger, we would recommend that you check the list we are adding below because if any of those things are broken or not working correctly, it can set you down in your budget as repairs or replacements can cost a few hundred dollars.
- WATER DAMAGE: This is one of the most common issues in the RV world because the roofing on RV’s has to be re-touched (especially if the RV sets outside in direct sunlight) yearly or every a few years depending on the kind of roof sealer the RV has.Direct sun can wear the protective layer of the roof, making it weak and allowing rain to cause many issues, from fully collapses roofs, to damage to interior walls and nasty mold inside and outside the walls. So if you find something with a little bit of water damage, it could be that you still have to replace a big portion of it.
- WORKING APPLIANCES: If you are buying something smaller than a pop-up or teardrop camper, you want to make sure that the included appliances like the stove, oven, microwave, and refrigerator are working properly.
- FUNCTIONAL WATER AND BATHROOM: Again, this only applies if the RV you are purchasing includes it, double-checking that the water tank, as well as the water systems inside the RV, are working is very important!
- AC and HEATING SYSTEMS: Depending on the season you purchase your RV, one of these might be overlooked, but it’s important to check both when you are purchasing to make sure that there’s no extra repair that you will need in order to use them.
- TIRES, BRAKES and TOW SYSTEM: These while super basic, could be items that you don’t pay too much attention when trying to assess the state of the interior, we had to replace the whole breaking systems in our camper, and we are so glad that we did look before taking our first long trip because not having enough braking power could have been not just a mistake but an accident waiting to happen.
- AWNING: I’ve seen many campers that have broken awnings, and while you can easily find replacements for the fabric for one or two hundred dollars, replacing the whole system can get super expensive, like almost a thousand of extra dollars depending on the size. So it’s definitely something you should check.
The main reason why we recommend you check all these things before purchasing is because those items will be expensive to replace or fix, so if you can get away with not having to invest money on the basic functionality of your RV, you will have more money to allocate to make it look AMAZING!
2 – Plan the RV renovation
The planning phase of your RV renovation can seem like such a not important thing to focus on, but if you (like us) are working on a budget, planning your priorities and where you want to splurge is super important to keep the renovation (and yourself) organized and account for everything you will need to purchase.
There are so many steps I recommend in order to plan the “look” of your RV so that you achieve exactly what you have in mind, spending as little as possible.
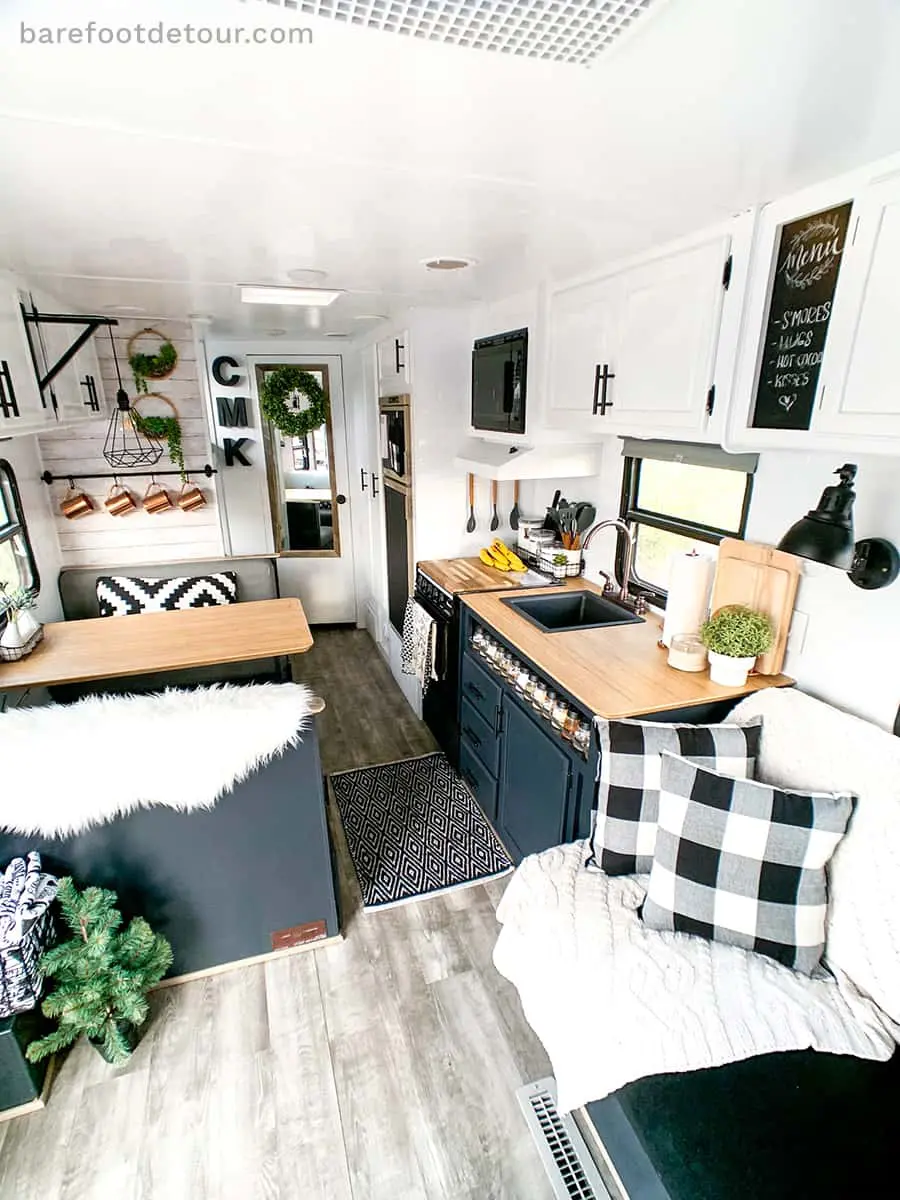
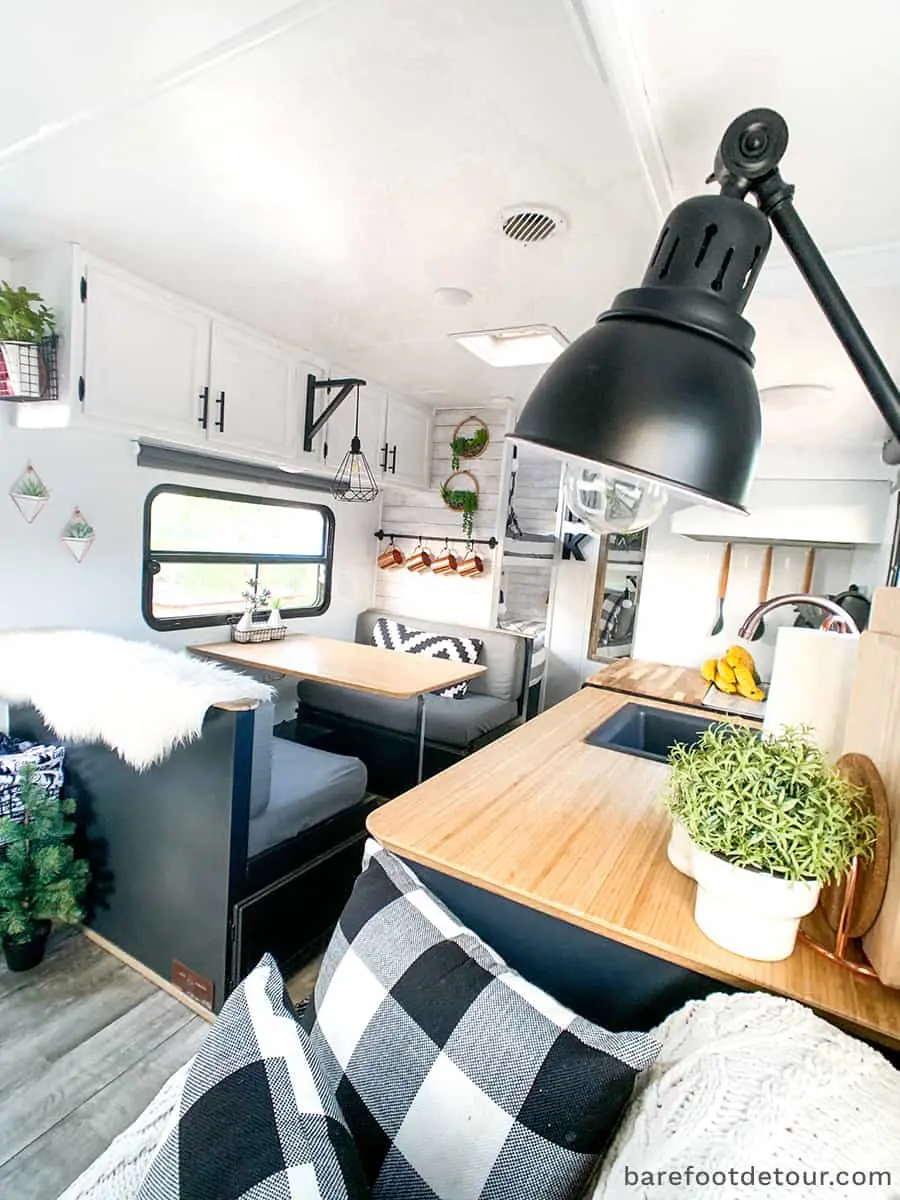
- Define your decoration style: This is such an important step because, to outline your remodel, you do need to know what style talks best to you. In my case, I love the mix of Industrial, Modern, and Farmhouse. So I focused on some items for each that really made me happy and decorated from there.
- What items in your style will you want to include: Even when two people like the same style, there are preferences that we have over the items that we like in each style, so it’s important for you to select what you want to include that is important to you, this could be bedding, a rug, decor pieces, wallpaper, etc?
- Select what items will be your “big ticket” items: After you have all the items that you wish to include, select when ones that are the most important to you. In my case, it was the peel and stick subway tile and the black kitchen sink. I wanted them so bad that I allocated a big portion of our budget to them and compromised on other items that I wanted but that ended up being not so high in my list, like the kitchen faucet and the bathroom sink and faucet.
- Find budget-friendly alternatives for expensive items: As I mentioned, I decided that items in my list were not as important, so I found very cheap alternatives for things like the kitchen and bathroom faucet and the bathroom sink. (I ended up paying $25 for the kitchen faucet by getting a 50% off coupon from Google Shopping, $4 for the bathroom faucet and $6 for the new bathroom sink from E-trailer during a sale) So if you wait for sales or use extra coupons, your cost can go down a ton!
- Make a list of all the basics you will need: From the outside in, when I started to plan the remodel I overlooked the number of items we would need that are just basics, like tape and paper to cover while painting, sanding paper, and tools like drills and hammers that if you don’t already have, can add pretty quick to your budget. So make a list of basics, if you don’t have the tools, check to see if you can borrow or rent instead of buying.
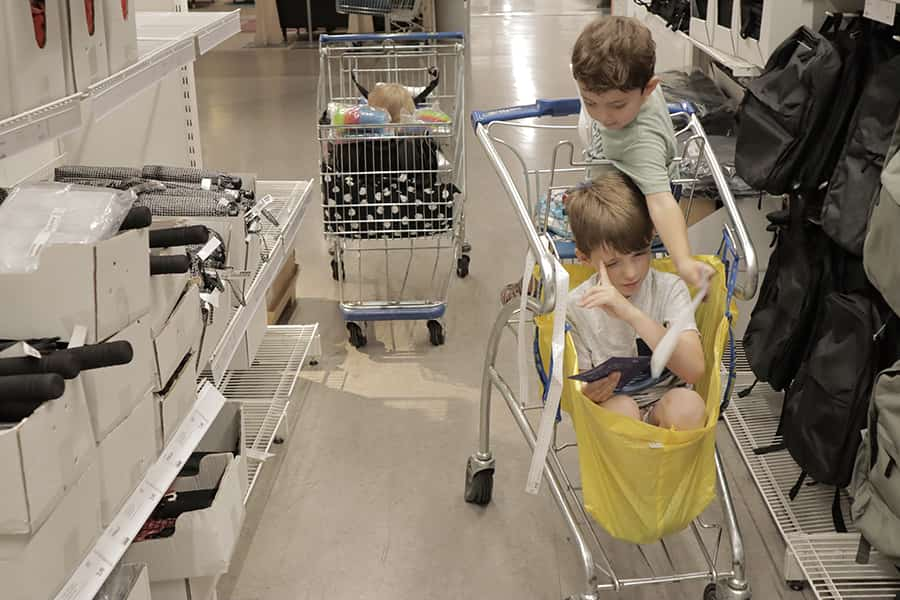
- Make a list of all the decor and extra items you will need: I know that by now you get that I am a list-making lover. But when planning a complex project like an RV remodel, staying organized on the things you need to do and how much you will spend on it can help you stay on track of the budget and also of the task you need to get done. I made a list of everything we needed to buy, where we will buy it and how much it was, that way I could organize our shopping trips (shopping with 3 little ones is complicated enough as it is, am I right?) and stay in budget!
Of course, this is just how we did things, there is no right or wrong way to approach a project! If you don’t like list-making, that is totally ok =]

3 – Shop for the RV renovation
As I mentioned, during the planning phase of our remodel, I made a list of everything we had to purchase, separated it by place, and also by importance.
The basics that will get us started were at the top of the list, the decorating items and things like flooring were at the bottom because we would not get to that until pretty much all the painting was done.
As I shared in our 5 biggest lessons we learned while renovating our RV post, we live in the mountains so shopping is already a full-day thing for us because most stores are 45 minutes down the mountain.
We basically shopped in person only at Home Depot and Ikea, and everything else we purchased online at Amazon and a few things from Target.

I recommend that you double-check the return policy on anything that you purchase for the remodel because until you see it where it’s supposed to go (even after measuring) you might change your mind.
Working with small spaces is tricky, and sometimes you will find something that you like but that it’s not necessarily the best use of the space. So that’s when the decision of what’s more important to you will weigh in.
I also recommend getting an Amazon Prime account because you will receive your items so much faster!
4 – Repair any damages
Before anything can start, you have to fix any water damage or other damages that your RV might have, especially if they are interior damages.
If your damage is only in the exterior, make sure that your RV is protected against the weather while you wait to get to it, that way it will not get worse.
Once the damages are addressed and fixed, we can move to the FUN part! Well, at least that is my husband’s favorite part of any project! DEMO!
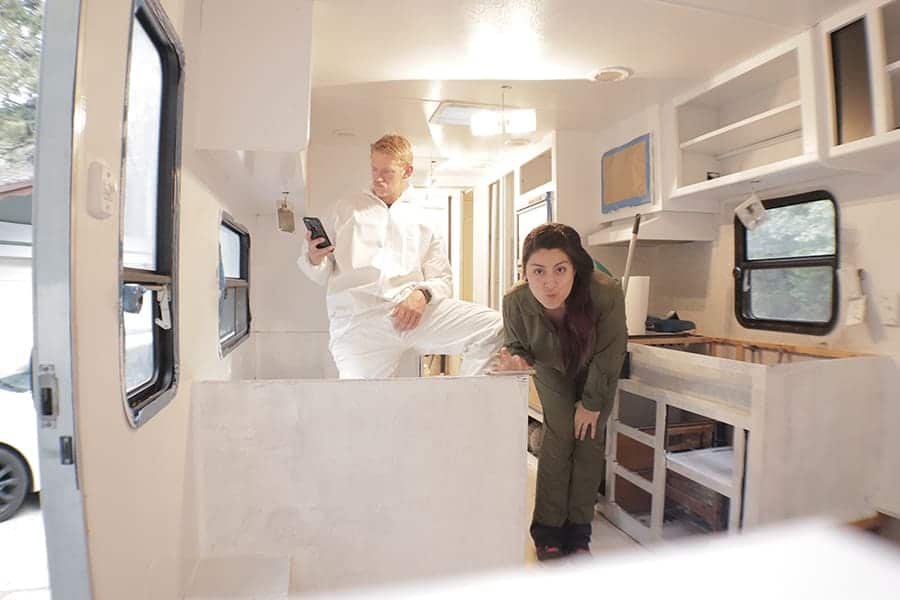
5 – Demo the inside of the RV
Depending on what you plan to do with the interior of your RV, at this stage you might need to take cabinets out, or like in our case, take all the doors of the cabinets out!

We decided against taking too much of the storage out, and instead, we only took the pieces that were outdated (TV stand and music system) and used the space in a very bad way.
By removing those cabinets, we saved enough weight to replace with something different, we found a cabinet for the bottom of the idea that was the exact measurements we wanted and taller than the old one so we could take advantage of the storage.
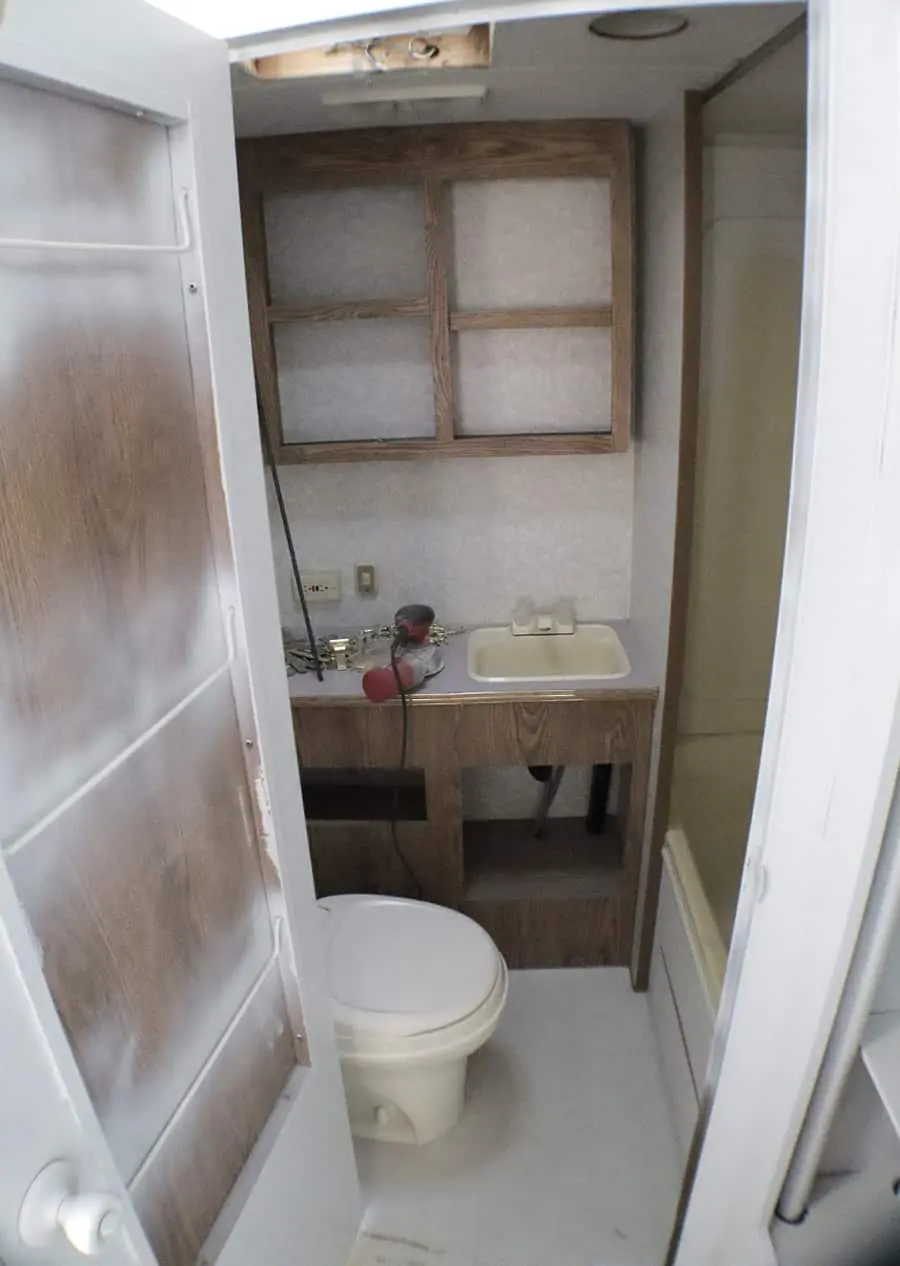
We also took all the countertops, the one in the kitchen, bathroom, the table in the dinette, and the counter in the nightstand of our bedroom.

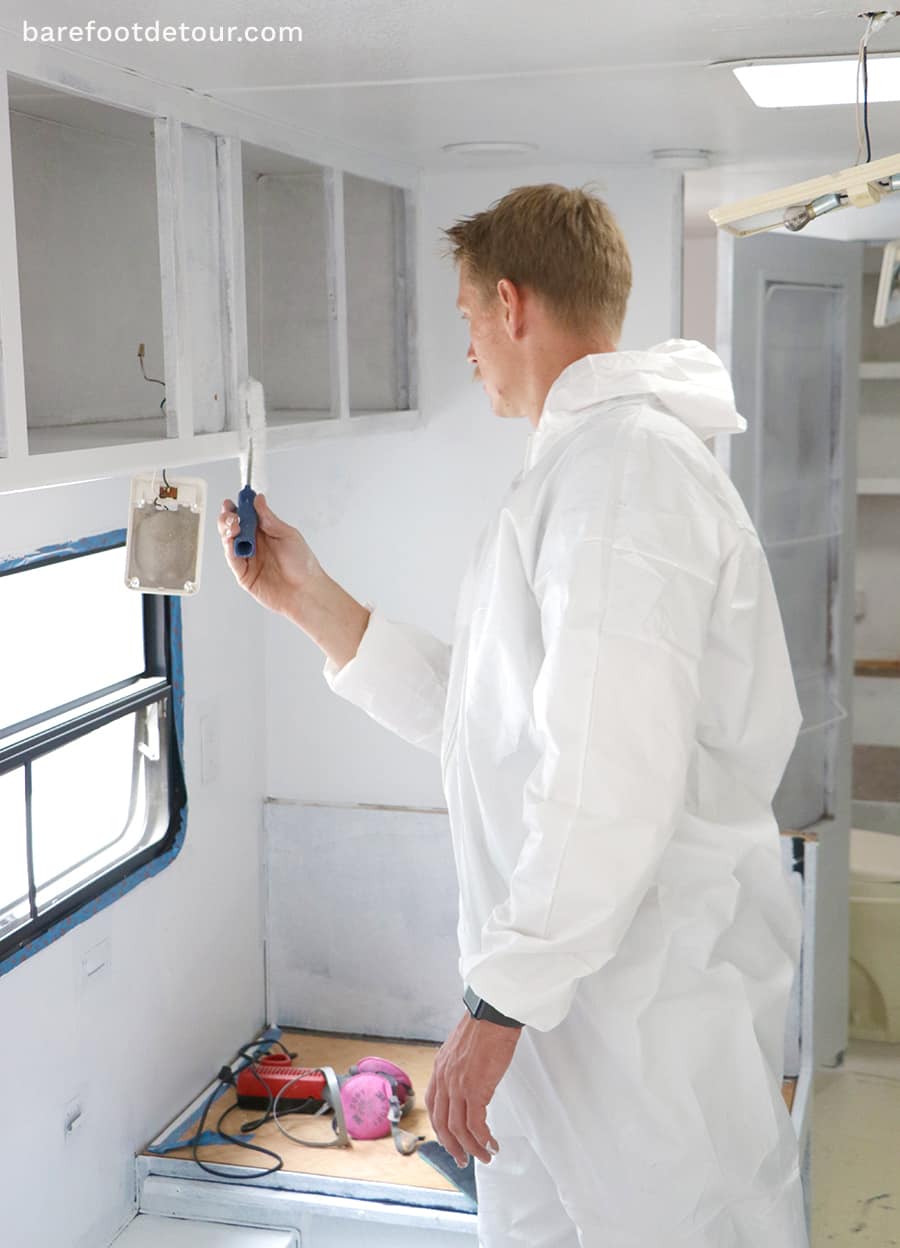
6 – Prep the different surfaces
In most RVs, you will find a mix of particleboard cabinets, some solid wood pieces, and veneer coverings. Most walls are either painted boards or wallpaper.
And depending on how old your RV is, you might find even more surfaces like glass and poly doors and other plastic panels.
Preparing each surface for an efficient and successful covering is not only the most time-consuming part of this whole process but also one of the most important!
If you read my post about the 5 lessons we learned while remodeling, you already know that prepping was something we didn’t invest too much time in at the beginning, and we ended up working double because of this!

So, How do you prep and RV for paint?
The short answer is, it all depends on the kind of surfaces that you have and the condition of your walls and cabinets.
Most old RVs have either a mix of particleboard (fake wood) and real wood, wallpaper and some have peel-and-stick surfaces.
For all the real wood parts in our RV, we decided to use liquid sander since we didn’t want to have to sand like crazy, every single part of the cabinets of the RV.
As the name hints liquid sander it’s a liquid that helps remove all the “gloss” out of your surfaces, we used about 2 layers of that, and then we lightly sanded all the parts that were going to be exposed to a lot of wear just to be safe.
For all the particleboard parts, we sanded a layer off (lightly) so that the primer would have a better surface to adhere to. We used a hand-held orbital sander that made the process so much faster than doing it manually!
The sanding part, while annoying, is super important to not skip over because if your primer doesn’t adhere well, the paint will chip with any minor scuff.
We didn’t remove the wallpaper on our walls because it was in very good condition, so removing it would have been more work for pretty much the same result.
So we decided to plain on top of it instead.
If you need to remove your wallpaper, I’ve read good reviews about this wallpaper stripper and also this wallpaper steamer that uses only water, no chemicals.
Just to be safe I wiped our walls (with wallpaper on) with this TSP substitute, this way I knew the surface would be spotless and in the best condition, so our primer would adhere better.
For all plastic parts, I washed them with the same TPS substitute as I did the walls and used spray paint for plastic, taping around the edges.
Because we rolled the paint on the walls and ceiling, painting around the already painted plastic parts was super easy.
(Ken did try to spray the camper instead of rolling, but he didn’t like how the coverage looked, so we opted for rolling instead)


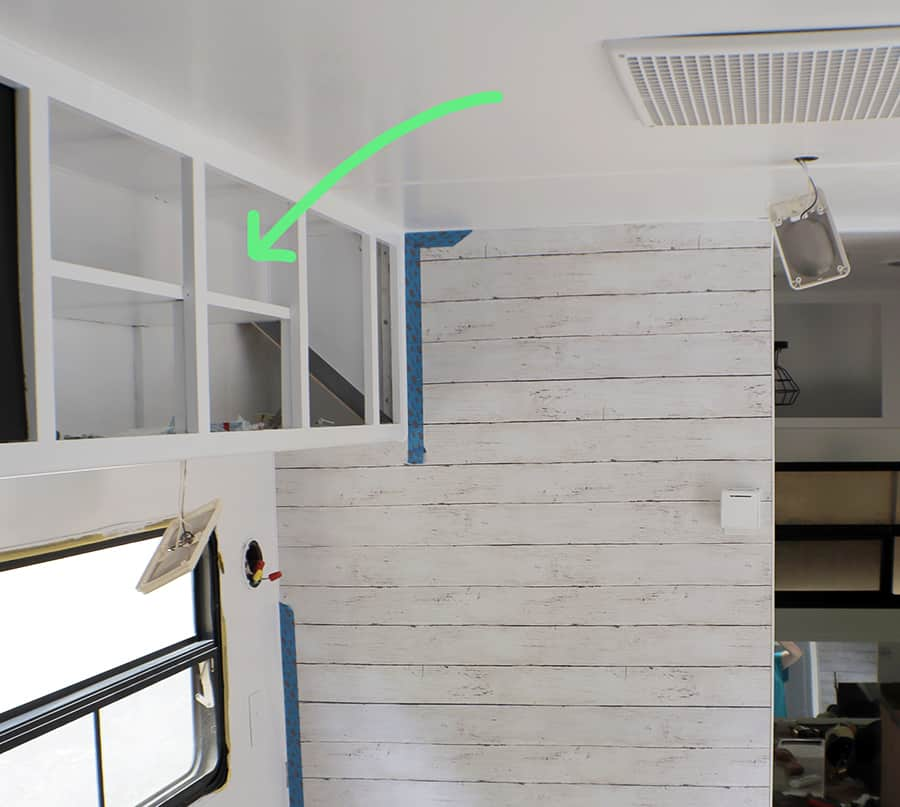
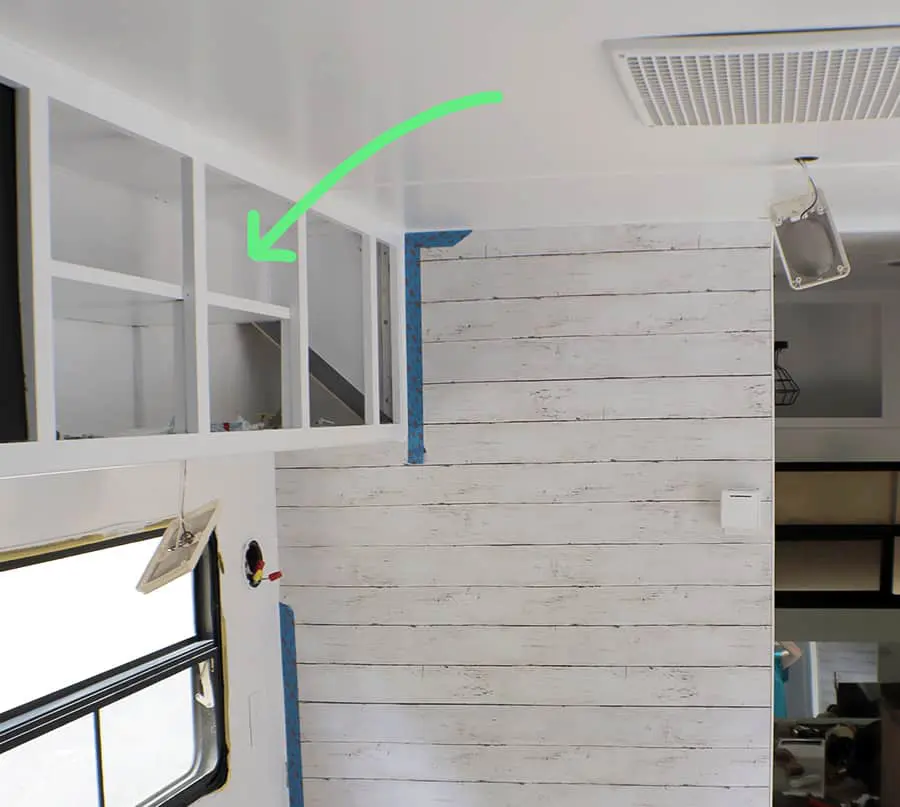
7 – Add inner shelves or separations for organization
Since I purchased containers to organize the kitchen as much as possible, I asked Ken to build extra shelves inside two cabinets so that my basket containers could fit perfectly, this way I was using every single inch inside the cabinets and keeping everything labeled and organized.
We did this at this stage so that we could paint those cabinets and later add shelf liner along with all the other cabinets.
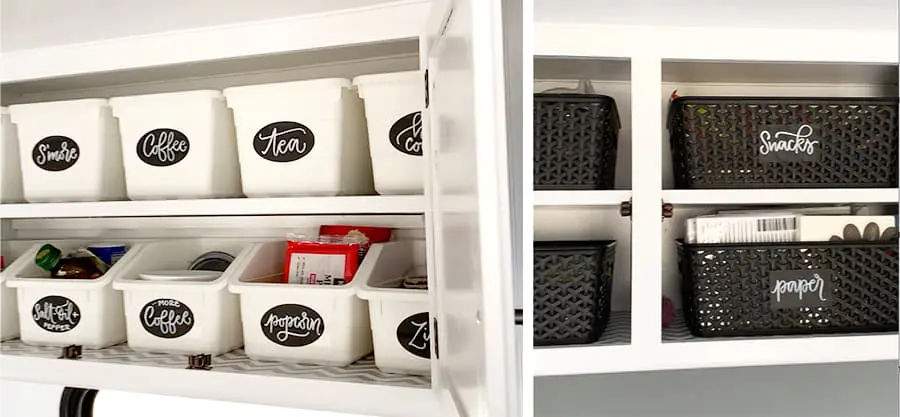
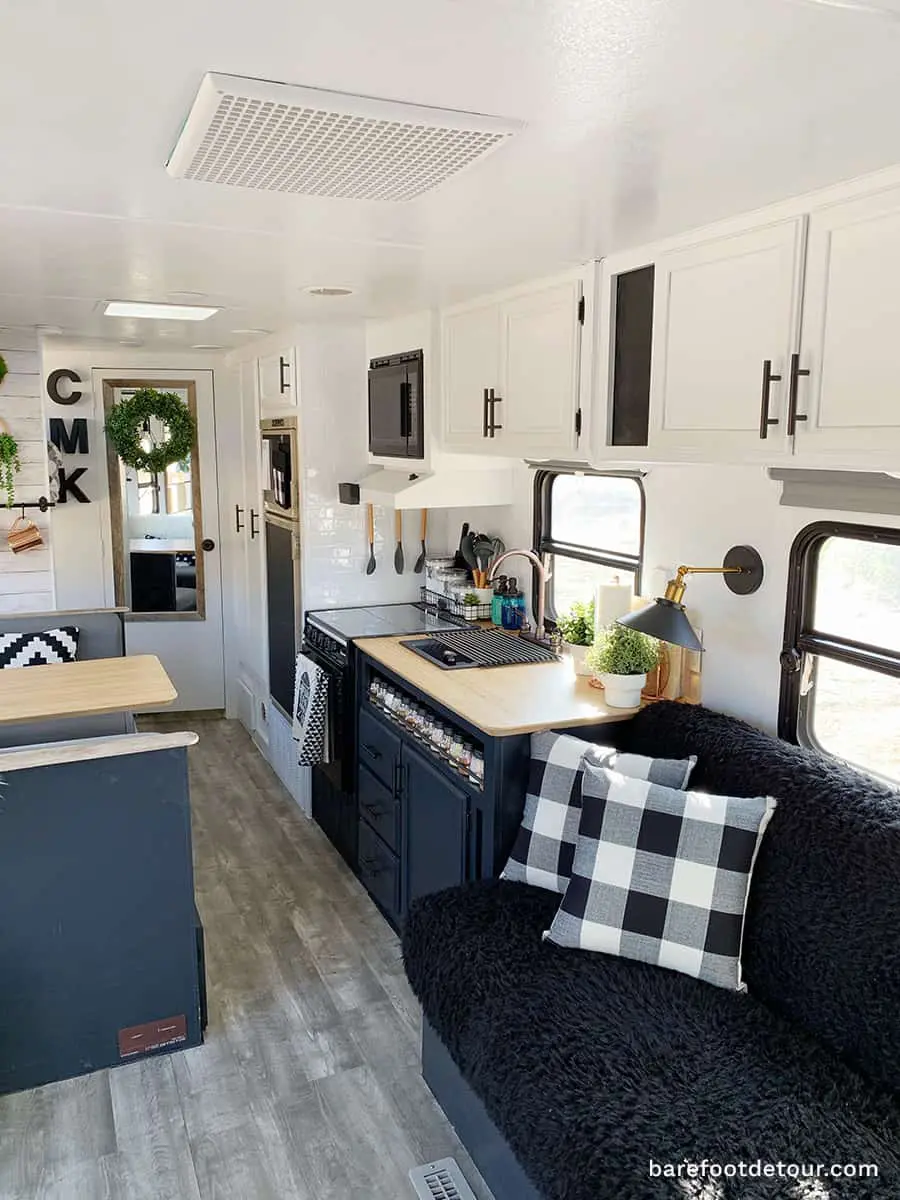
Below you can see the finished shelves, with liner and the boxes on top. I used black vinyl to cut oval and rectangle labels and used a Posca ink marker to write the labels (and the spice jars below my sink)
Below the left picture, you can see how I used these containers, and boxes from Ikea for above the sink. For the right picture you can see that I used 4 baskets from Target for the area above the couch, we left the last cabinet at full height for all the tall kitchen appliances.

8 – Prime and Paint
Just as important as selecting your paint is to select the right kind of primer.
As I already mentioned, if you plan to paint over different kinds of surfaces as we did: wallpaper, laminate, etc.
We definitely recommend you select a shellac primer (Zinsser Bullseye is what we use) or good oil-based primer.
Water-based primers can moisten and sometimes lift off a porous substrate, and that can cause the paint to lift or crack.


And if you have any laminate (fake wood) you want to go with an oil-based paint that will “attach” better to the surface.
To Prime our walls and cabinets, we used the Rust-Oleum Zinsser Bullseye primer because we’ve had a great experience with it in the past, and it’s good for pretty much every surface we’ve worked with (it’s oil-based).
I could not recommend it enough and at Home Depot we got the best price for it, we rolled the walls and also sprayed the bathtub before using this tub refinishing kit.
In our camper, the only particleboard parts we had were mainly the cabinet structure, bathroom structure, and countertops, but since we replaced all the countertops, we only worked on the rest of the surfaces.
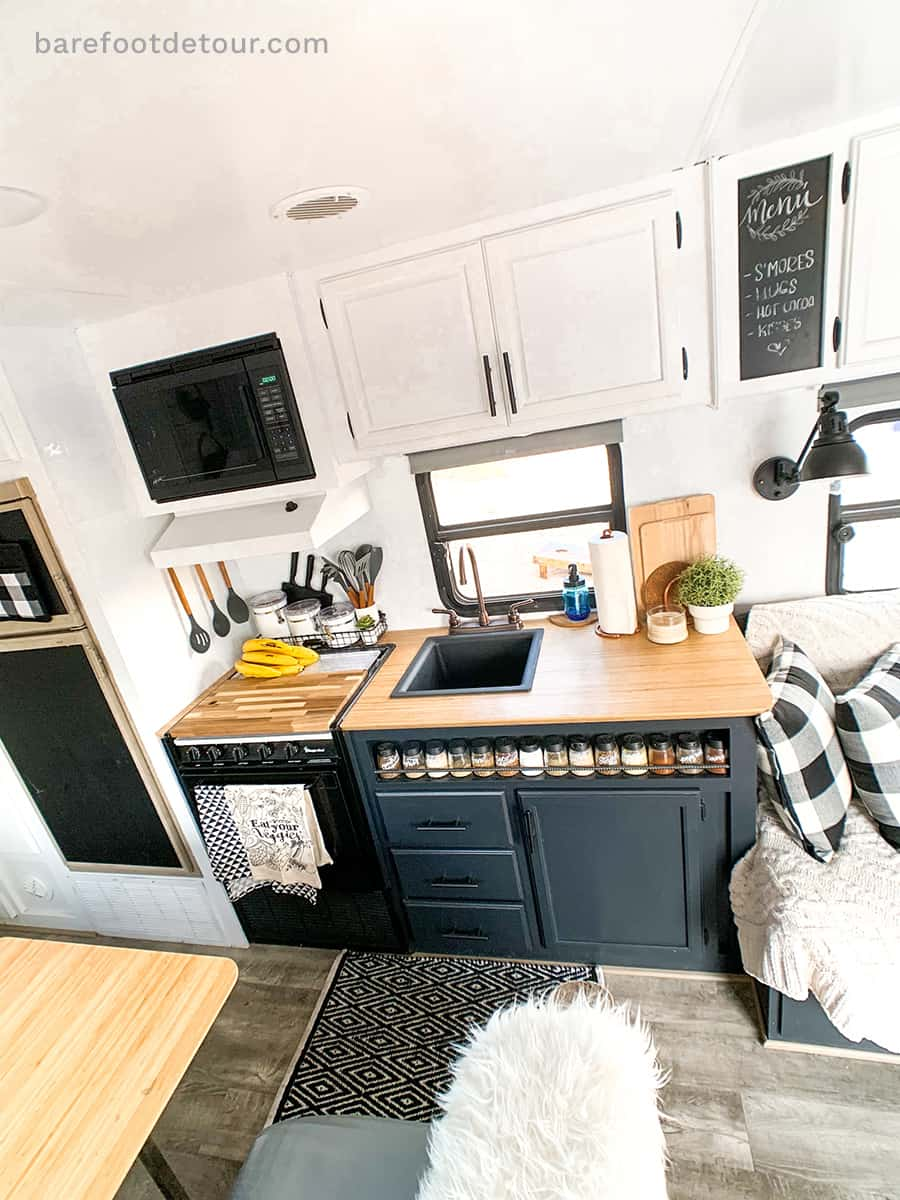
When we selected our colors, I knew we wanted two very contrasting colors. So when looking at swatches, we decided on using BEHR Night club for everything that was dark and BEHR Silent White for everything light.

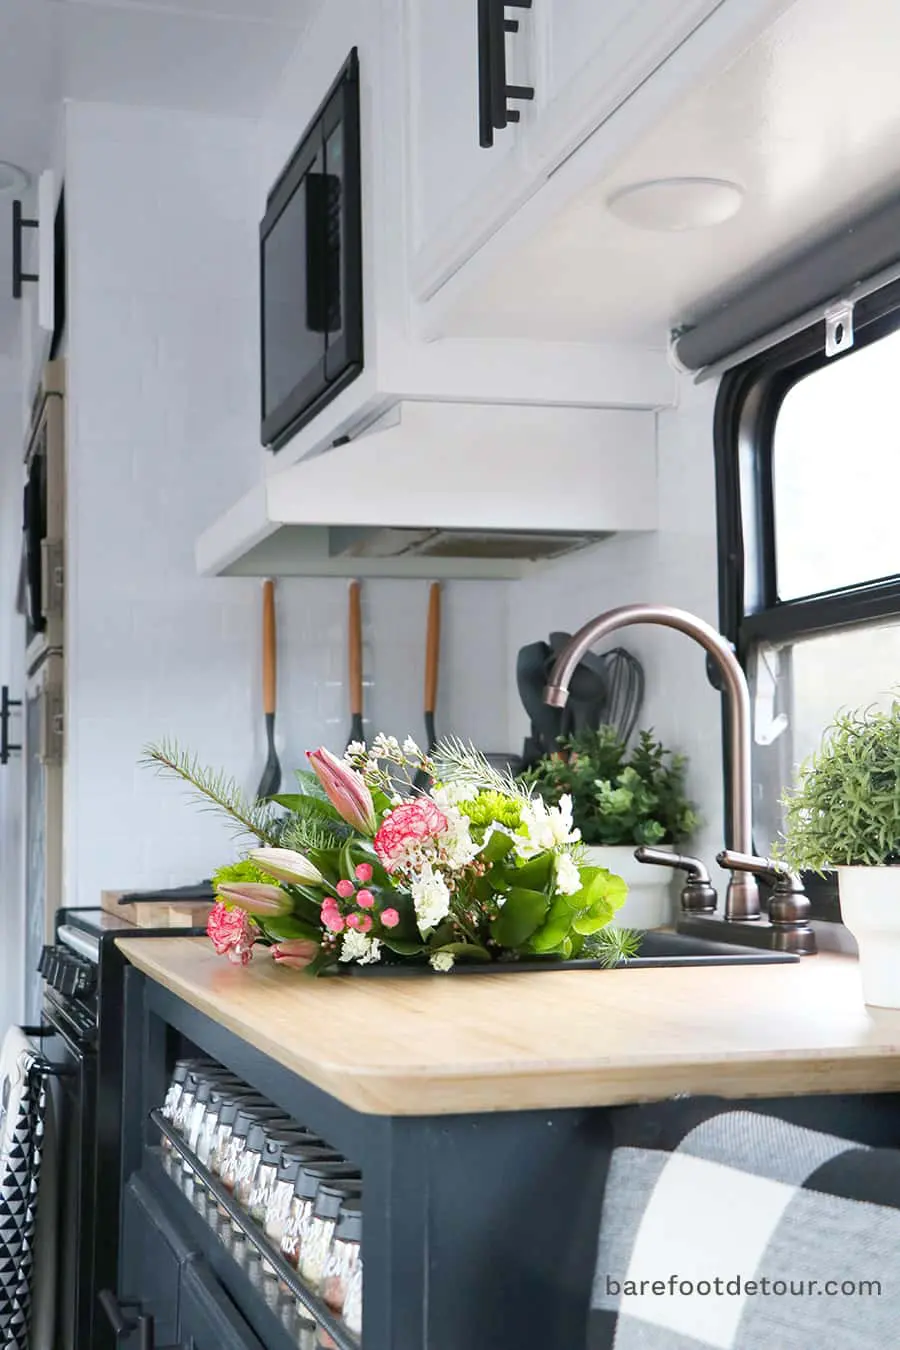
9 – Renovate countertop and table
Probably one of the most common questions we get asked on Instagram is how did we refinish the countertop for our kitchen and didn’t break the bank in the process?
Because I wanted a special sink (this one) we allocated most of the kitchen budget towards that and the peel and stick subway tile.
This left us without the kind of money we would need to get a “real” butcher block counter.
So we put our thinking caps on and thought about using something different for the same look. After some research in our favorite stores, we found the perfect solution, this Ikea tabletop used for desks.
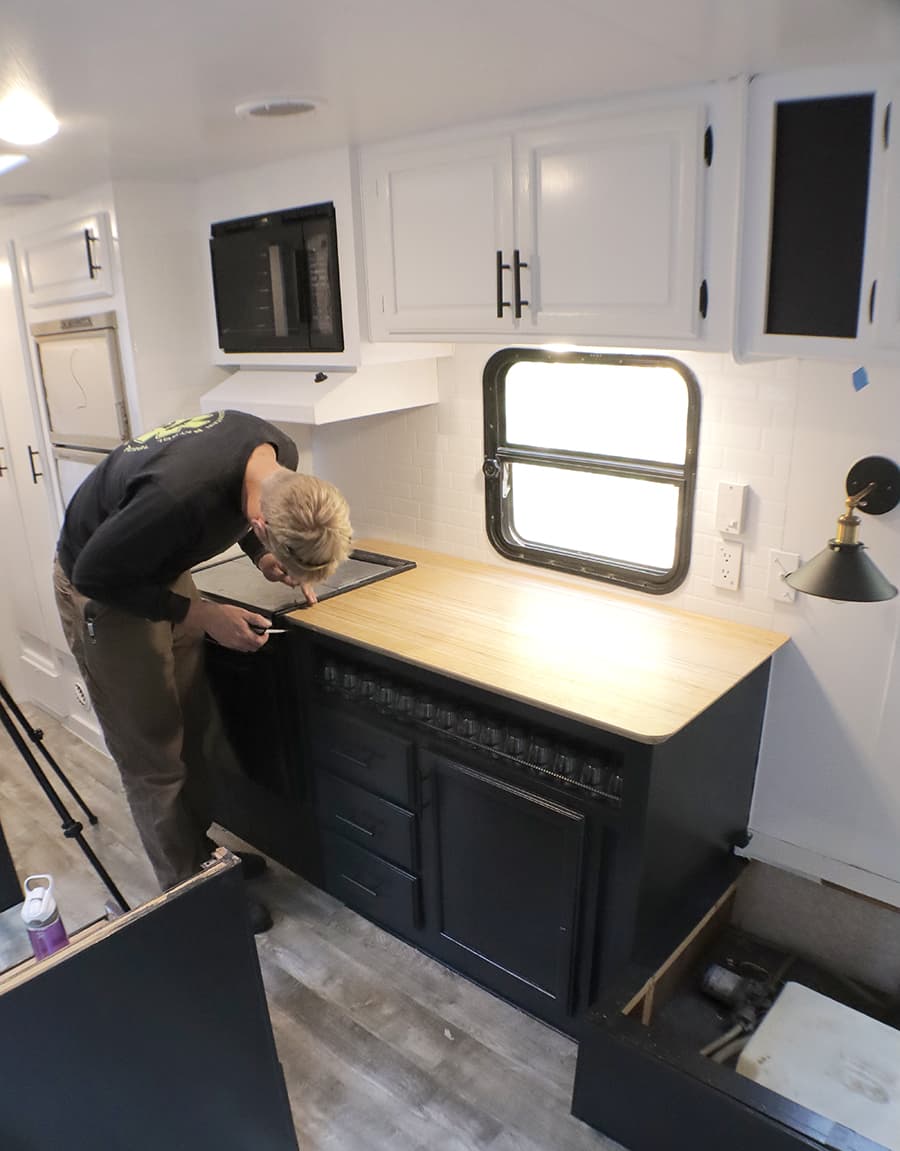
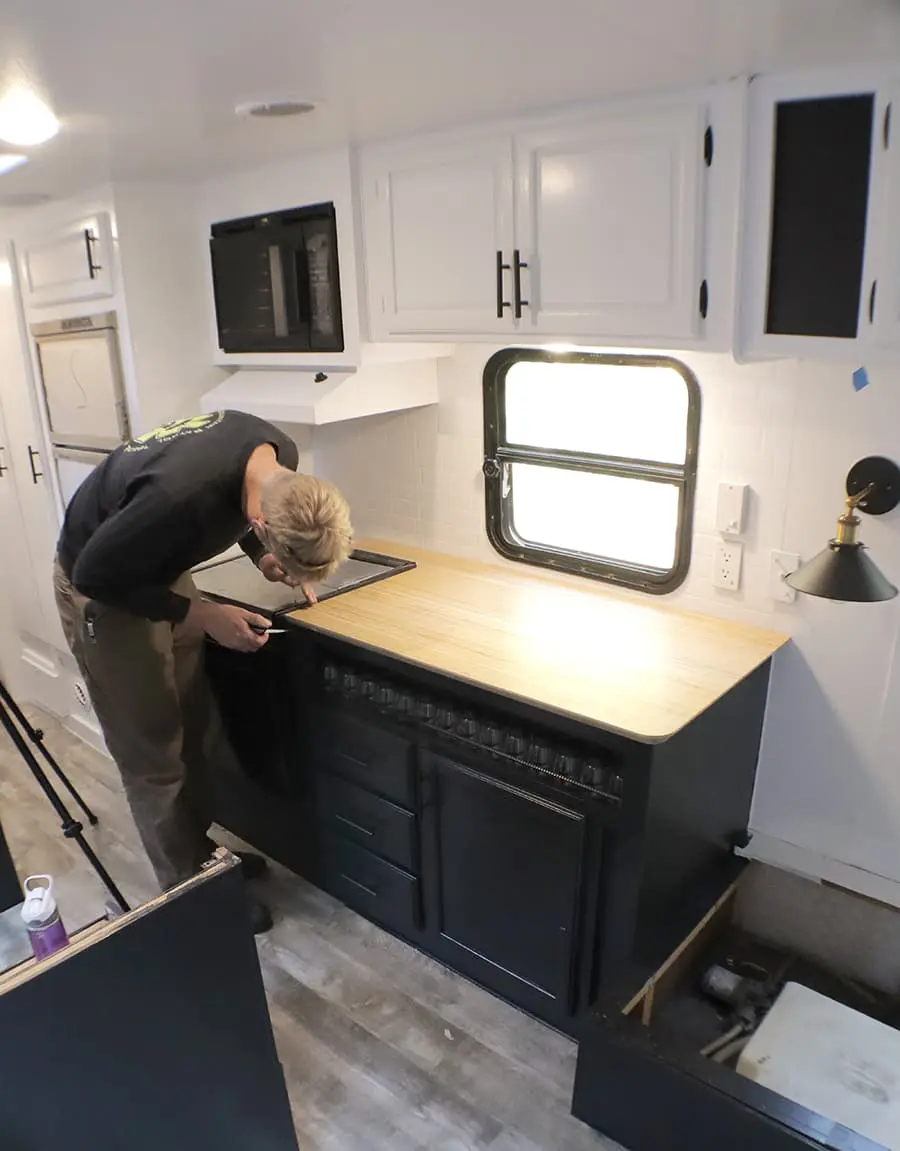
The only problem was that our counter was longer than the tabletop.
So we decided to also change the table in our dinette; this way we could use the remainder of that cut to finish the countertop.
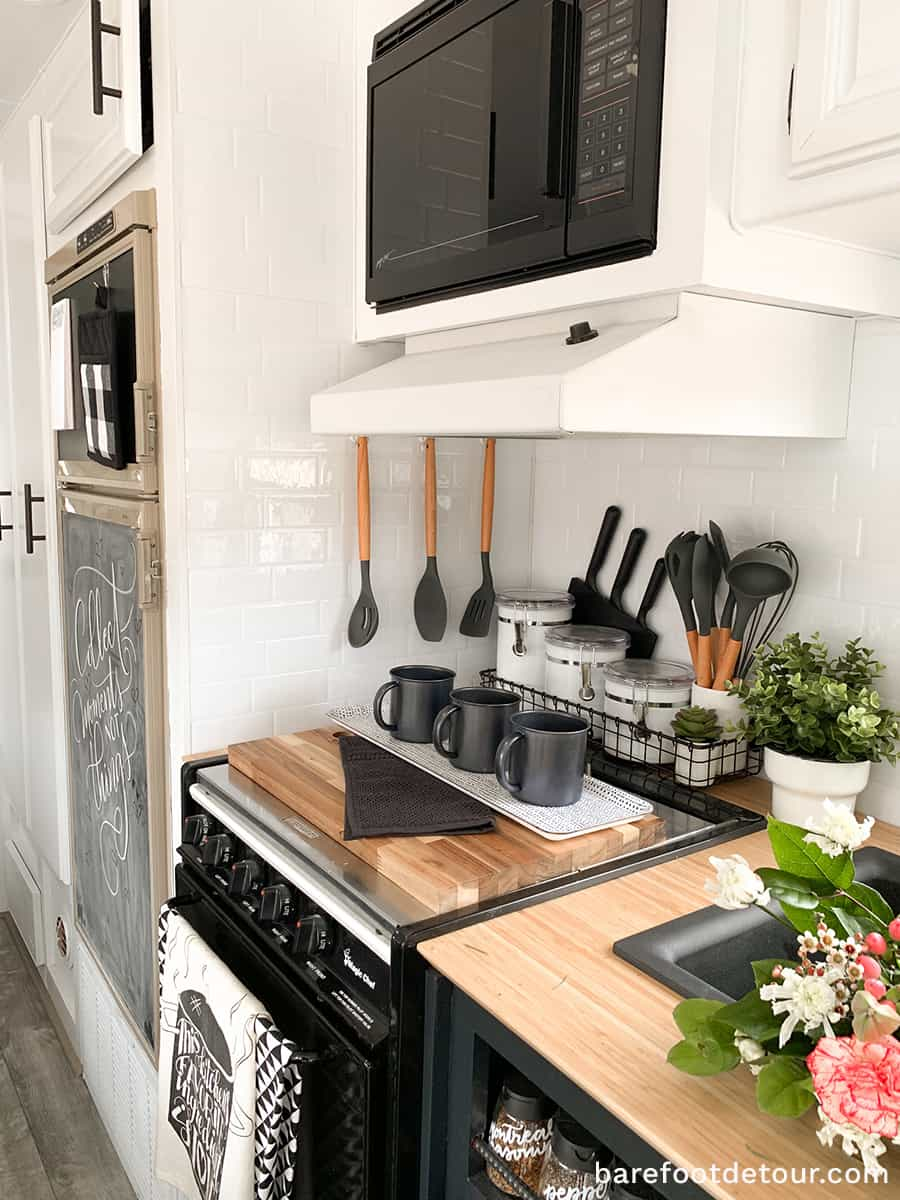
It worked so perfectly! The seam is behind our stovetop, so I placed a basket on the back to cover the seam.

I am so happy with the way that the counter looks; they have worked perfectly even without any treatment on the top.
We considered doing a layer of poly sealer but decided to try and see how it went without it.

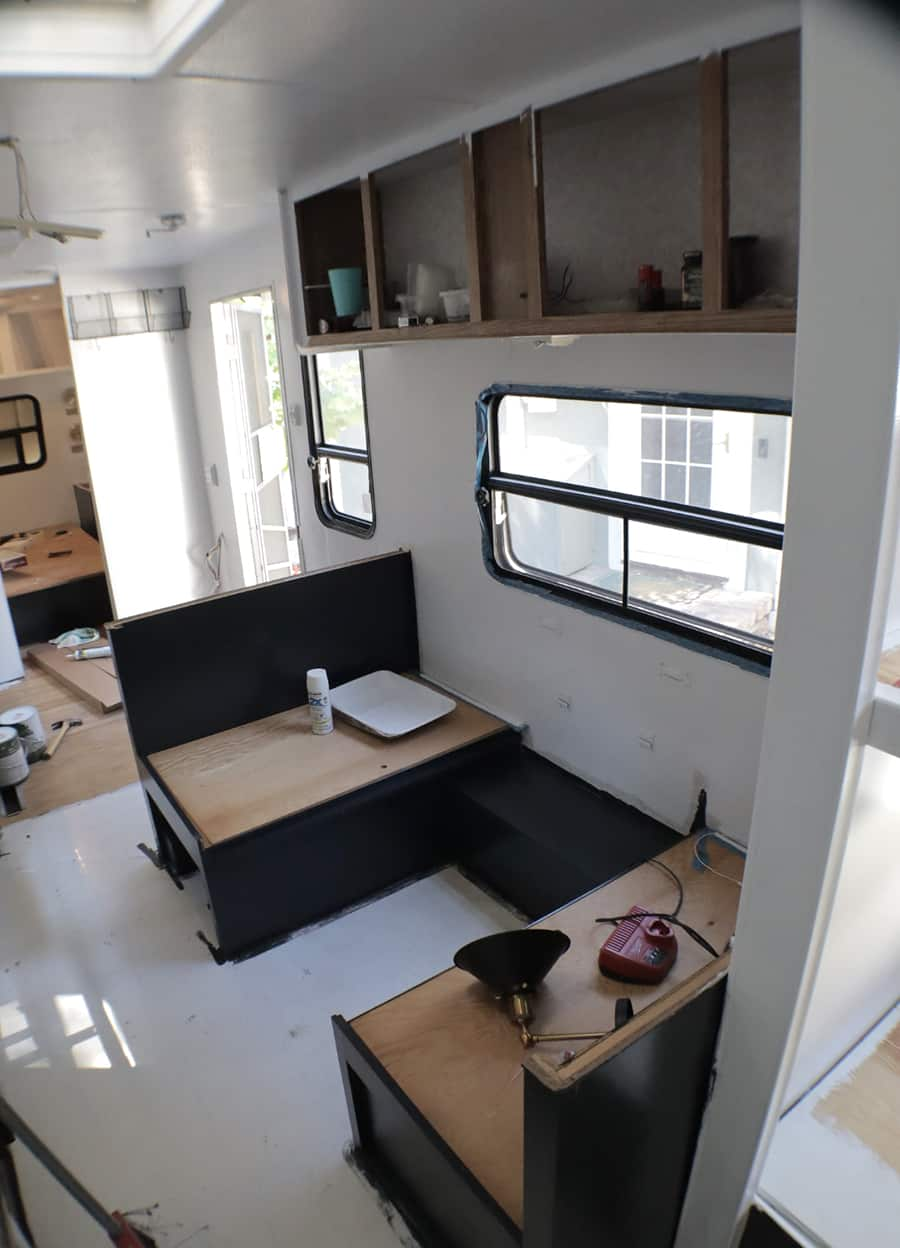
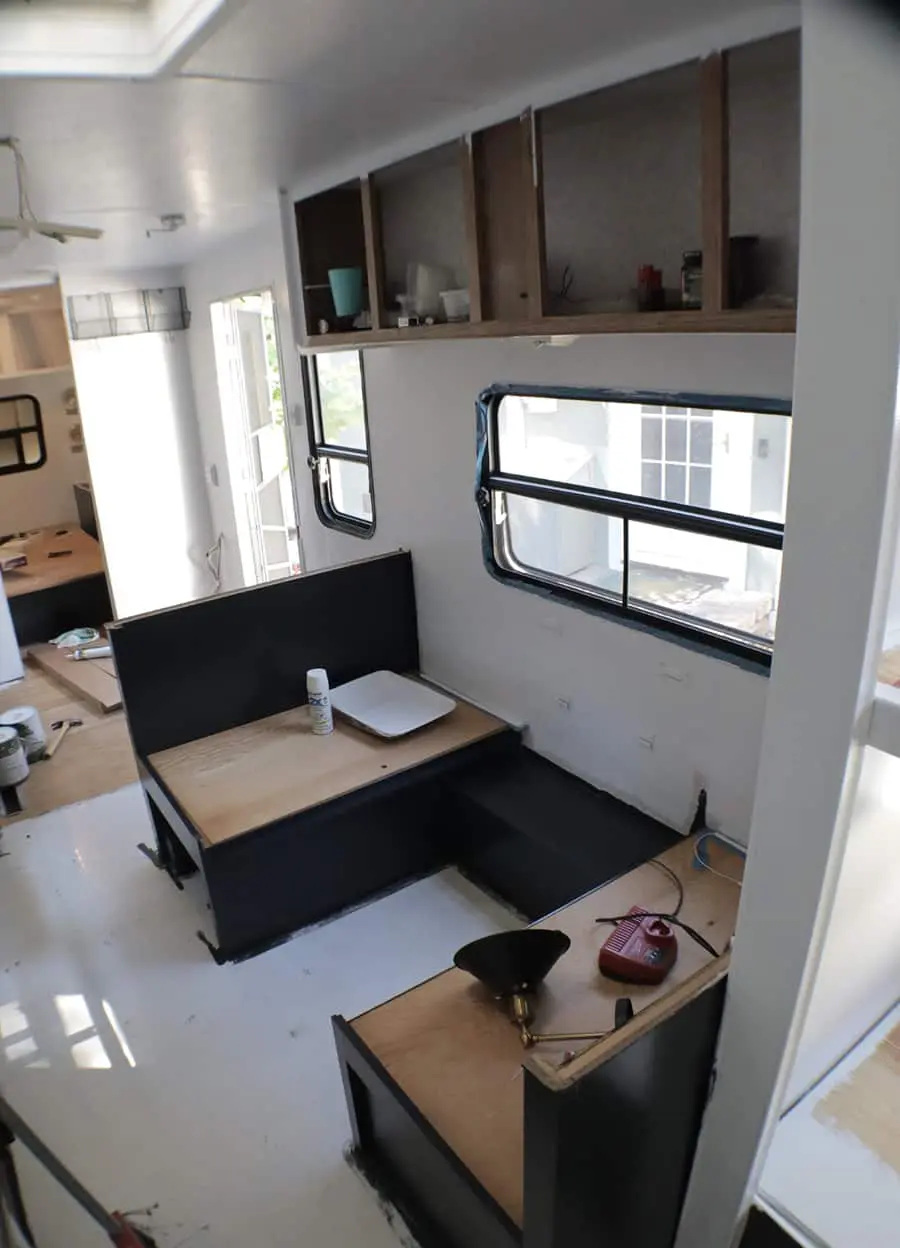
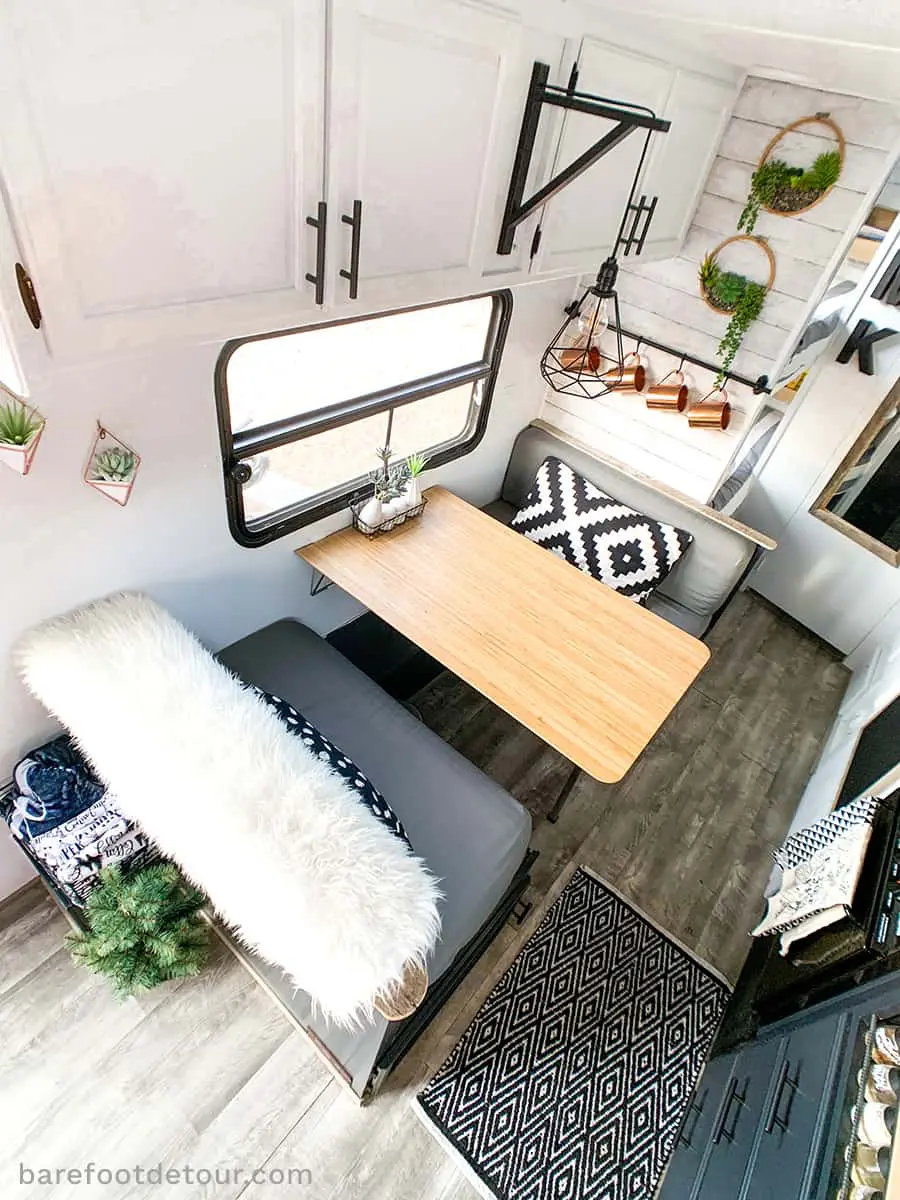
Below is a top view of the table in our dinette. This one was super simple; Kenny just cut it to size and switched the mechanism from the old table.
Because this table was a little more narrow than the older table, to make the transformation from table to bed work. Ken added pieces on each side of the dinette (the bottom part) so that the width would compensate for the missing 1 ½ inches from the desk. He also added a small piece of wood at the bottom of the edge he cut to add support and strength when used as a bed.
This way, it looks good, but it’s still functional in case we need to use the bed of the dinette.

10 – Add peel-and-stick backplash
As I’ve already shared, one of my priorities was to get the black sink and the peel-and-stick backplash tiles.
I did SO MUCH reading of all kinds of reviews to select the Smart Tiles; at the time there were not many options, but from what I read, they had some of the best reviews I found.
I selected the full white subway tile because I really liked the look. I kept going back and forth about either selecting the ones I did or the ones that have the gray “faux grout” and I was *this* close to going with that one =]
The instructions are super simple, and it was pretty easy to install. You do want to make sure you have a clean surface and the necessary tools for the job.

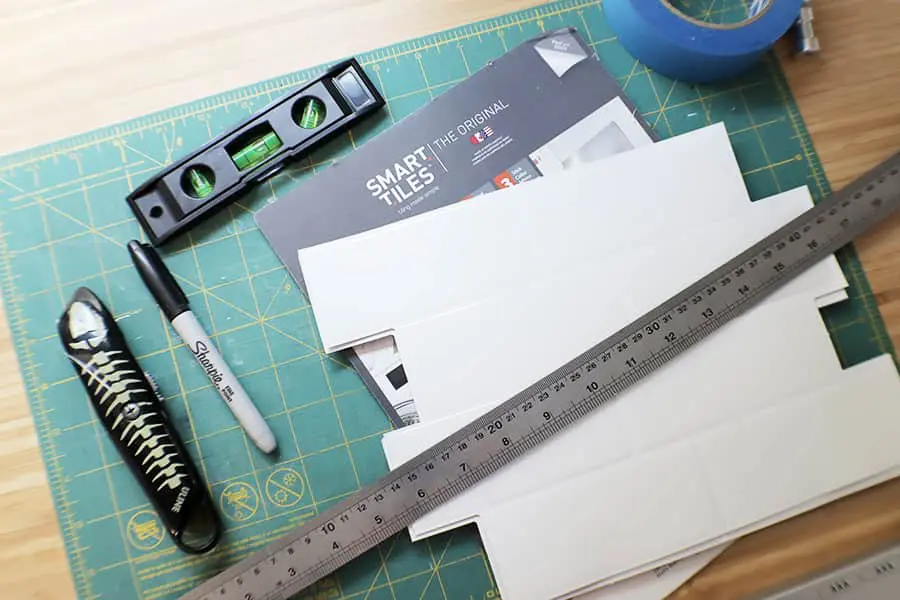
You will need:
- Cutting surface—I used this self-healing cutting mat
- Metal ruler
- Box cutter or x-acto knife
- Small level
- Sharpie or a pencil
- Masking tape or painter’s tape
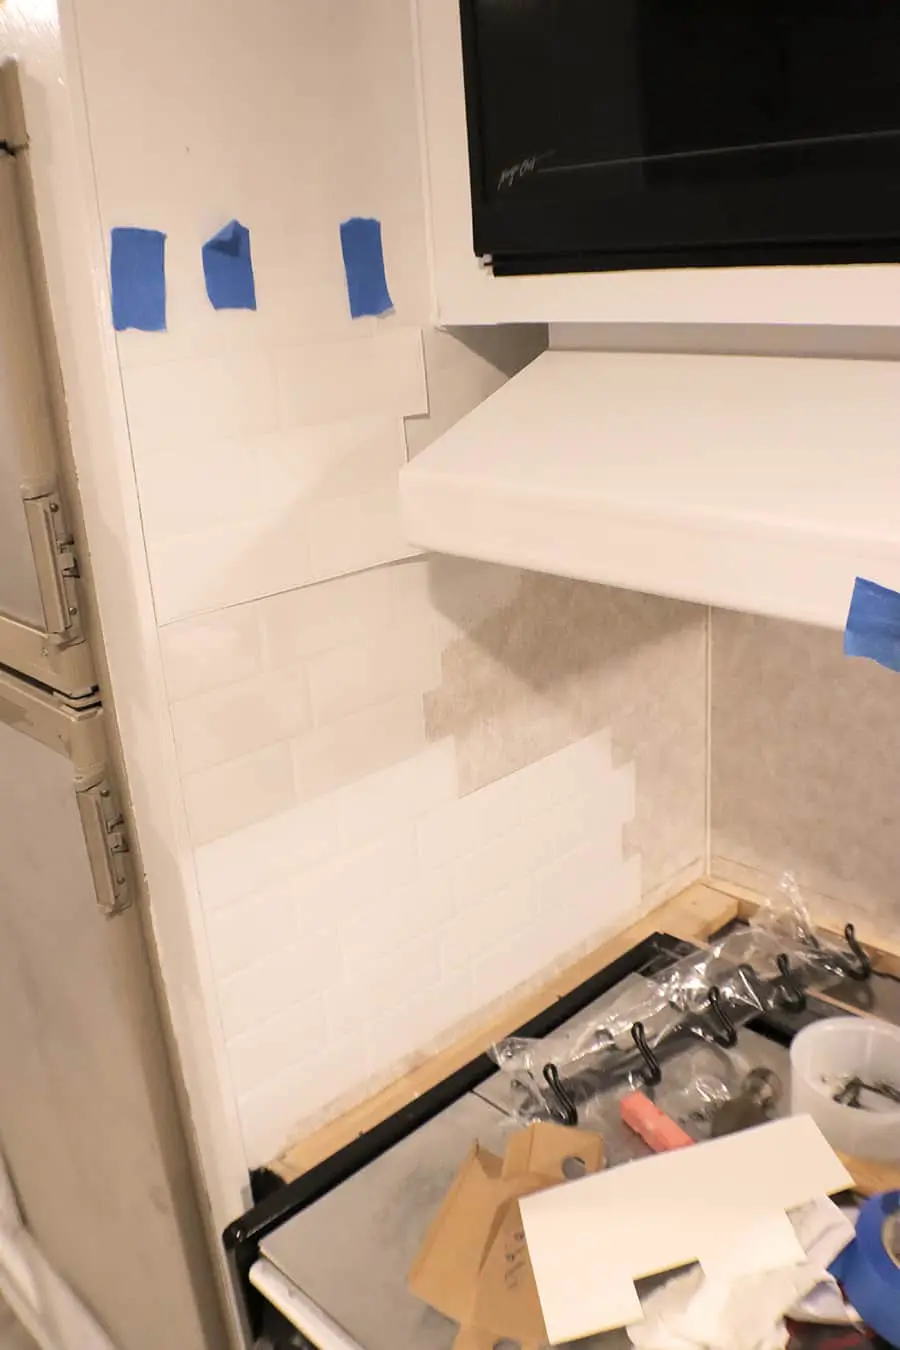
I like starting by making a reference line where the top of my first row should go, I used the level to mark and make sure it was straight. A note here would be to make sure that the RV is level because if the RV is not level, your line will not be straight.
You also want to start at the bottom-left side of the area you want to cover and work from there to the side and up.
I used some sheets of newspaper to create a cutting template for the windows since they have those tricky curves that you want to cut as clean and close as possible.
I also dry-fitted all my pieces with painter’s tape and peeled a bottom edge while still having the painter’s tape on the top, so this way they were perfectly positioned. Once about ½ an inch was stuck in the bottom, I removed the painter’s tape and proceeded to remove the backing of the rest of the piece. This made the process super easy, and I had no need to remove any pieces to readjust.


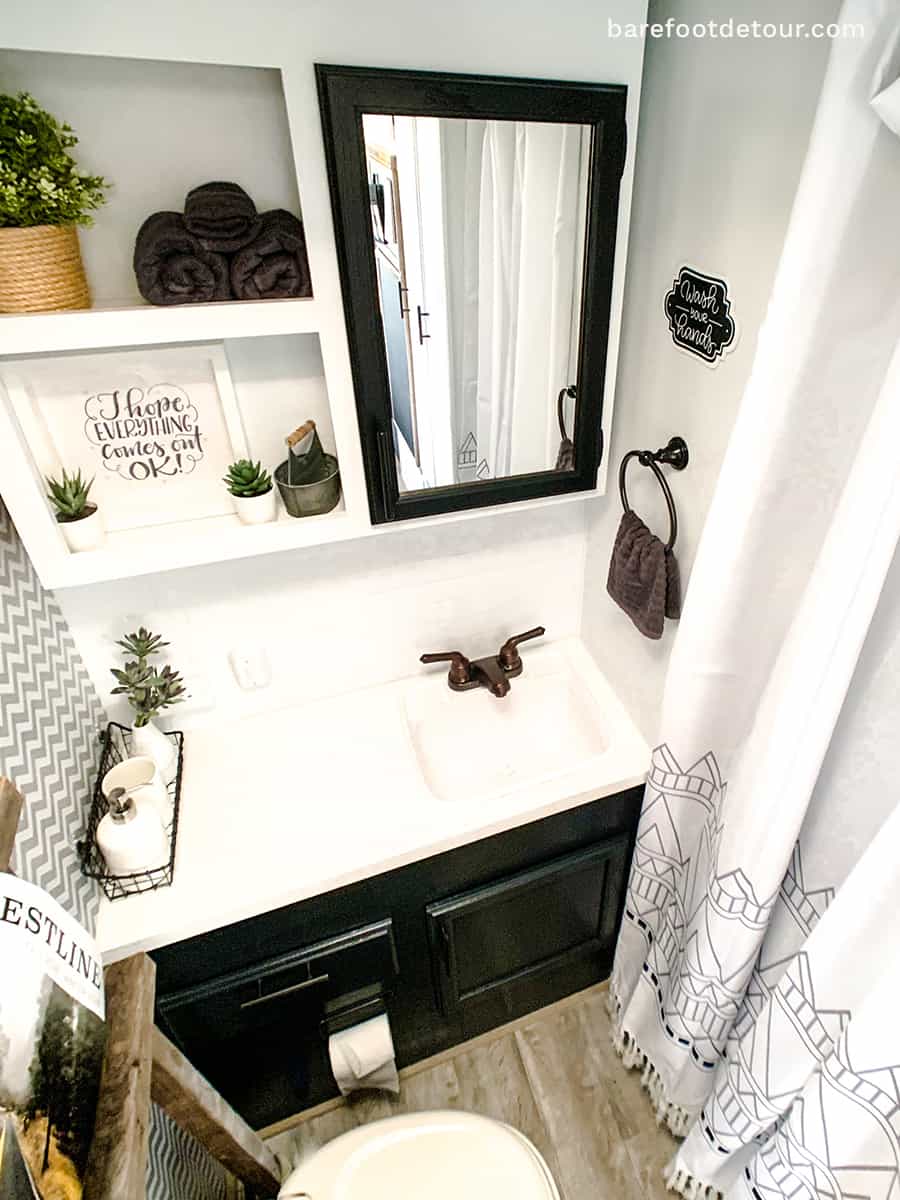
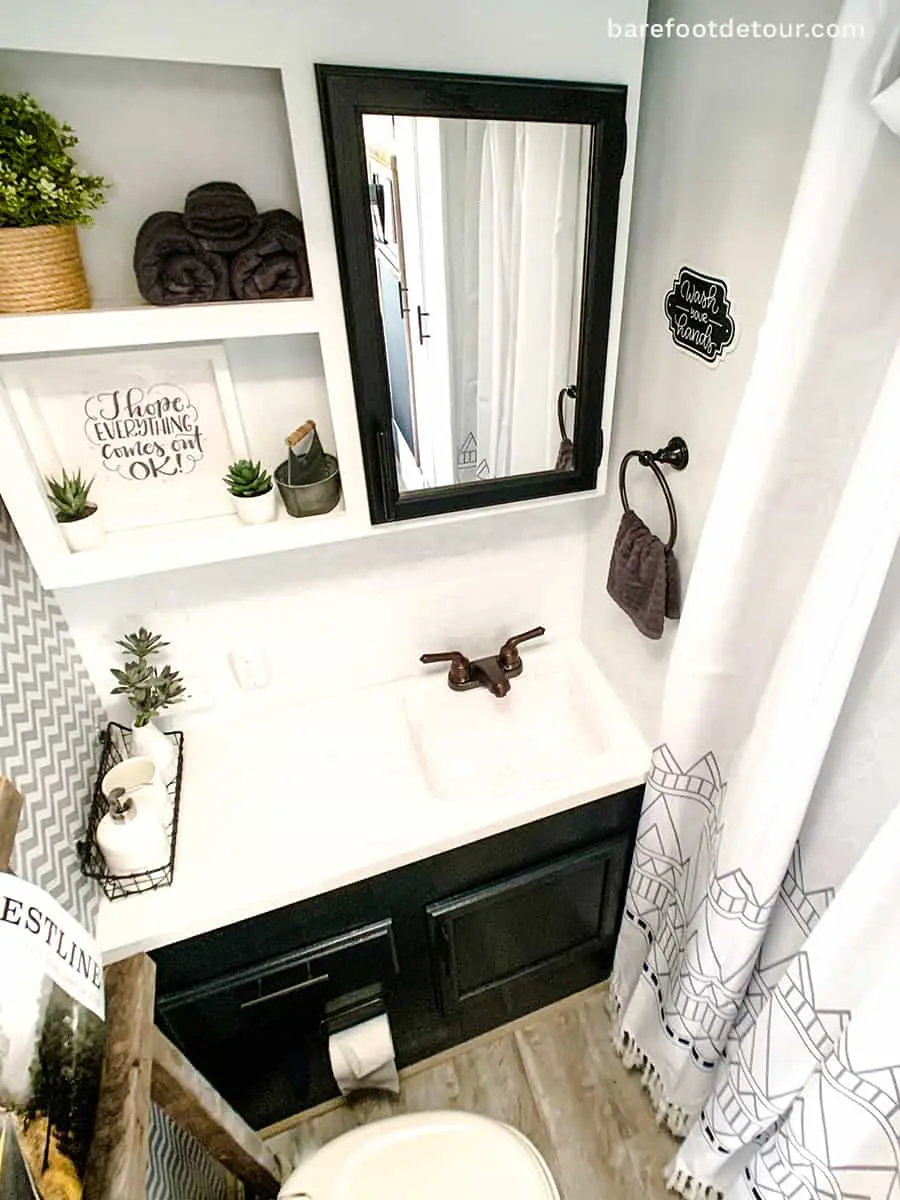
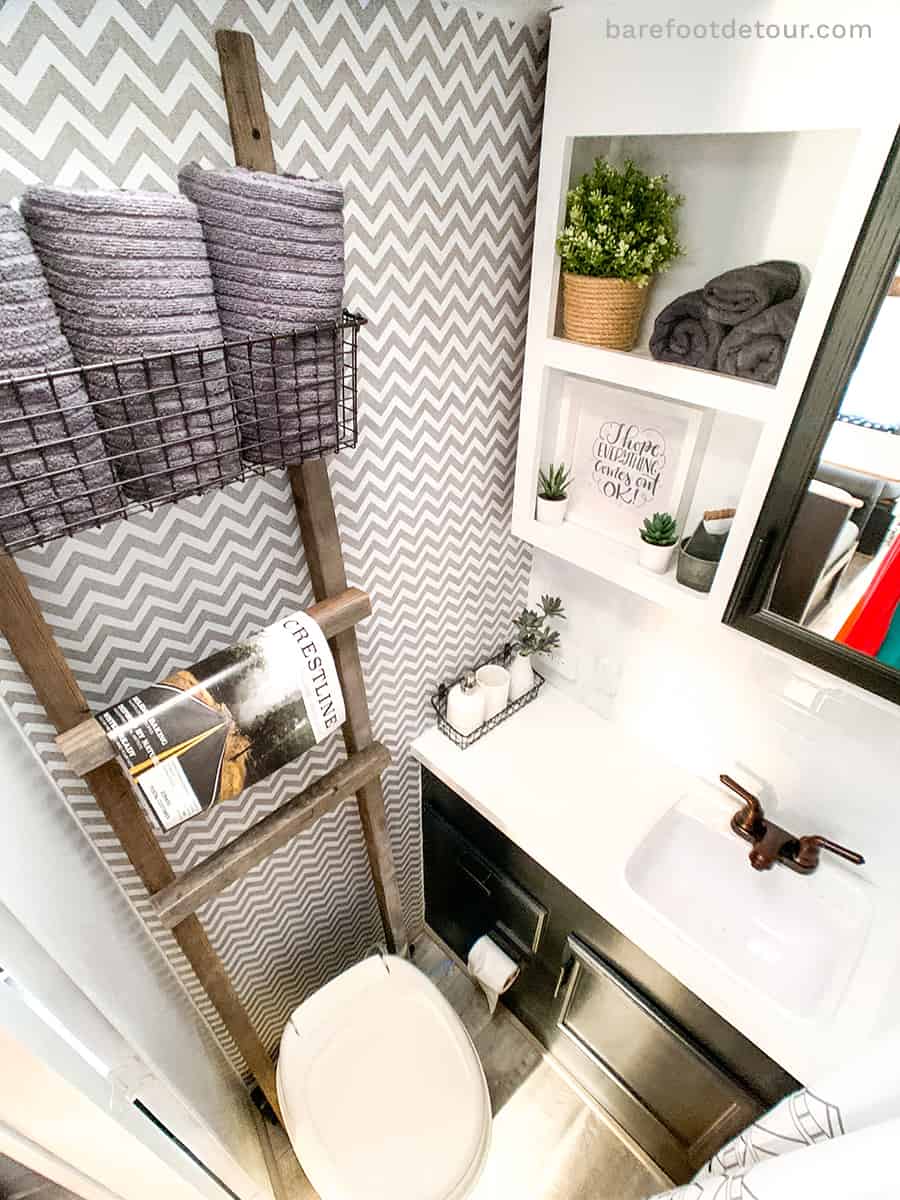
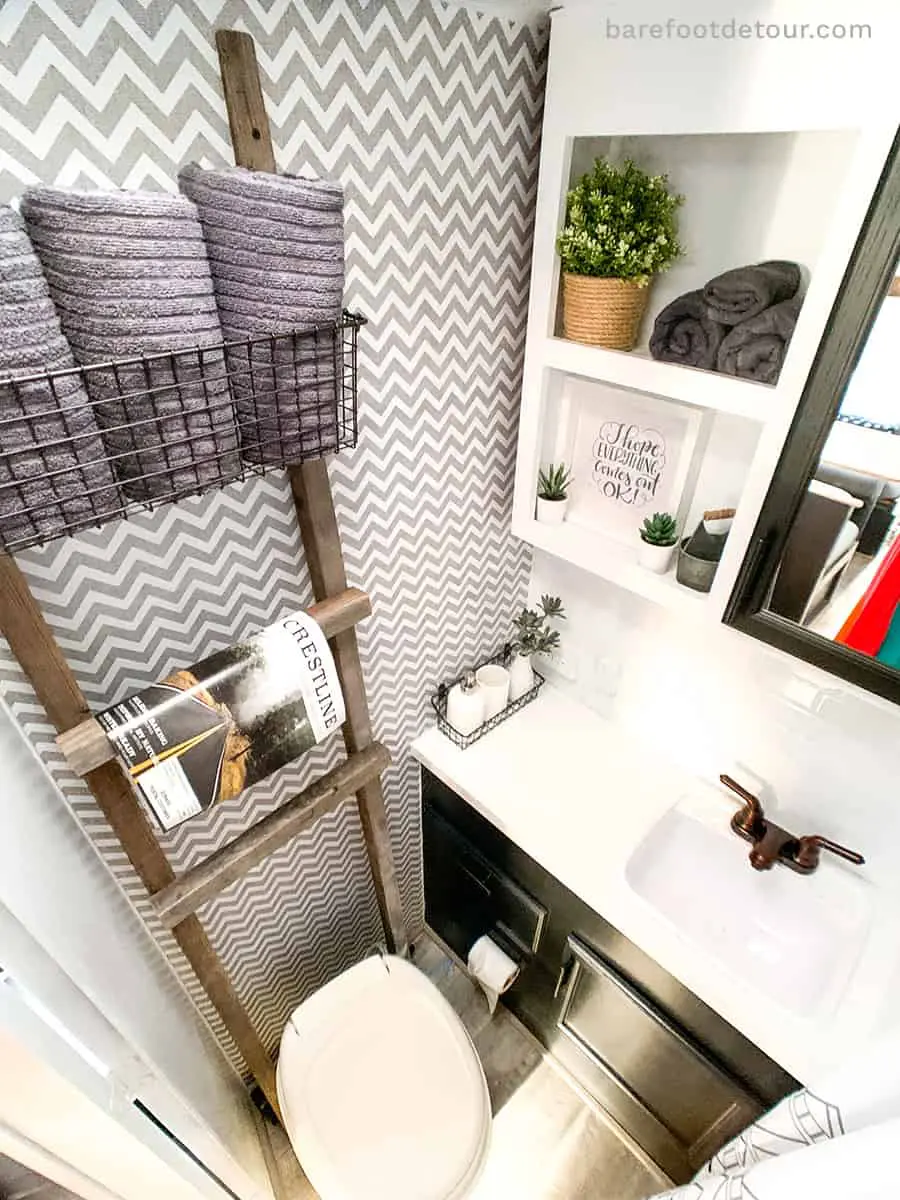
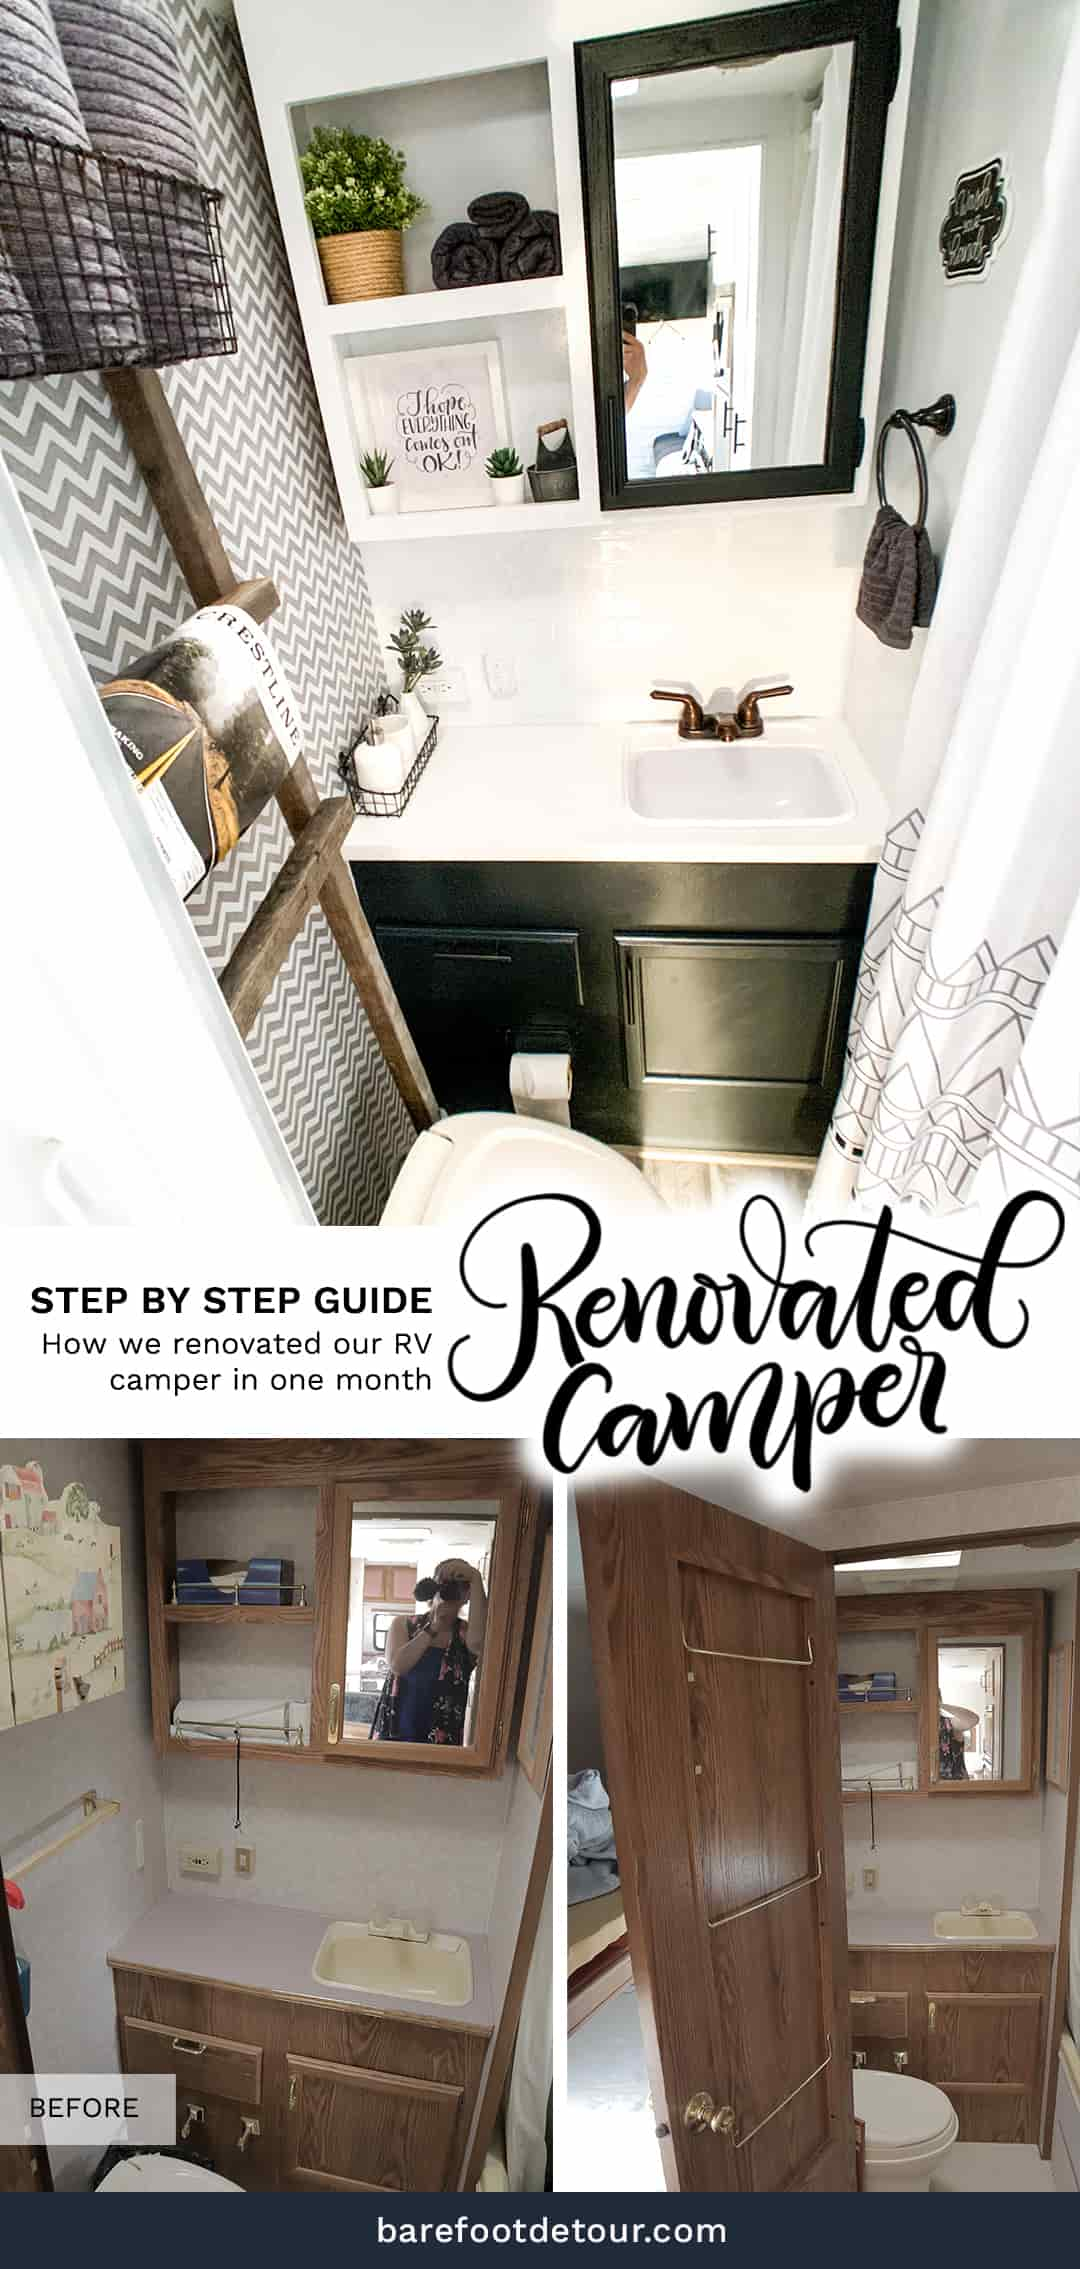
I was so excited to have enough of it leftover to also add a little piece of backsplash in the bathroom!

Peel and stick wallpaper
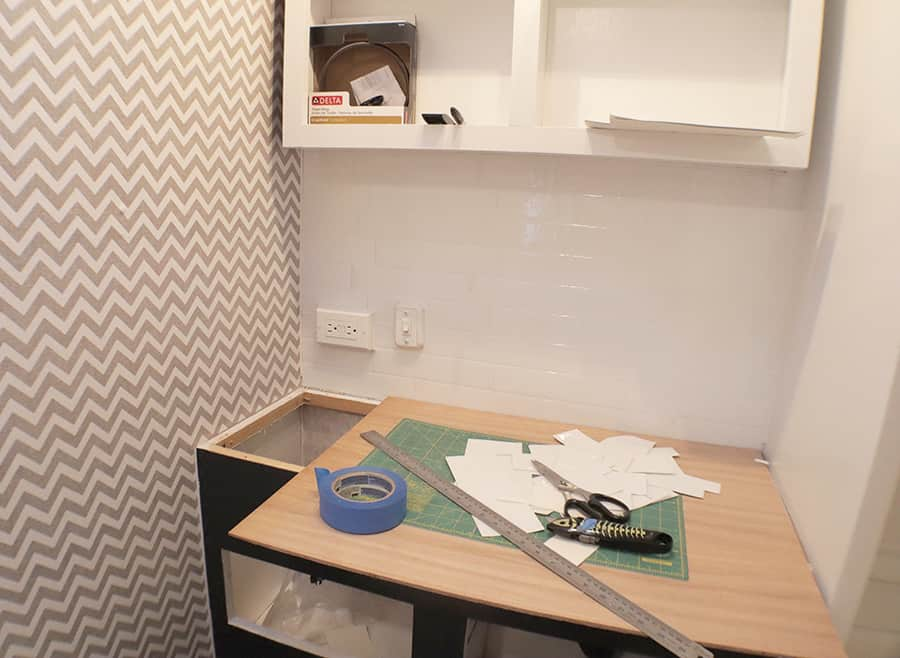
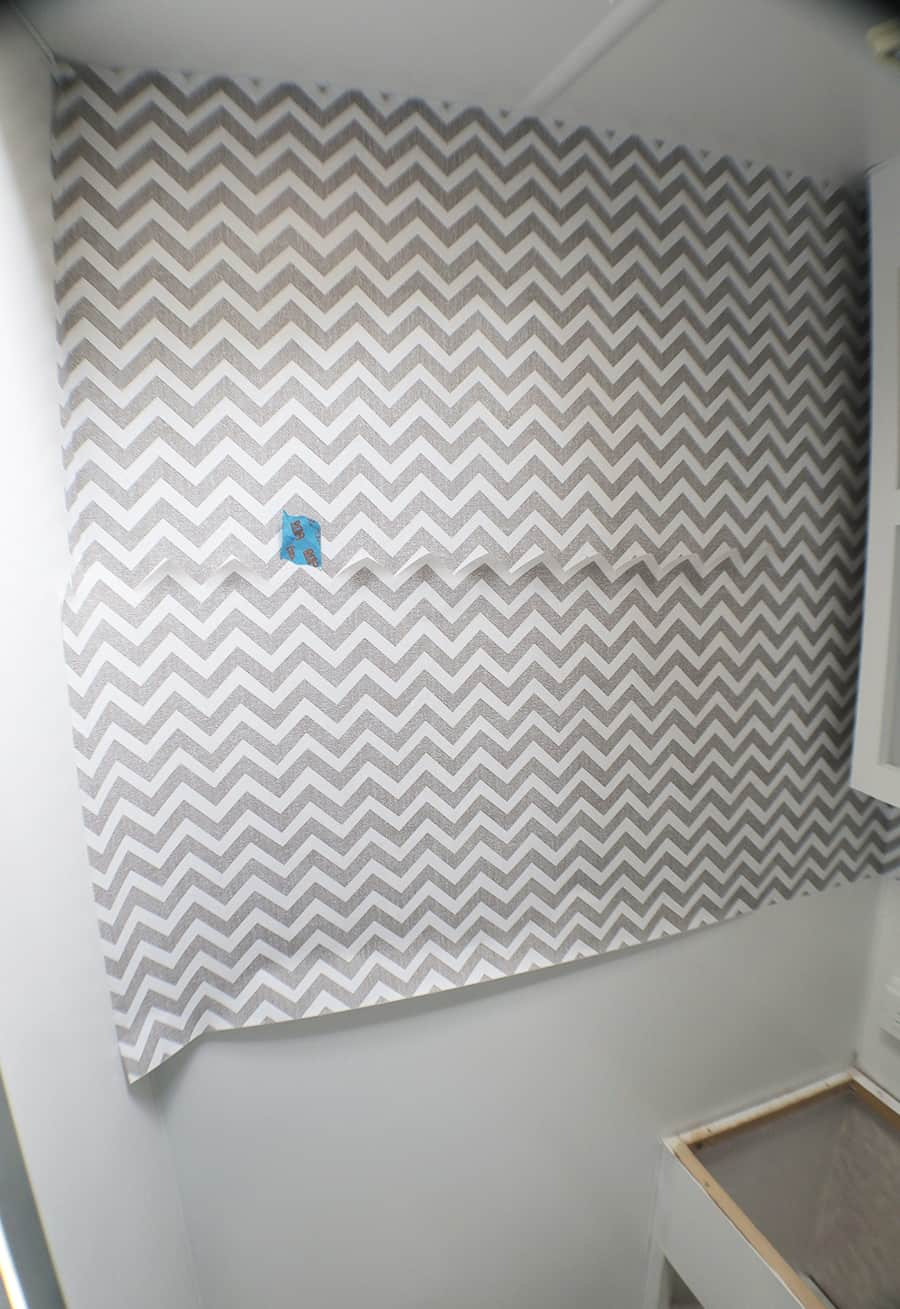
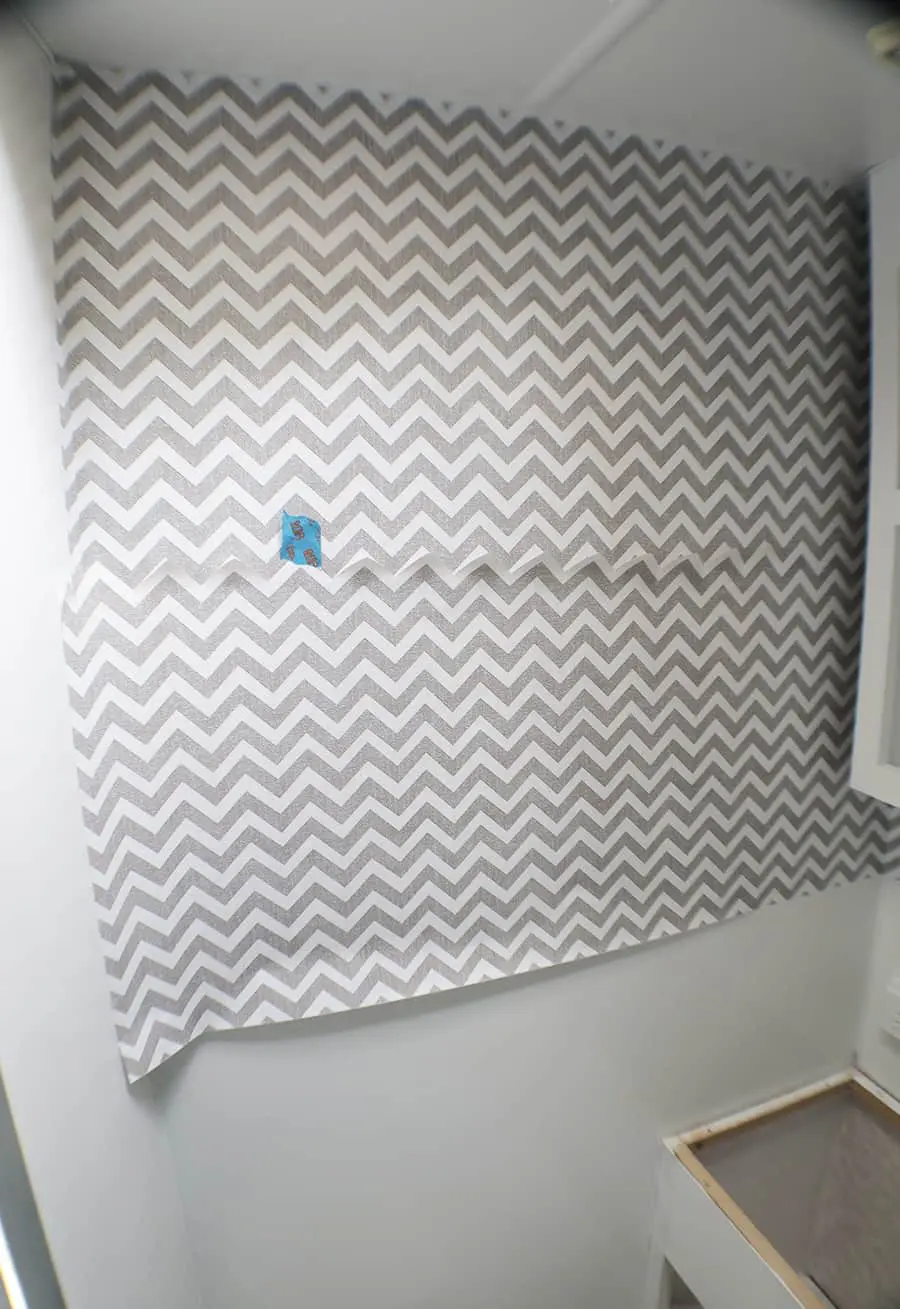
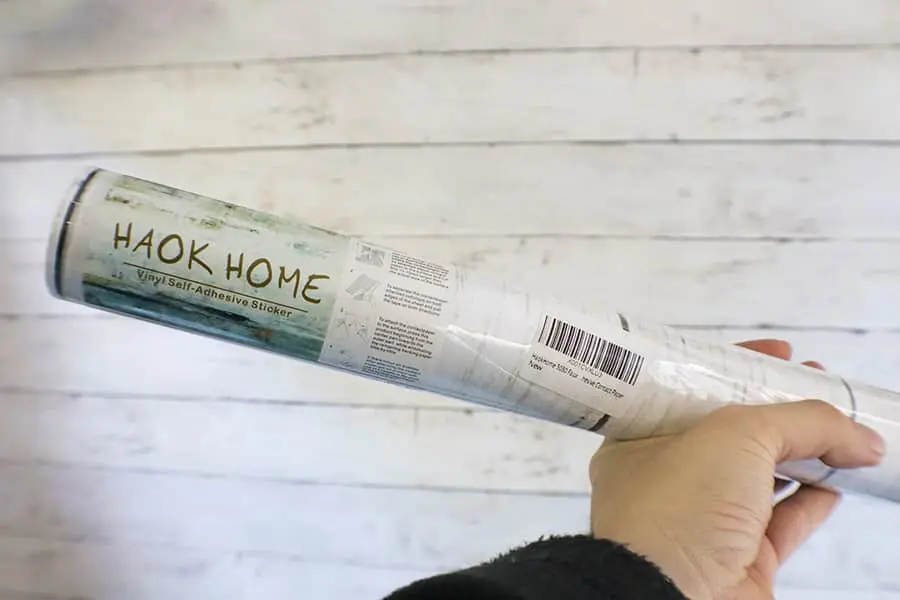
If you follow us on Instagram, you probably already know that I am a little obsessed with “faux wallpaper” I call it faux because to save money, I used shelve liner as wallpaper for all of our accent walls in the RV.
I basically used two different kinds, the shiplap one, and the gray chevron.
One “hack” that helped me make seamless lines when adding different sheets of the chevron shelve liner, was to cut the edge of the pattern to place it as close as possible to the edge without having crazy lines.
I’m sorry I am one of those people that little miss-alignments in patterns would just drive me bananas, and I will see it every time I enter the bathroom, so I wanted to try to make it look as seamless as possible.

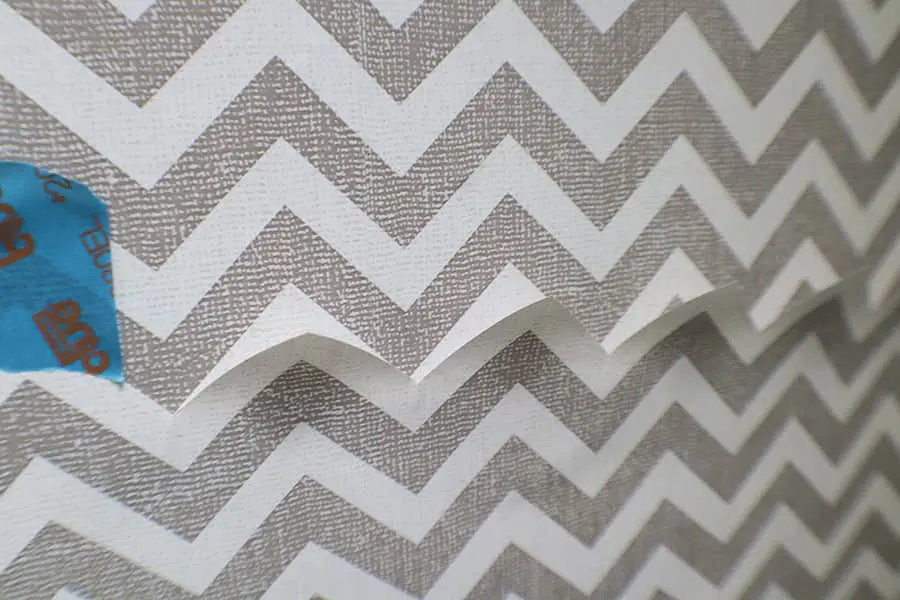
I have to mention that this shelf liner has stood out the test of not only time but also, humidity and heat.
Something that the shiplap one didn’t!!! I’ll explain more about the issues we ran into at the bottom of the post, but what you should know is that I am not happy with the shiplap shelf liner. We store the RV in the high desert, so it gets super HOT and sadly the shiplap paper shrank with the fluctuation of temperature.
Don’t get me wrong, the cubbies that I have in my craft room (that I cover with this same one) are still holding beautifully! But there is not such an extreme fluctuation of temperature in our house, so it makes sense.
I did learn my lesson with that one though, and as I am going to go over at the end of the post, I recently ran into LoomWell, a company that carries wallpaper that is resistant to higher temperatures. So I plan to at some point upgrade to one of their patterns for some shiplap walls.
11 – Replace lights
One thing I was so happy to find out when doing research on light fixtures was that you can use any kind you want for an RV; the only thing is that you need to use low-voltage light bulbs. For our camper, we used 12V light bulbs for the light fixtures that needed bulbs.
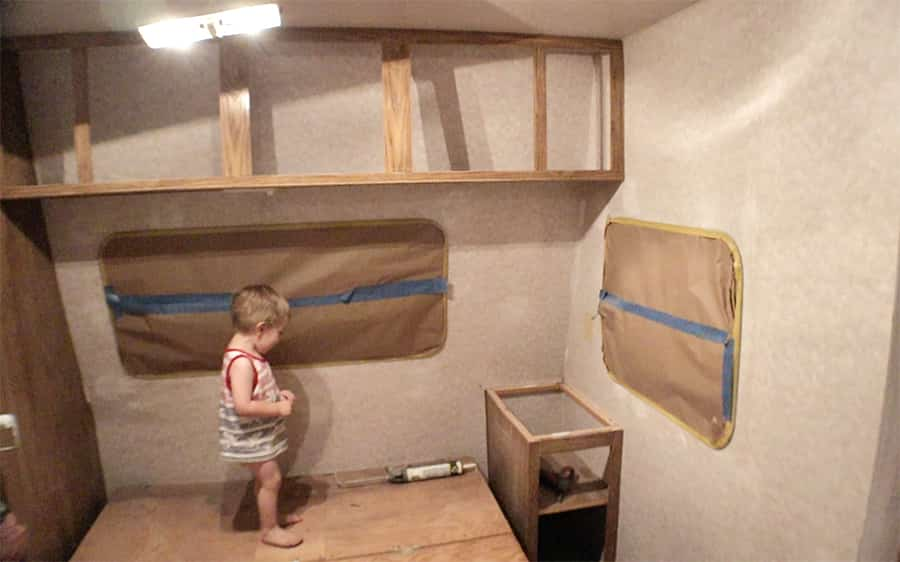
In the picture below, you can see how it looked when we detached all the lights from under the cabinet and ceiling.
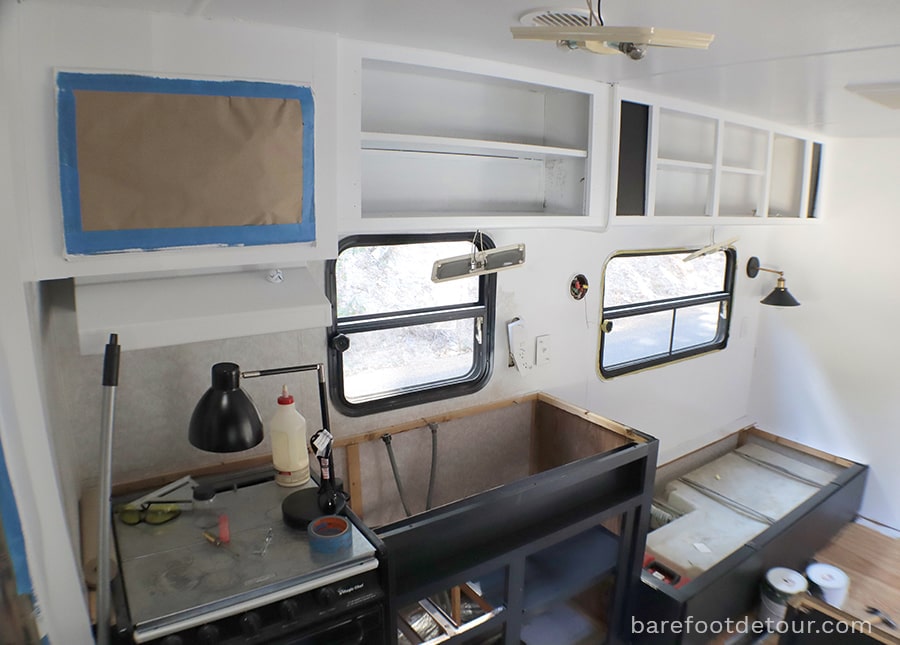

I knew I wanted something brighter, more efficient, and less dangerous than those lights (I’ve read horror stories of burns with these bulbs!)
So I knew LED lights and bulbs were the way to go. So let’s discuss what we ended up doing for each area:
Couch area light
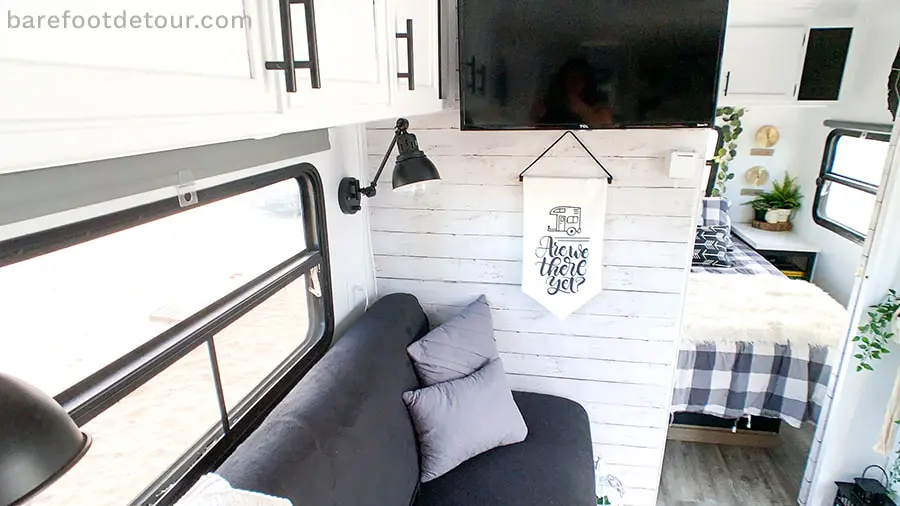
For the lights above the couch area, I fell in love with this set of sconces below; they were in my price range and also in the modern farmhouse look I was after. You can check them out here.
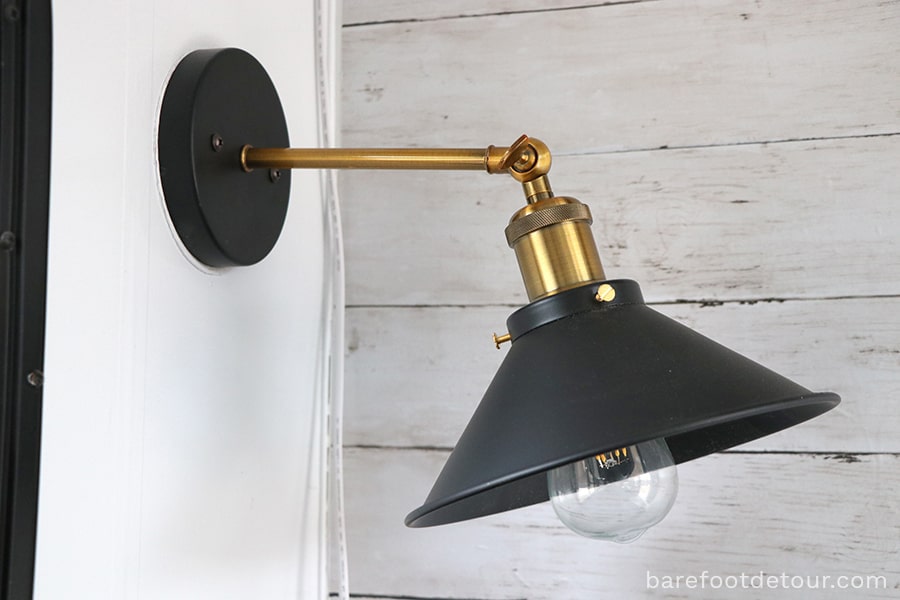
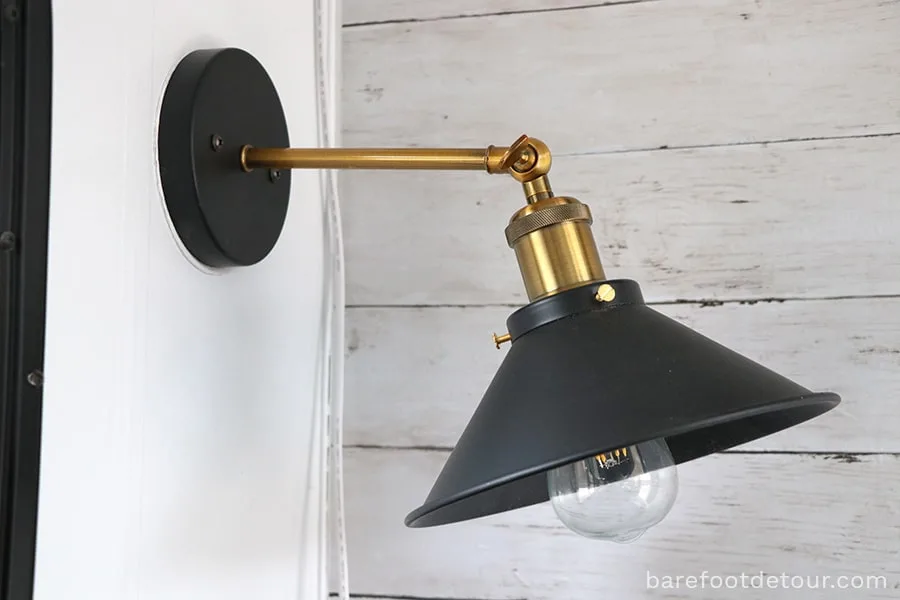
The only downside of the set of sconces is that they do not come with switches. But that can be easily fixed with these little guys; just drill a hole on the side and connect them like you would any other switch.
We eventually upgraded them to this set instead so we could have more control over the angle; these ones have a double pivot point that helps the lights to point to where we actually want them to, and because they have integrated switches.
(If you have done electrical work before, if you don’t know what you are doing, please ask for advice from a professional; don’t risk injuries!).
Bedroom light
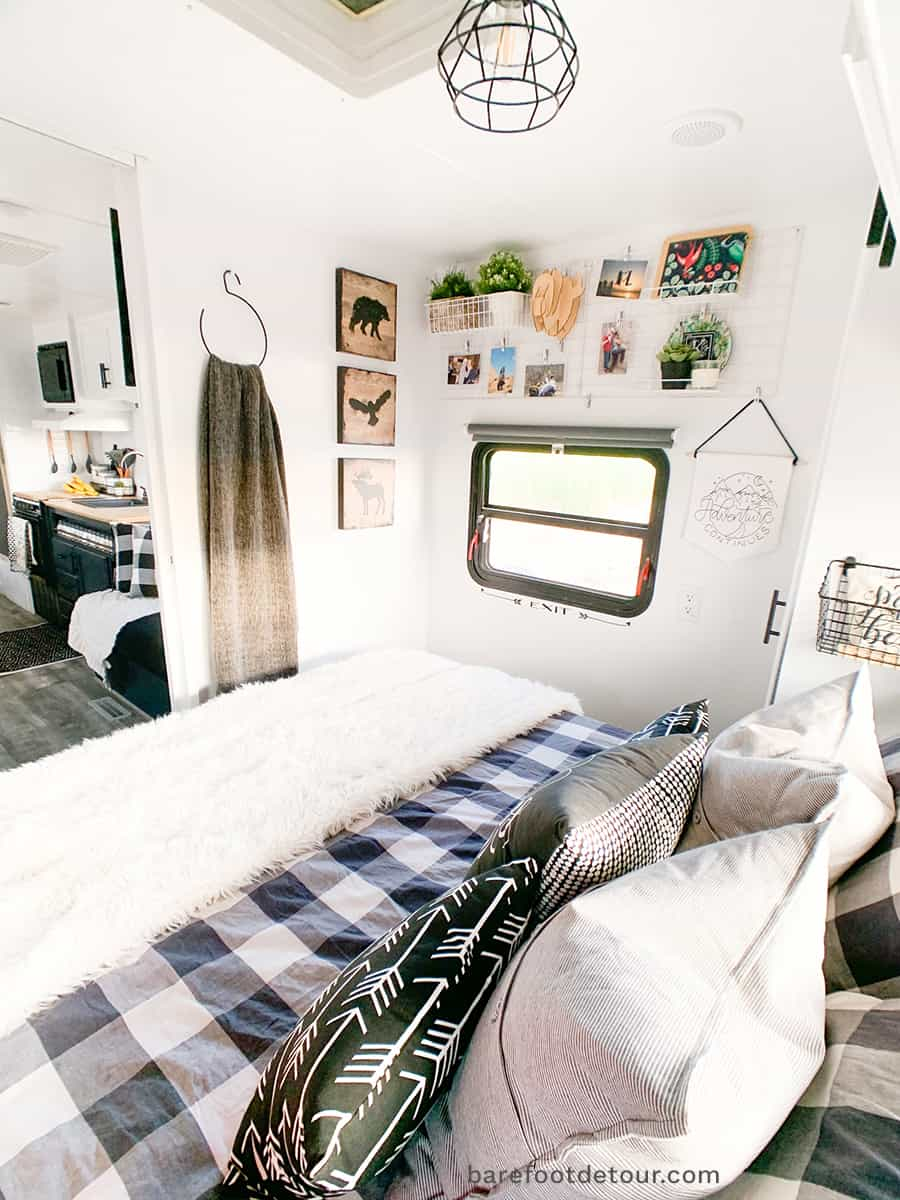
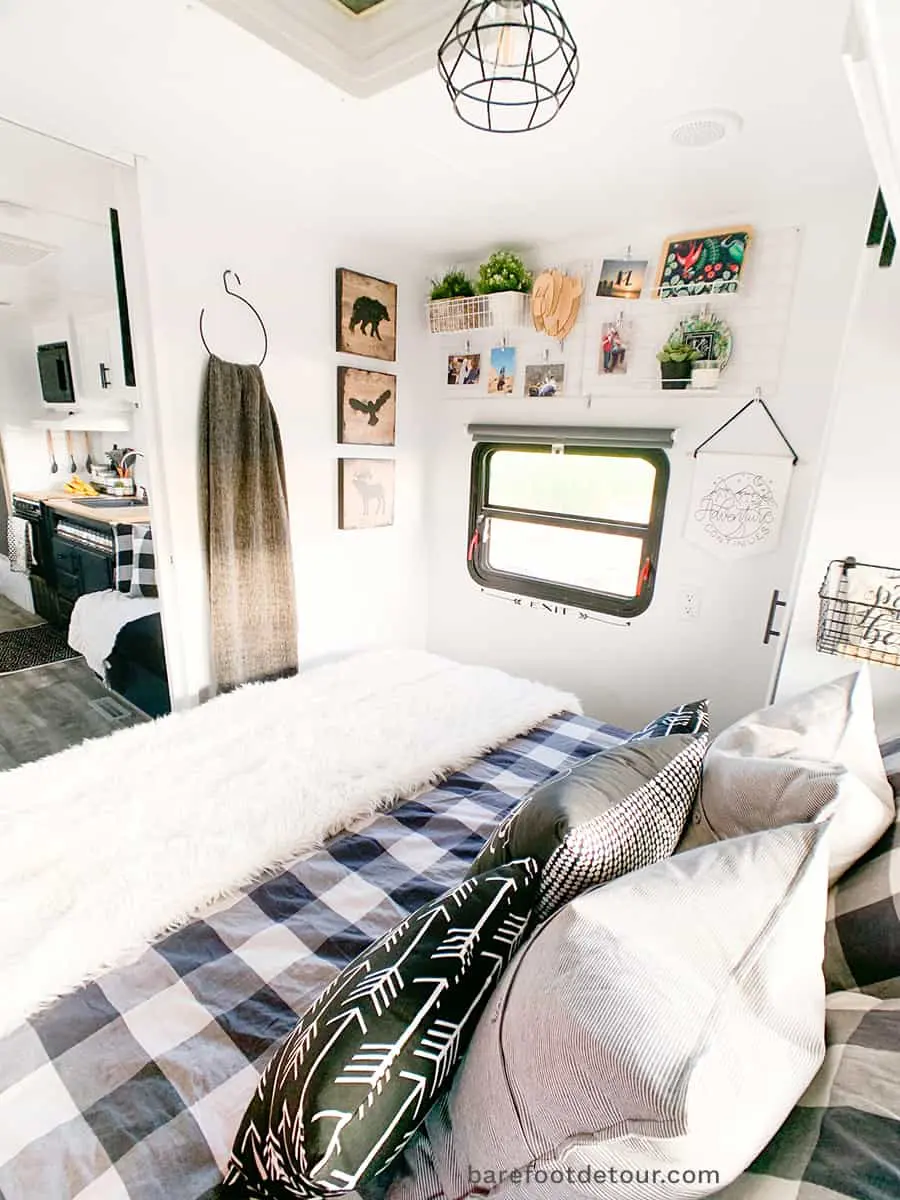
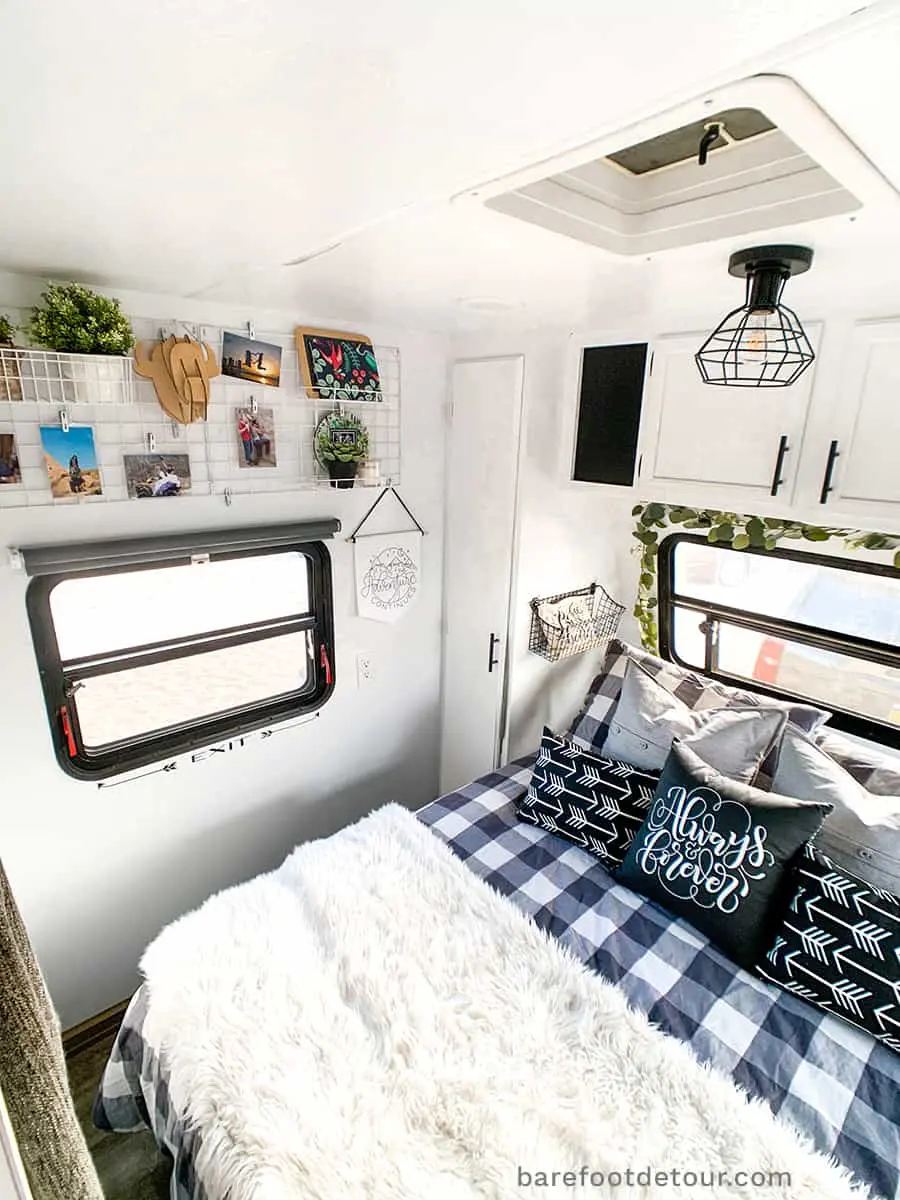
For the light in our bedroom, we pretty much did the same thing. I made sure to select something that was more flush because we are both tall.
I settled for this ceiling light that had just the perfect industrial feel and accompanied it with this bulb. We also added a switch.
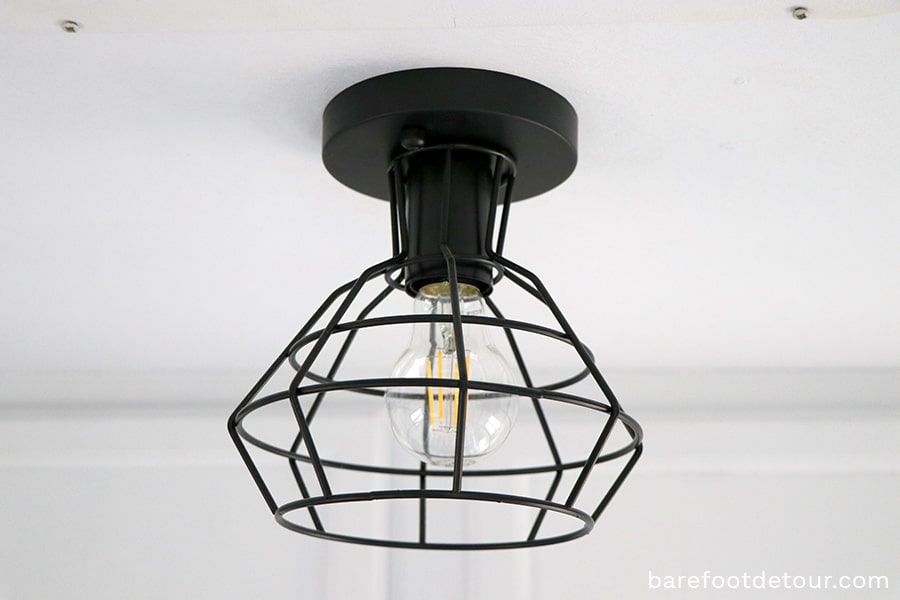
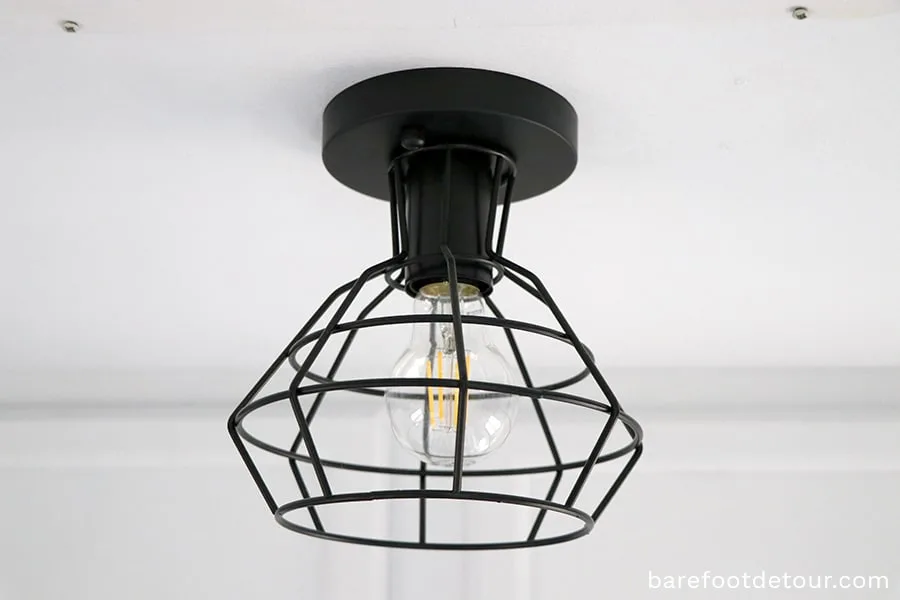
I intended to use this remote control switch, but it made the bulb look too long (I think they are better suited for bulbs with lampshades that are not see-through, so I’m saving them for our brick and sticks house instead)
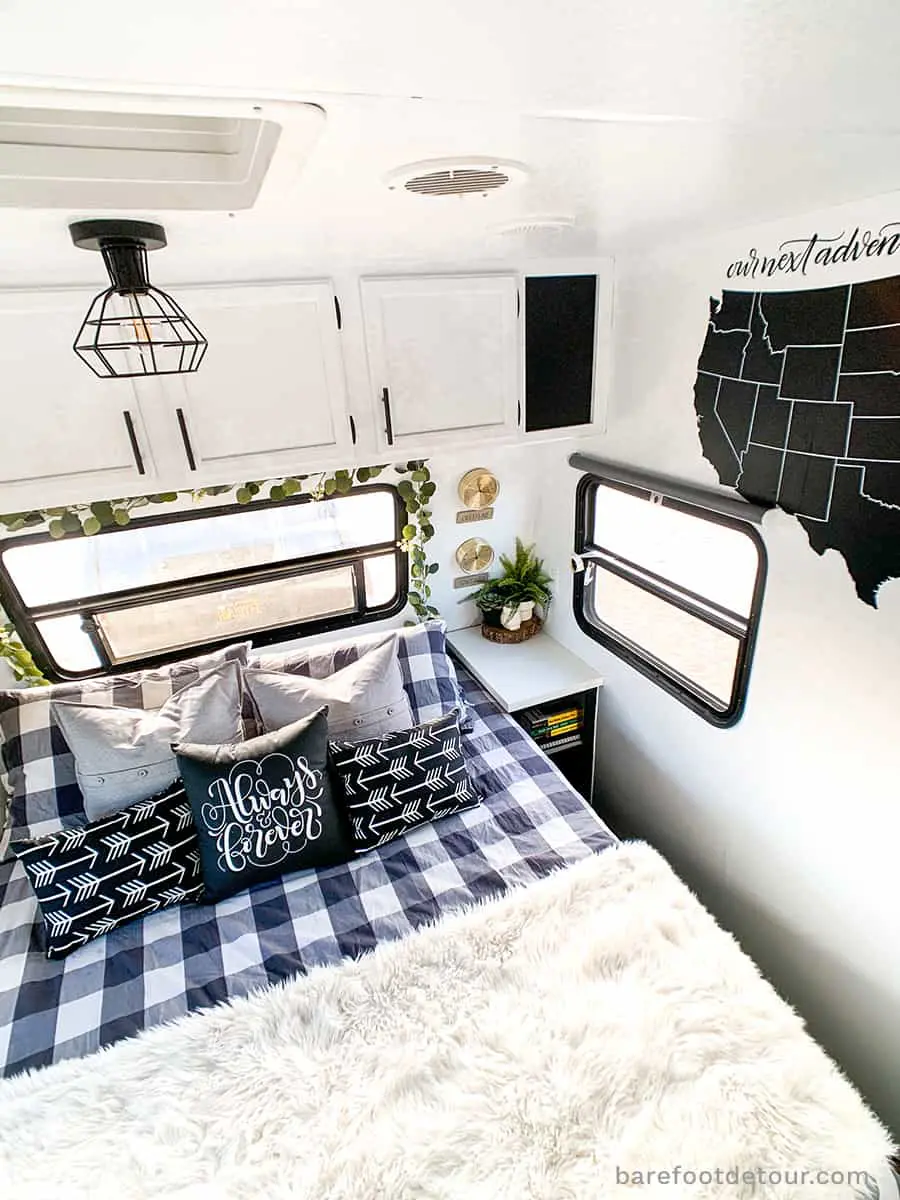
And this is how it looks in our bedroom:


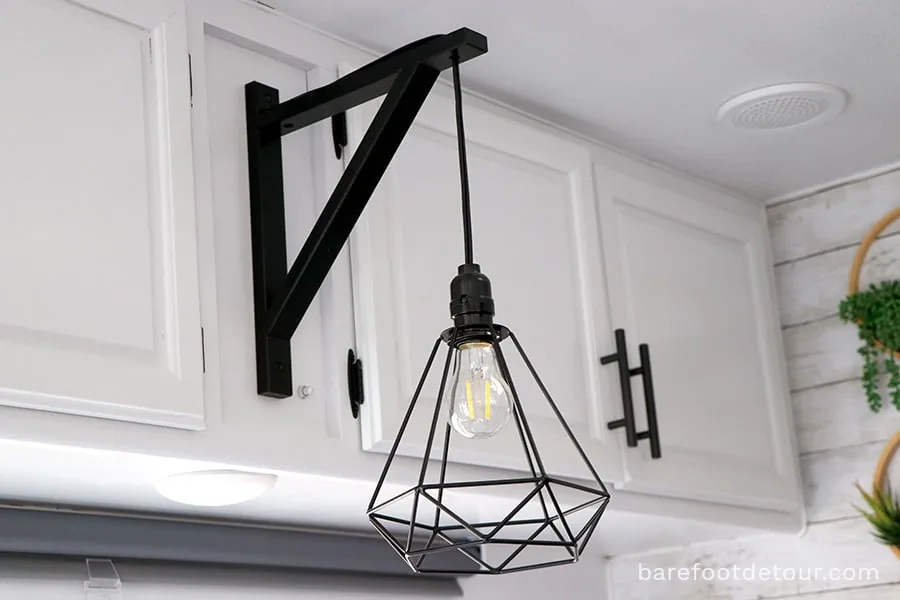
Dinning light
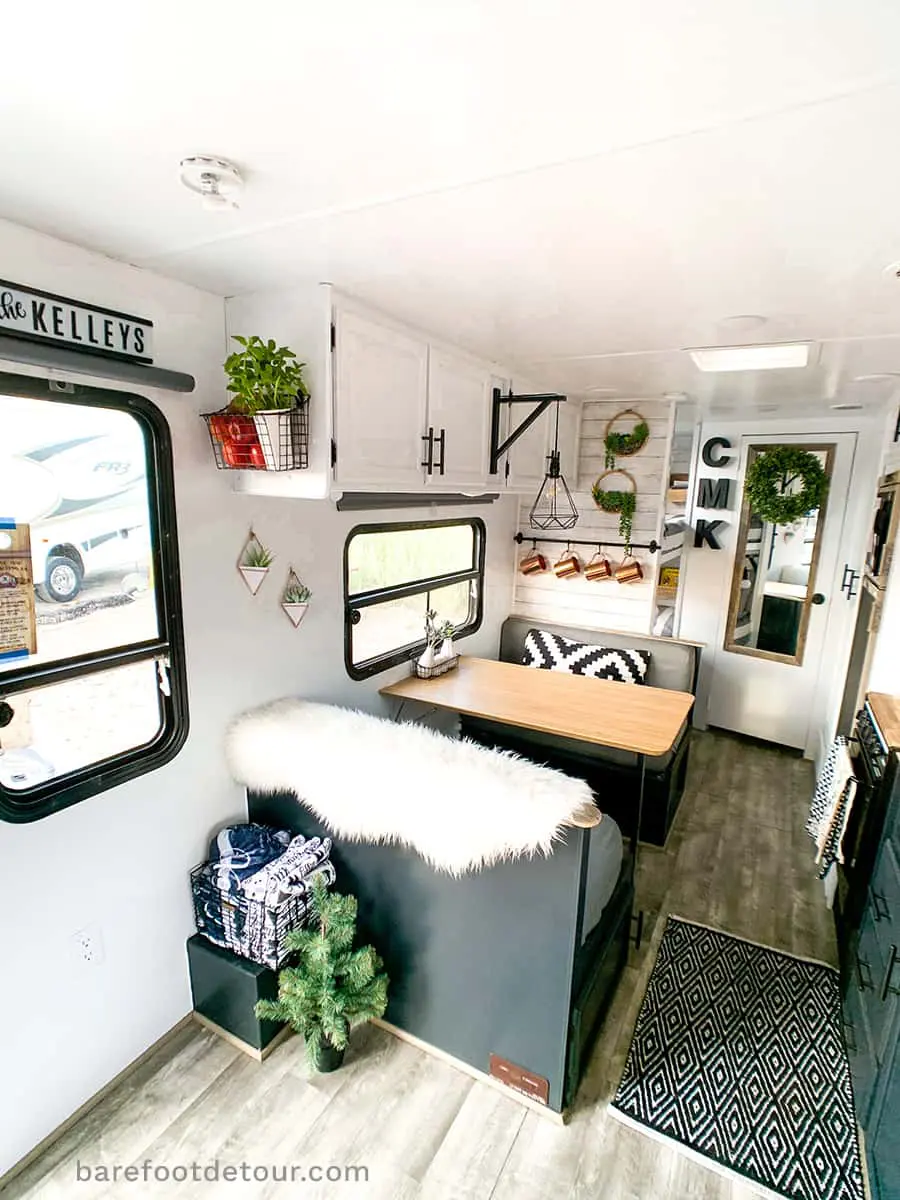
For our dining room, I wanted something special but also budget efficient. So we decided to make our own light using the same bulbs we had for our bedroom, a shelving bracket, a vintage cage lampshade, and a pre-made lamp cord.
Since we wanted to make another for our house, we purchased everything in pairs; it was cheaper, but you can definitely buy everything in singles.
We already had a switch from the old light we had there, so we didn’t need another switch, but if you do, this is the one we used in all other lights that needed it.

All other lights
For every other light in the camper, we replaced the old lights with these small round LED lights, why?
- They are smaller.
- They save a ton of energy.
- and look SO MUCH BETTER.
- The light is so much brighter than the yellow low light that our old ones gave.
Let me show you a closer look:

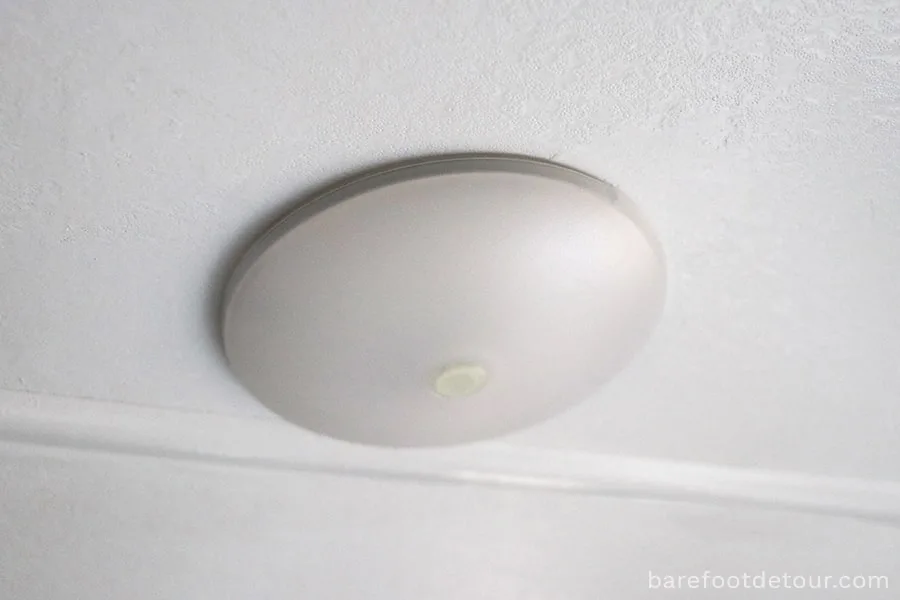
I am so in love with them!
You turn them on and off by pushing in the circle in the middle, and after they are off, that little piece glows in the dark, so they are easy to find!
You can see our new LED lights in action in the picture below, they are in our ceiling and also under the cabinets, we replaced the ones in our bathroom, the boy’s bunk beds, and under the cabinet in our bedroom as well.
We used 16 of them to replace all the lights that we had left.

I also wanted to mention that since we purchased everything on Amazon using my Prime membership, I knew I had the option of returning it if I didn’t like what I had ordered.
Because I wanted to be able to test options before buying in bulk to replace all the lights in the camper.
I purchased 4 different alternatives for the remaining lights.
That way I could see in person the kind of light they give and how they looked in the camper.
Once I was happy with the bulb size and the kind of light it gave (some are warmer than others, so if you want a cooler light, the best way to go find one is by testing),
I purchased the total number of lights I needed to replace (and in the case of the bulbs, I purchased extras so we could have them on hand in case one broke.)
Also, just a note: I mistakenly bought bulbs that were not 12V, and they just about died as soon as I tested them in the camper.
So make sure you read the details carefully! I, of course, could not return those because it was my fault for not reading the details.
PS. NOTE OF CAUTION—We are lucky to have my father-in-law, who is a licensed building contractor, nearby, and Ken has electrical experience as well. BUT if you are not sure, please don’t put yourself in danger when redoing electrical work, and either consult an electrician or hire one instead.
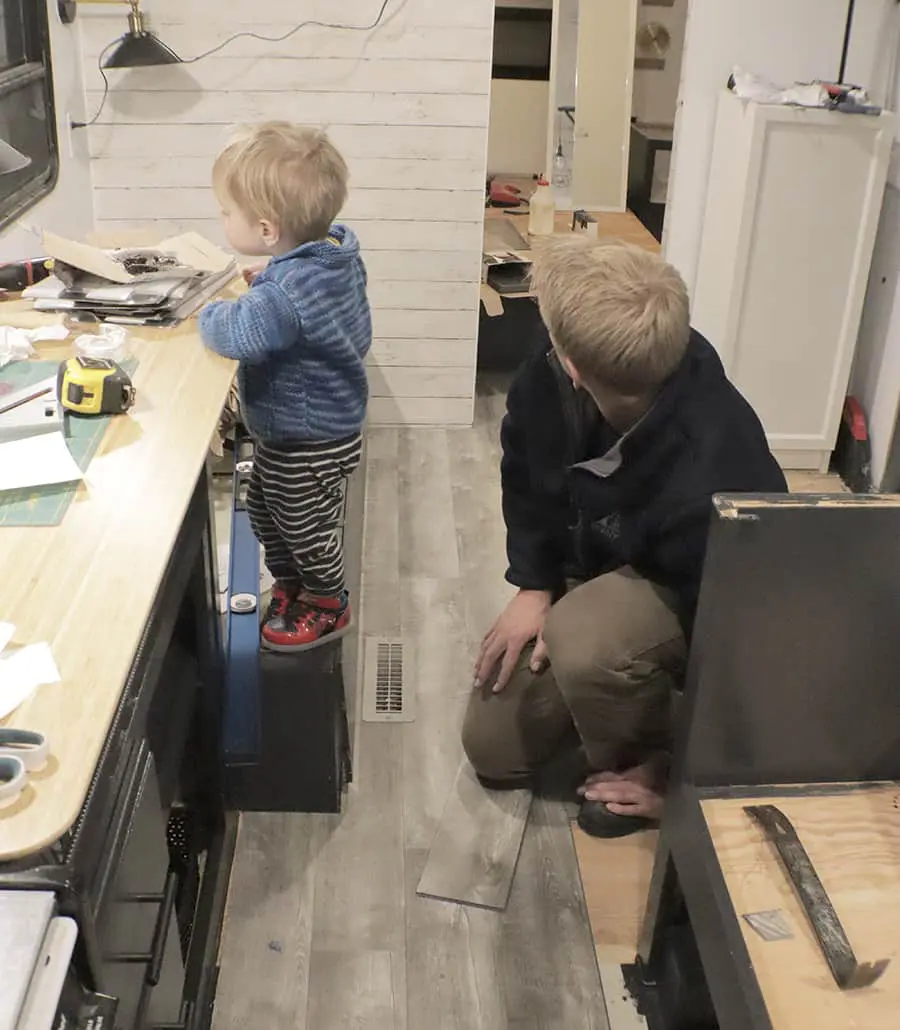
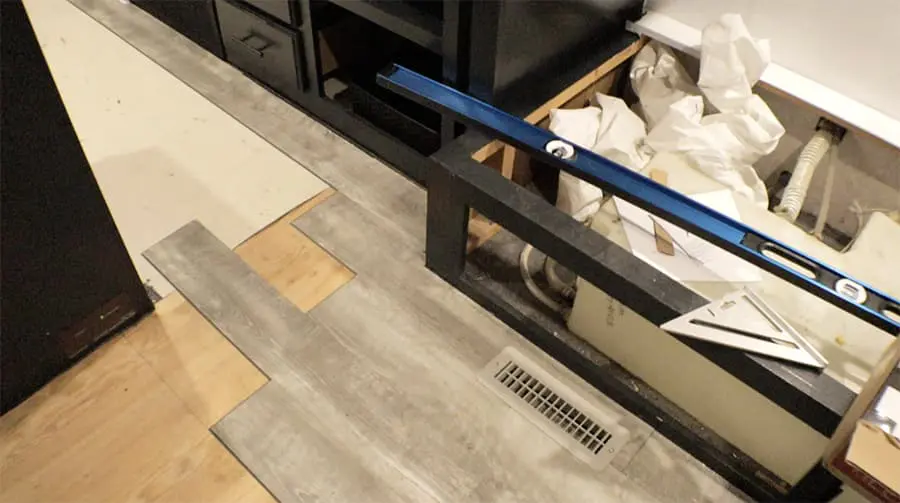
12 – Redo flooring
If you are familiar with snap flooring, adding flooring to your RV would be the exact same process.
One thing that Ken was not happy about was that he didn’t account for the expanding of the flooring with the very high temperatures we experience where we store our RV, he added a little bit of room for expansion, but what he normally does at home.
If you are going to store your RV in an area that gets very hot, I would recommend you account for a more than average expansion of the floor.
We do want to see how this peel-and-stick flooring or this one behaves to see if that would be a better option for our next renovation.


I’ve noticed that some people also use peel-and-stick floor tiles for RV renovations, and while I want to give those a try as well, I will probably make a full post diving into the possibilities of flooring for RVs.
13 – Add furniture
We only added the corner white cabinet from Ikea, Ken bolted it to the wall to make sure that it would not move.
We added it before adding the flooring, so the flooring goes to the edge of it and not under it. We don’t plan to switch it, so it made sense to us.
If you are not 100% sure if you will put something in your RV permanently, make sure you only added it after you re-do the flooring.
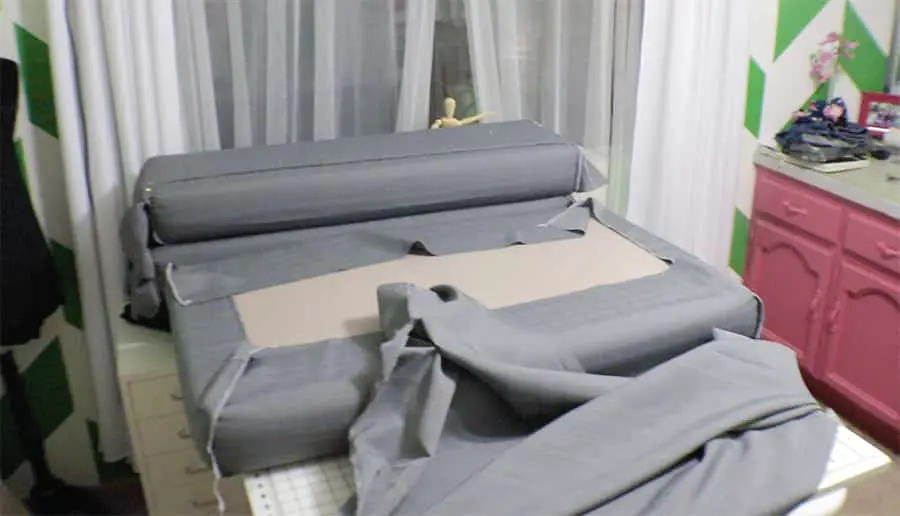
Also, originally, I wanted to fully replace the couch, and place a regular sleeper sofa there, but then we realized that our water tank was under there, so we decided not to mess with it and just make new covers.
In our case, we didn’t change as much as we wanted and did more cosmetic upgrades instead. So I have no experience changing too much furniture, but I did all the research when I considered switching the RV couch for an RV sofa bed and posted it here.
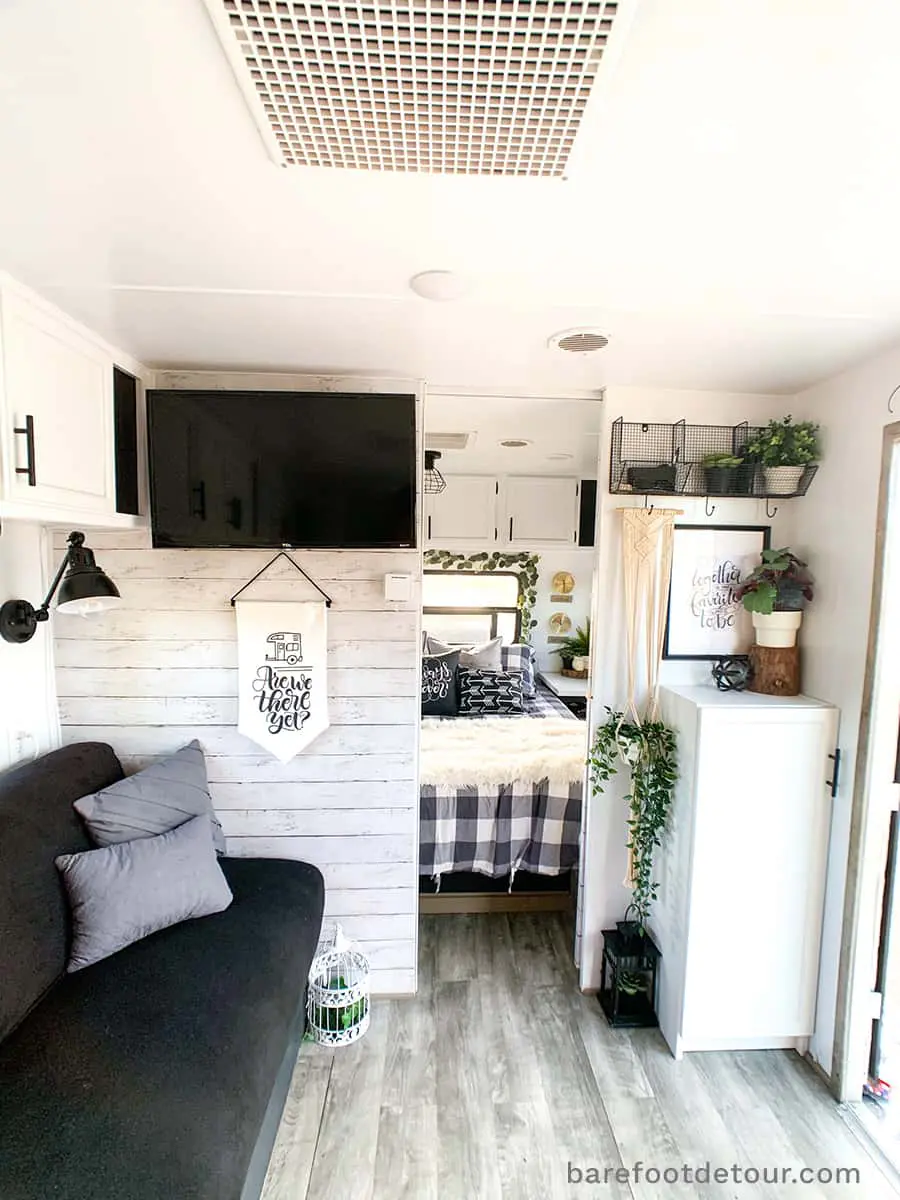
14 – Renovate the couch and dinette pillows
This is probably another of the most asked questions that we get. So I had to include it as a point and I will elaborate more on each one in a full post later.
I basically selected 2 different fabrics to make the new covers.
For the couch, I selected a long-hair Minky fabric that was super fluffy. I love the idea of having that for the winter, so it was almost like having a blanket for the cover.
And for the dinette, I selected a great water-resistant fabric so that I could wipe it down. Since we have 3 little (and very messy) boys, I needed something that I didn’t need to wash every two minutes.
I purchased my fabric from fabric.com, but unfortunately, fabric.com is no more. But I found a very similar waterproof version at Wholesale Fabric Direct: this grey waterproof one and this minky. They have a whole selection of RV upholstery fabrics; you should definitely check them out.
To make the cover, I basically placed the fabric inside out and pinned the corners. I sewed the edges and made sure that I had enough fabric for the edges to come all the way in so we can hook them using the hack I describe below.
Cover securing hack
One hack I used to make sure the cover doesn’t move is to attach curtain hooks with wire to different parts in the bottom and back of the couch.

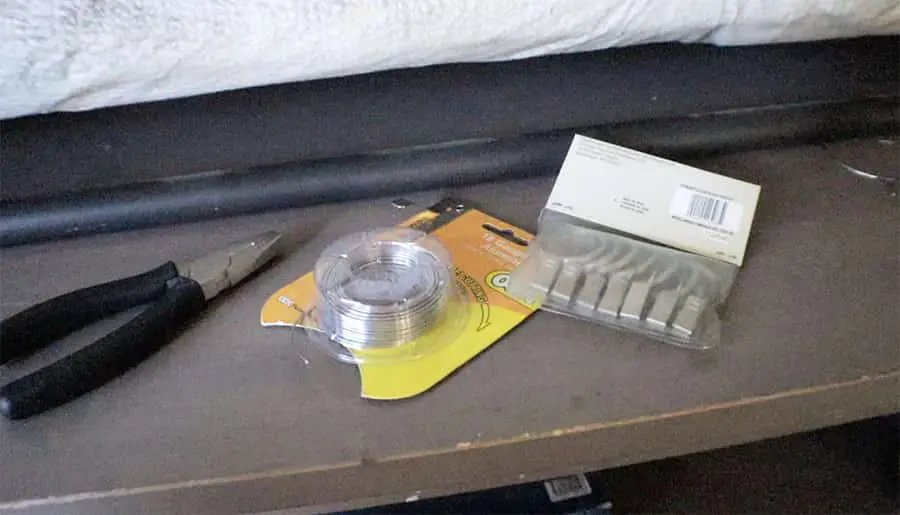

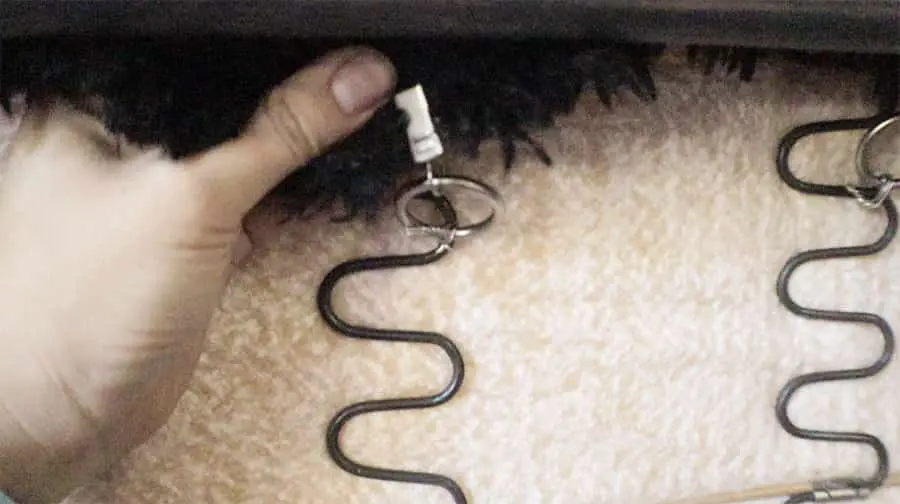
This way I could hook the cover (which is basically fabric with sewn sides) and make it stay in place even when transforming the couch into a bed and vice versa. The more hooks you have, the more you can secure the cover.
And for added security, I also added 3 in the middle; those are a little tricky to hook because you will have to shove your hand in the middle until you see the fabric from the bottom, then hook them.
For me, it works better when I keep the couch semi-folded to hook the bottom and middle best; I hook the back once the couch is in an upright position.

Dinette couch covers
I used a fabric similar to this grey waterproof one, and I made covers by contouring the cushions with the fabric.
I used elastic around the edges to secure them, but they ended up moving a little bit, so I added two extra pieces on each side so that I could tie them down and secure them better.

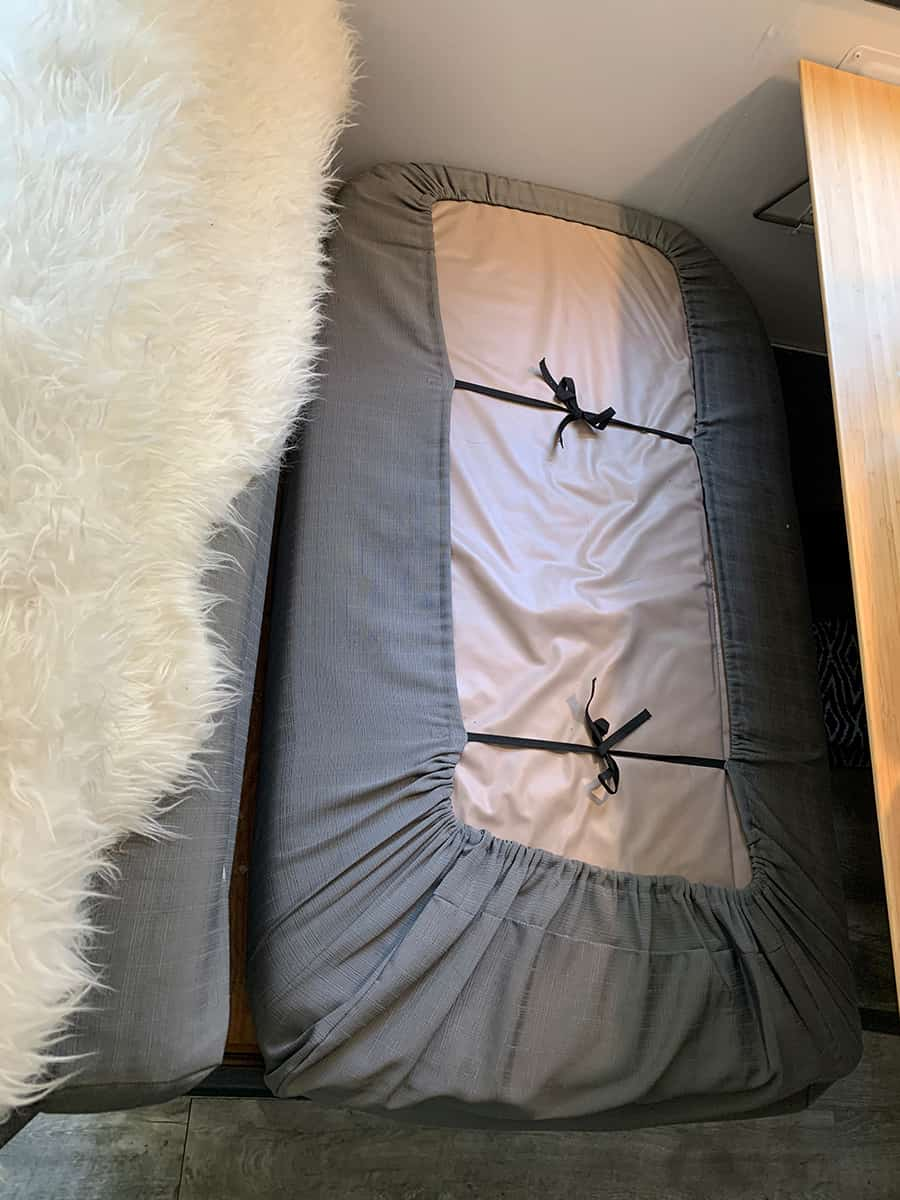

I did this for the big bottoms and the small backsides. I just made them using an envelope fold in the back since I made them with the fabric inside out and super tight. While they are a little tricky to pop out to wash, they stay without needing any extra ties.
15 – Select mattresses and bedding
We decided to get brand-new mattresses and bedding for the bunk beds and also our bedroom.
Our bedroom mattress is a standard RV queen, so we just purchased this one. We love that it has cooling gel, and, honestly, we sleep better on that mattress than we do in our bricks-and-sticks house.
But if you are looking for different mattress sizes for RVs, we have two awesome recommendations for you:
They are 100% made in the USA and part of Brooklyn Bedding, specialized in RV mattresses and with 4 different options of comfort.
Bear offers RV mattresses that have a breathable Celliant Cover to help improve athletic performance, also 100% made in the USA.
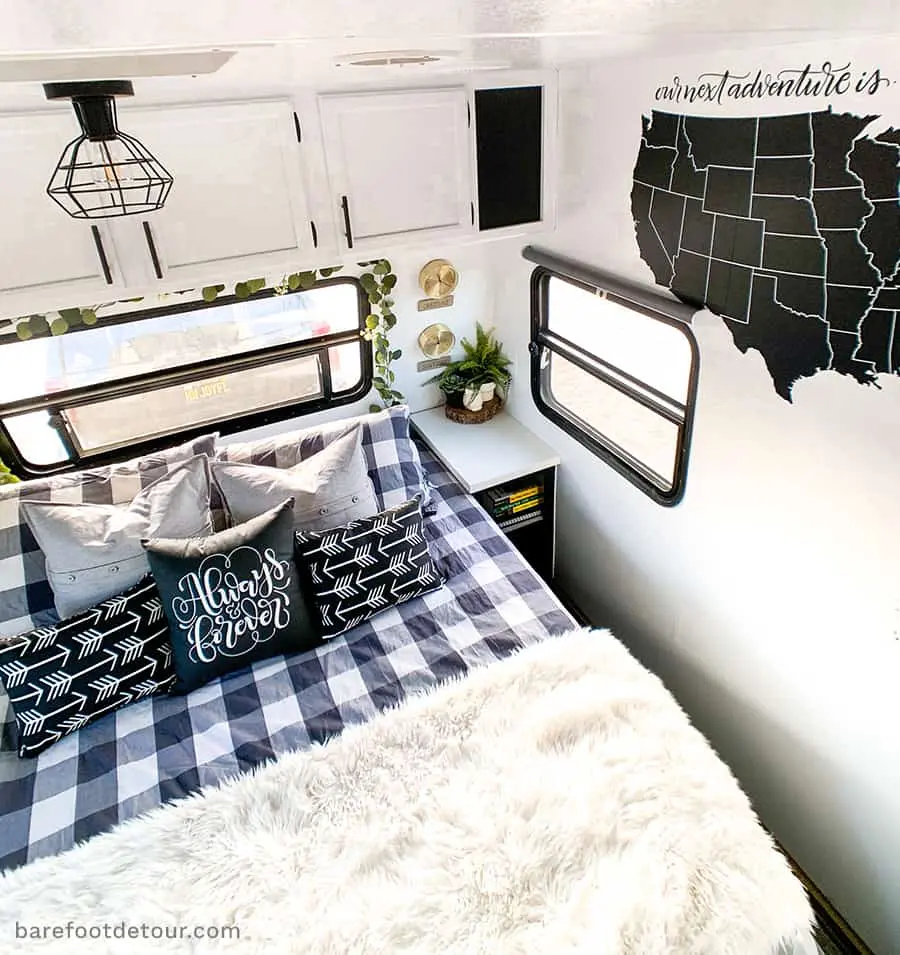
Master bedding: Our sheets and comforter are from Ikea, and while they still have the inner comforter, I was unable to find the duvet cover online, and I have not seen it anymore at the store, but this one is very similar.
I actually liked the pattern in the camper so much that I wanted something similar for our bed at home, but Ikea does not carry California King sizes, so I bought this one, and I am loving it!
I also added a hand-lettered pillow with a black background; you can check my pillow collection here. You can change the background color to any color you want!

Bunk beds bedding: The duvet cover is the same one as the one we have in our master bedroom, from Ikea (they have different patterns per each side), but I found this similar one and use it in our brick and stick home, along with the buffalo plaid one.

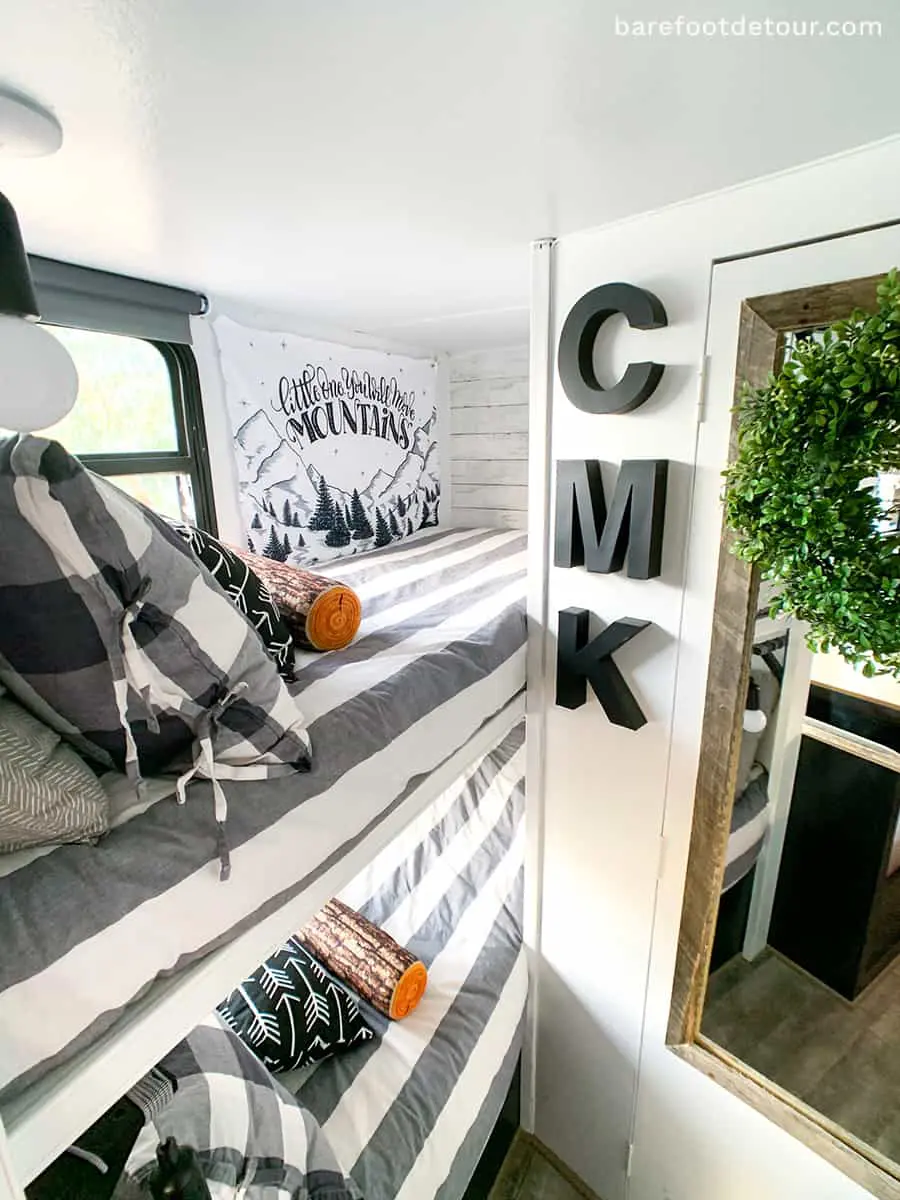
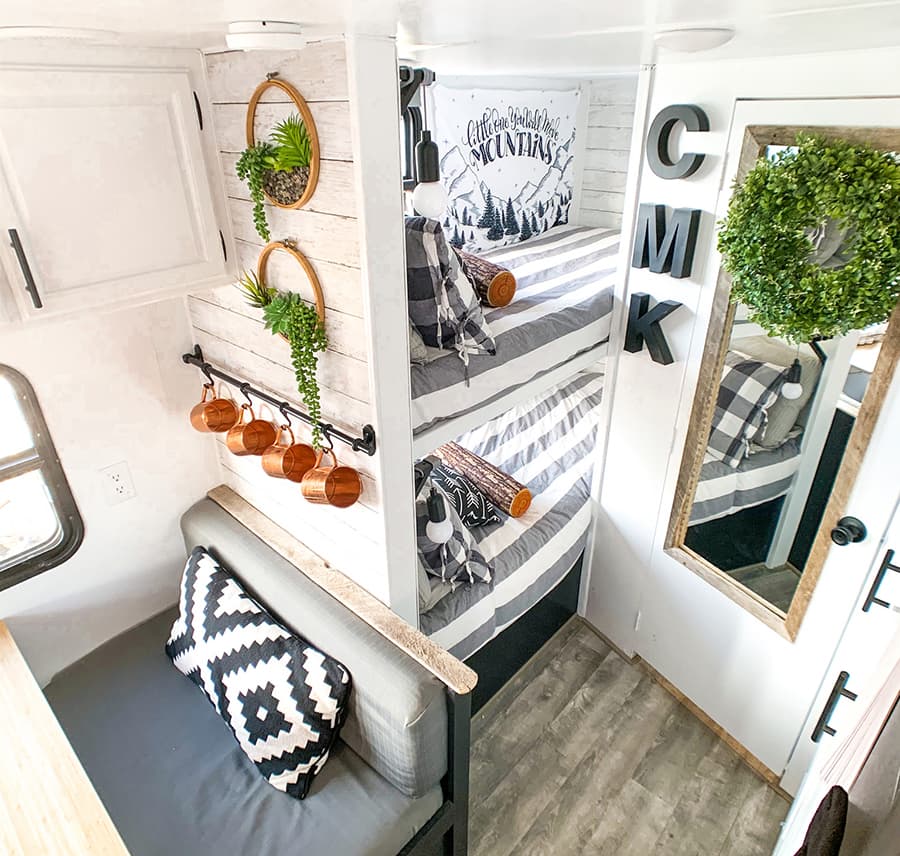
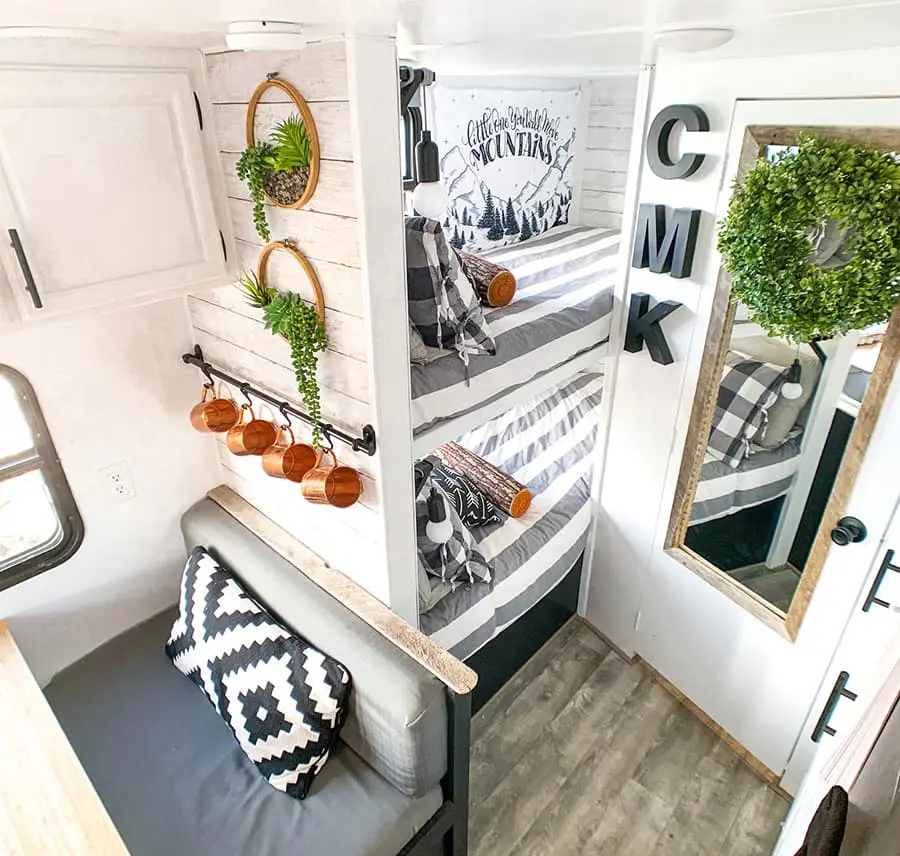
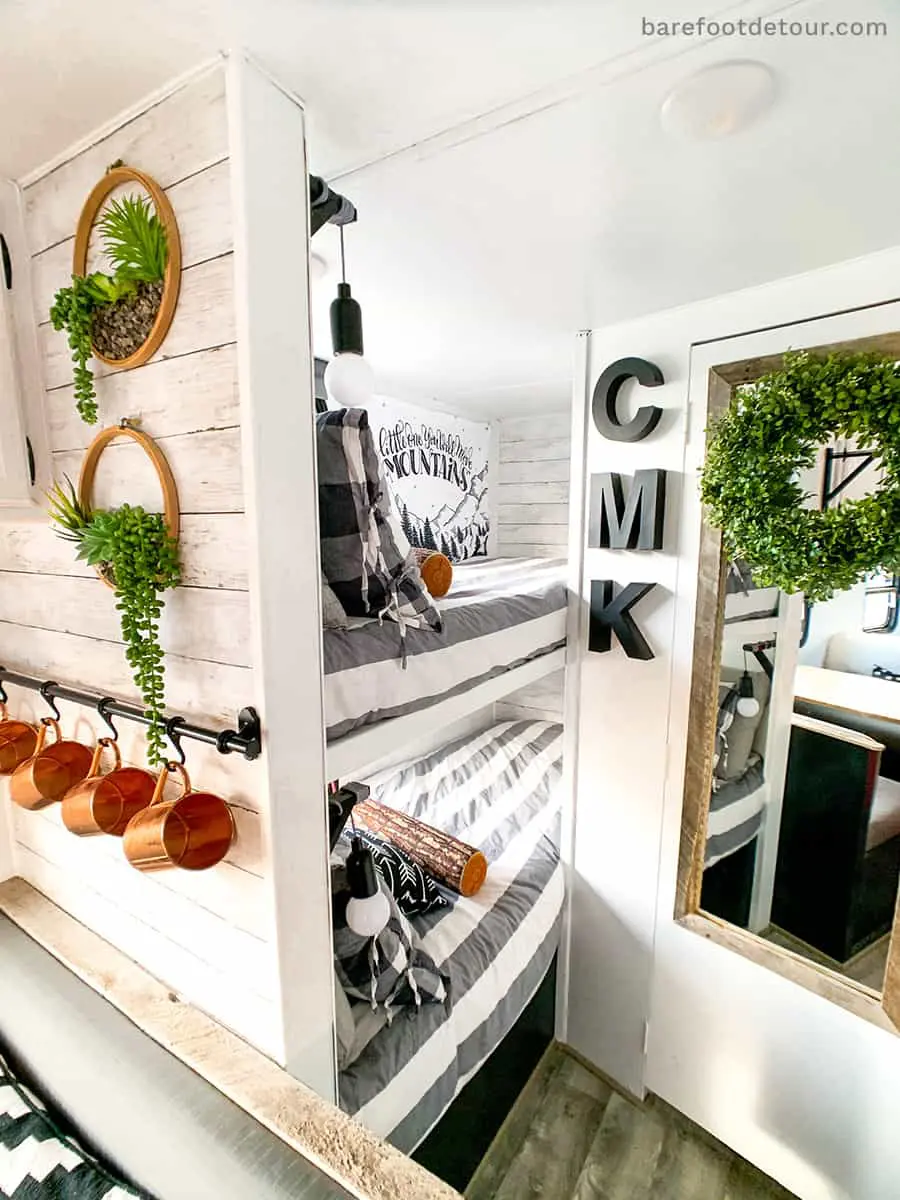
To finish their bunk beds, I hung one of my favorite pieces of artwork, “Little one, you will move mountains” and while this is a swaddle, I am working on adding it to my shop as prints and tapestry. And also these adorable log pillows.

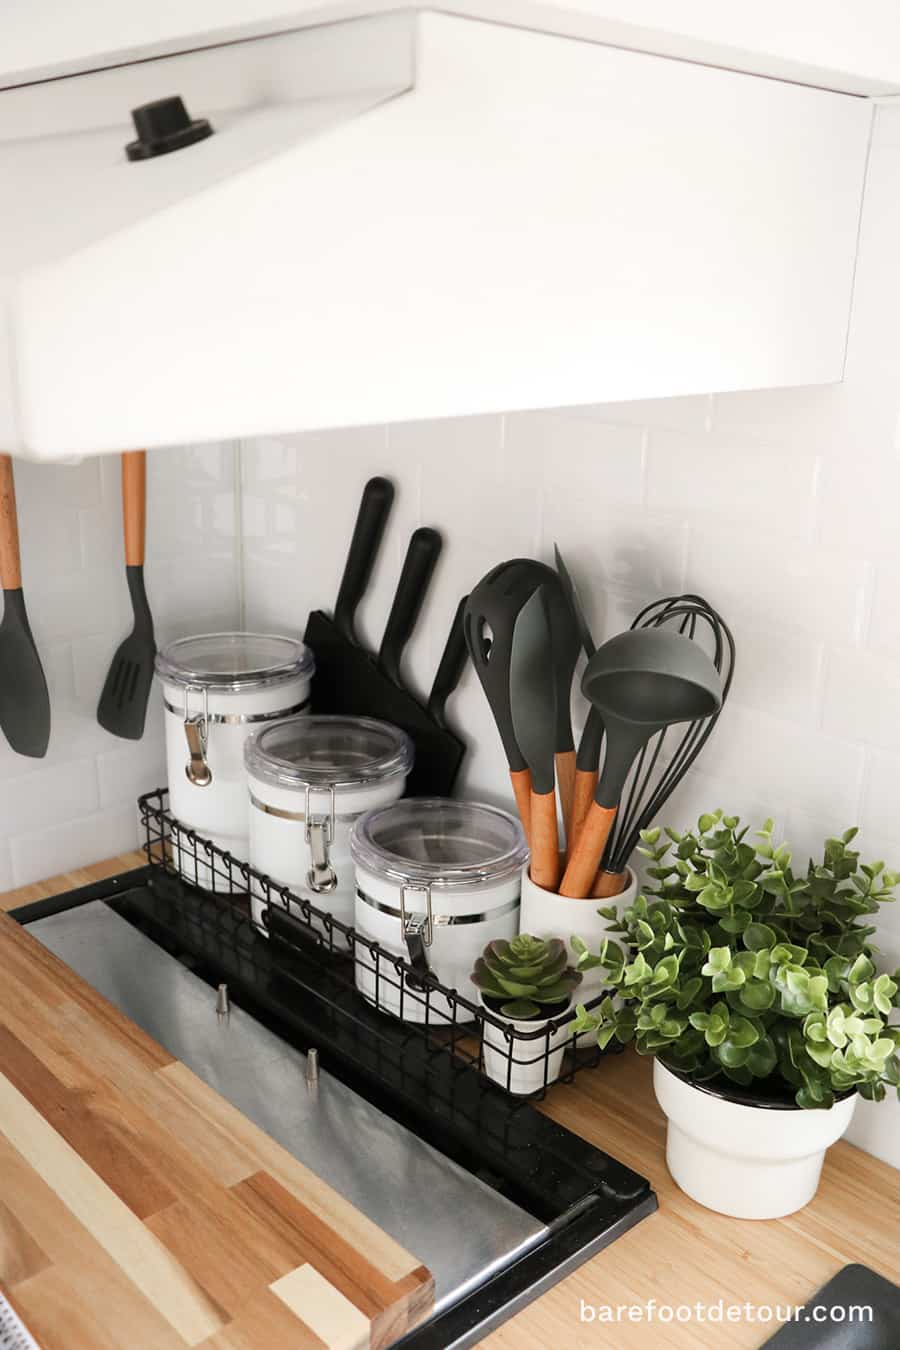
16 Select kitchen wares
We purchased everything for the kitchen of our camper, from plates, cups, and wine glasses, to pans and pots. Of course, we made sure to get as many things as we could out of melamine so that it would not be at risk of breaking when driving.
- Melamine dinnerware: We purchased a set very similar to this one from Target.
- Melamine cups and wine glasses: I love these cups and also these wine glasses because mama needs her wine!

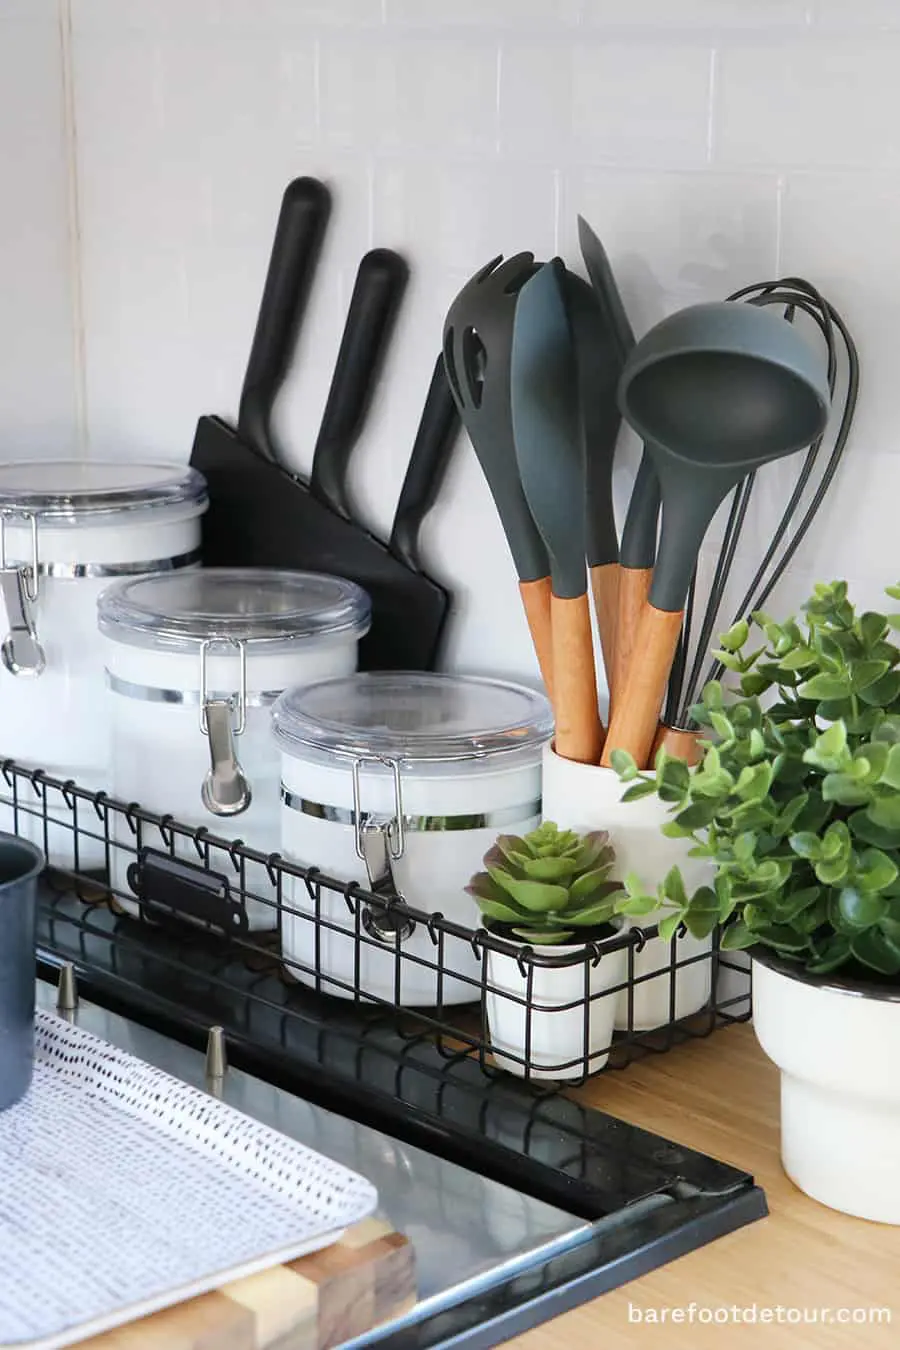
Behind stove storage: This basket, with these metal and plastic containers + these wooden handle utensils + this IKEA knife block (without the base) and a couple of faux cactus.

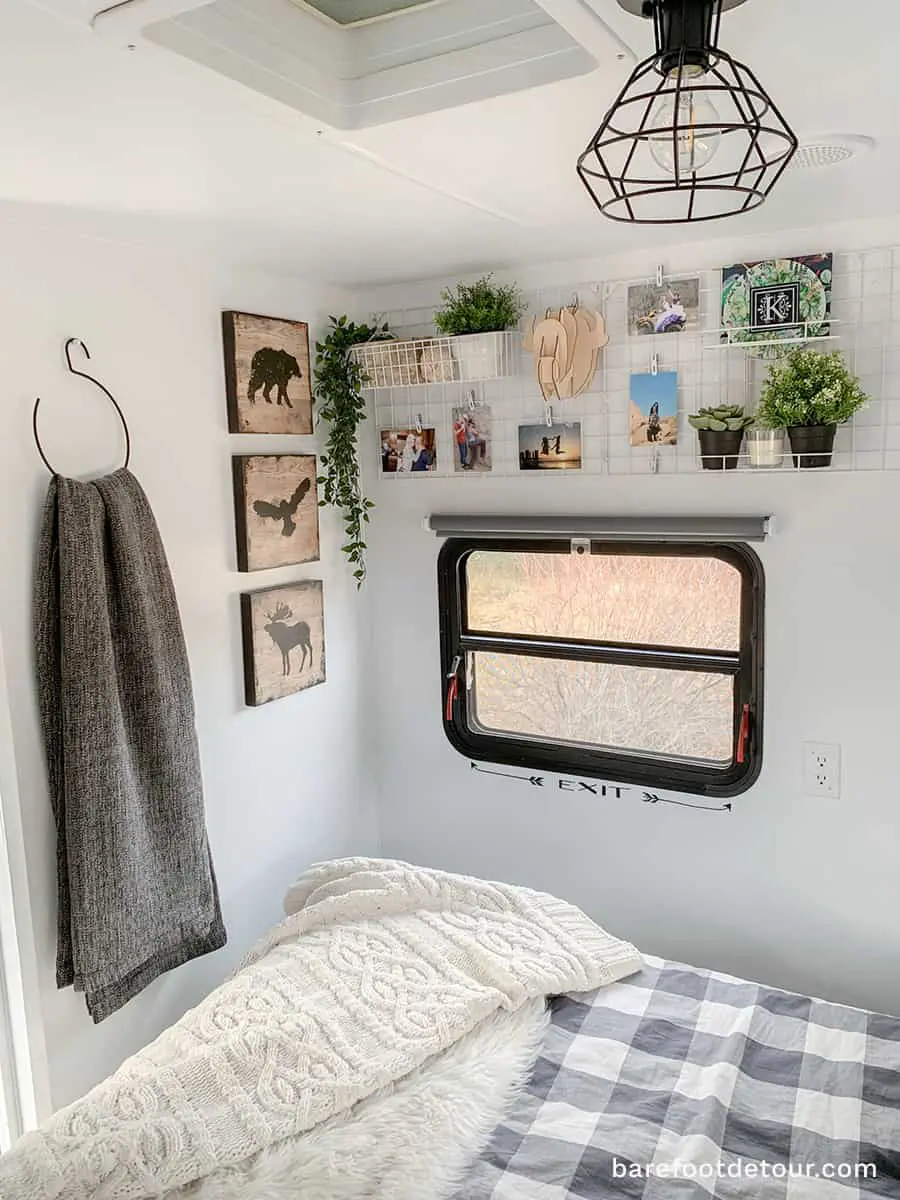
17 Decorate and select different hanging methods
We hung so many things in the camper, and while for some of them (very few) we did use screws with anchors, for all others we selected options that would not hurt our walls, like:
- Poster hanging strips
- 3M hooks (with metal hook)
- 3M hooks (full white)
- Heavy duty Velcro (for frames)
- Museum putty (for thing on top of the shelves or counters)

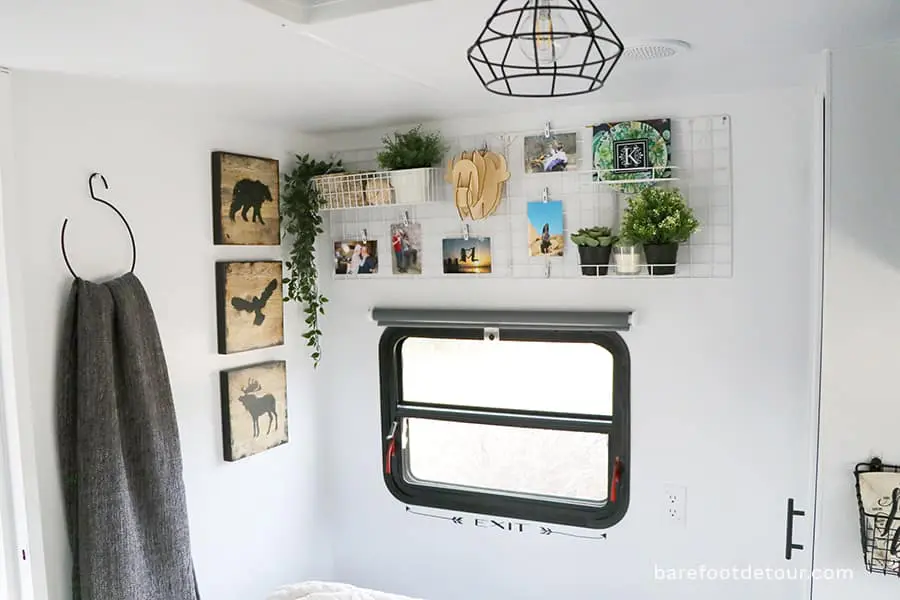
I used this wall grid panel (spay painted in white) and re-assemble long-ways, so it would fit the space better.
I added some decor and pictures that I sealed by running them through my Minc machine and some lamination pouches, this way I have the margin to hand them with clips without ruining them.

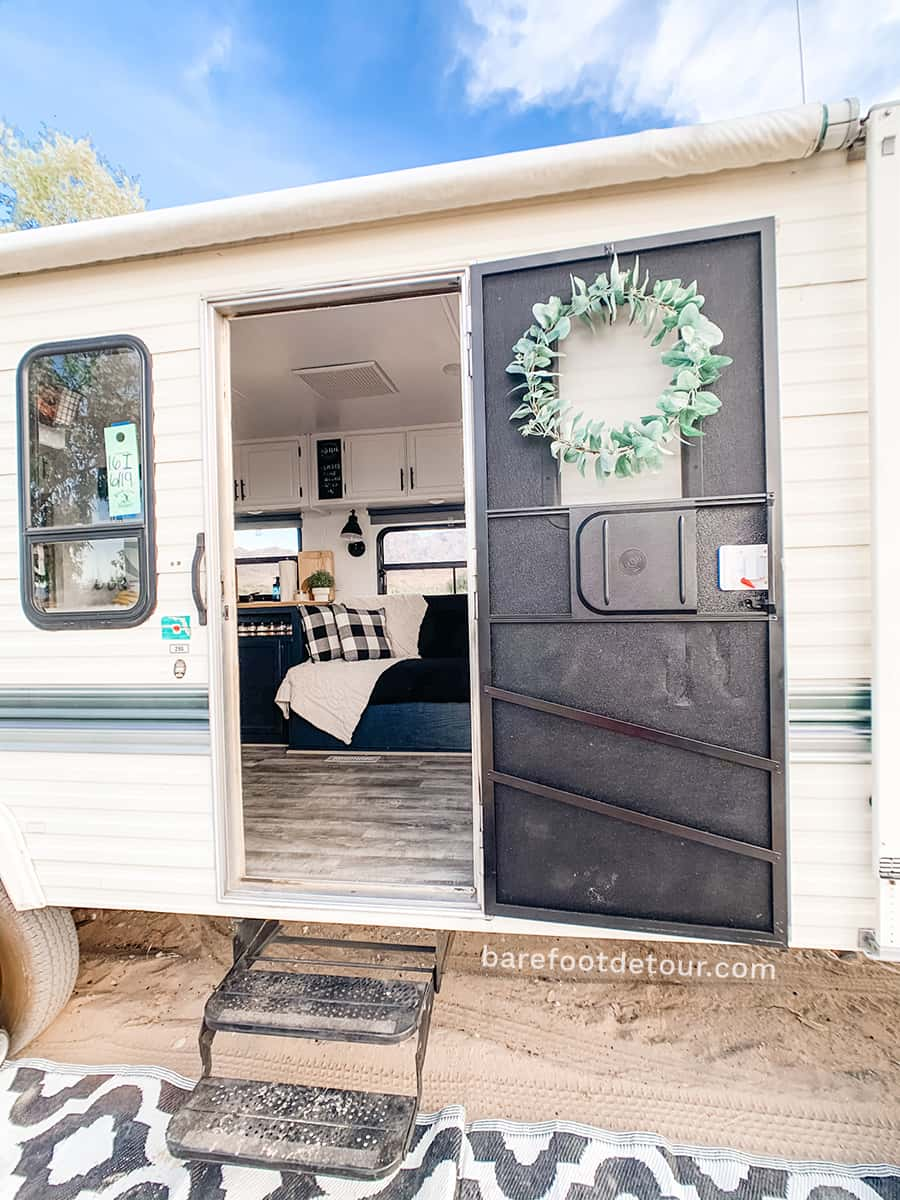
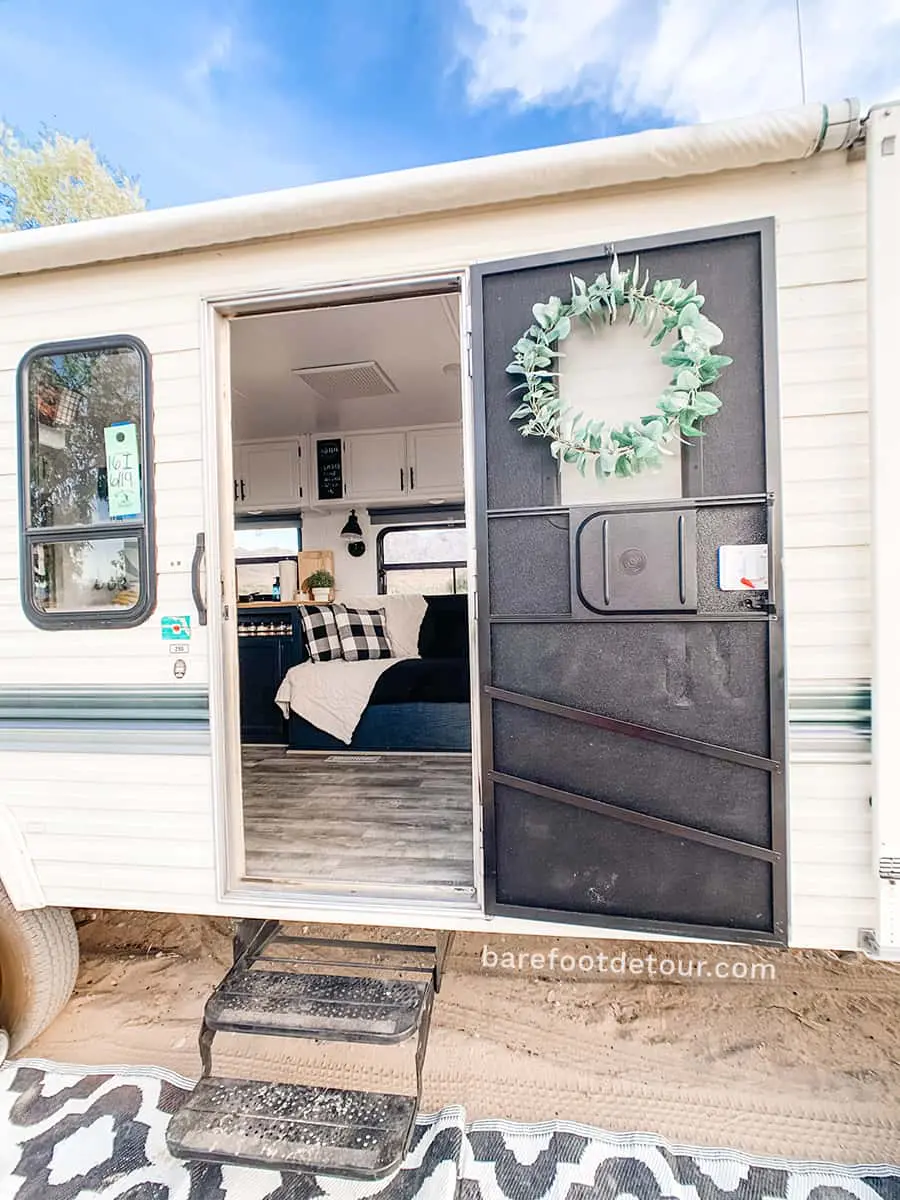
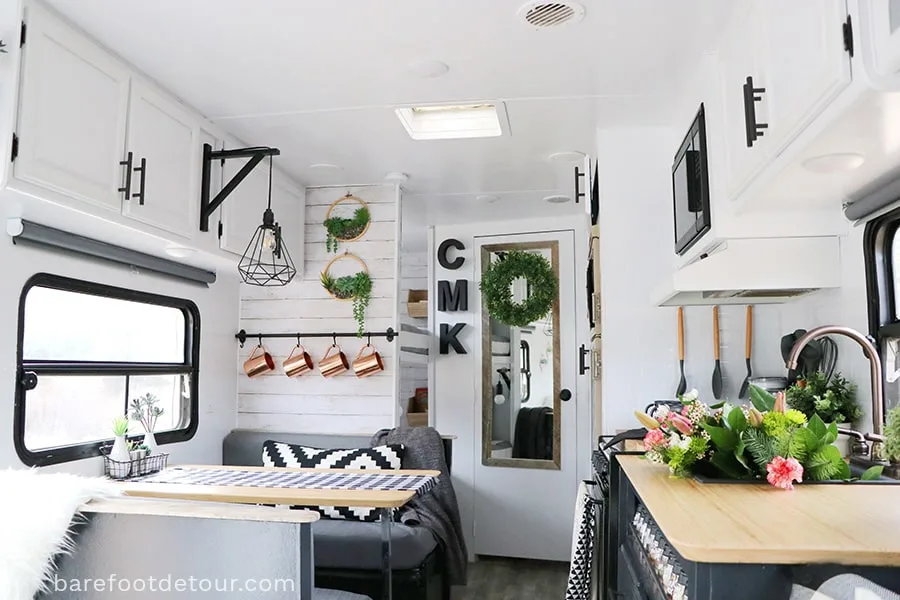
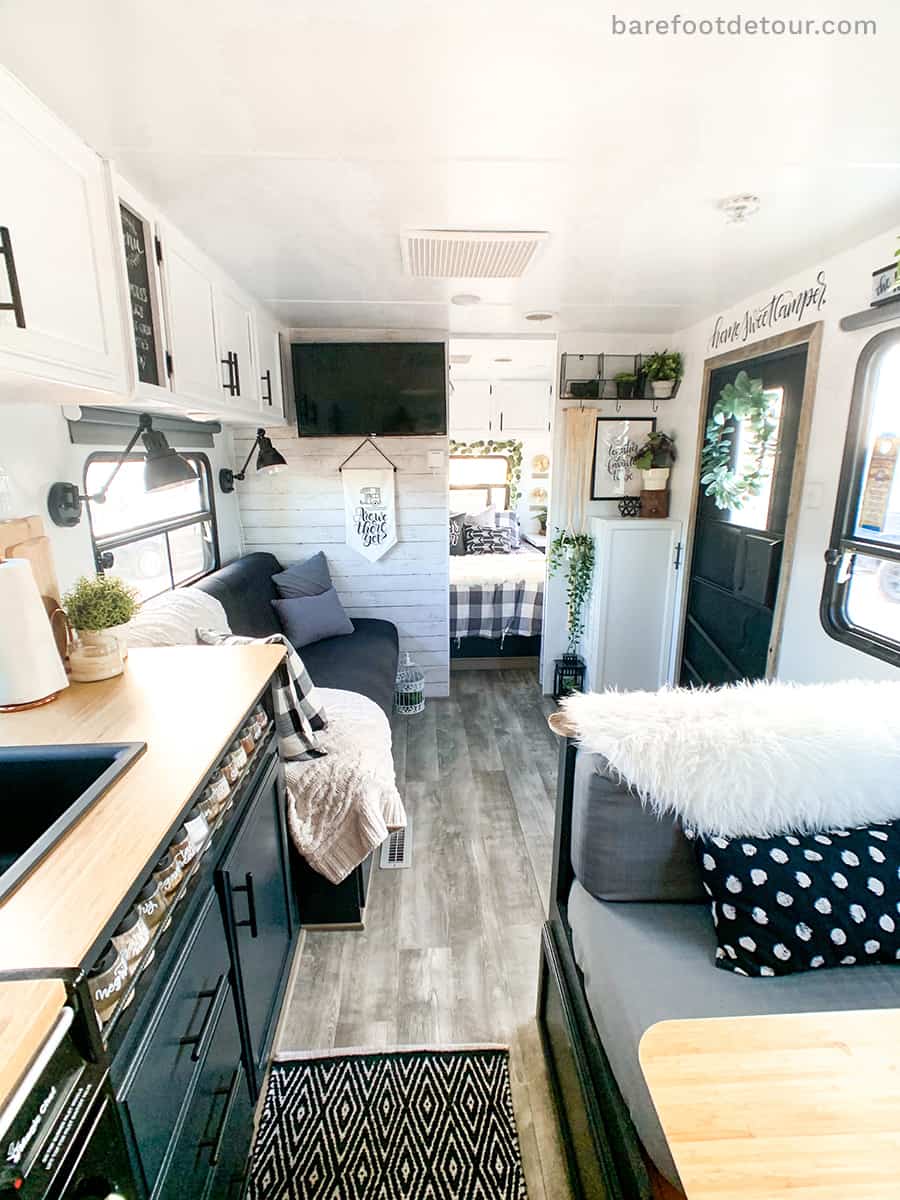
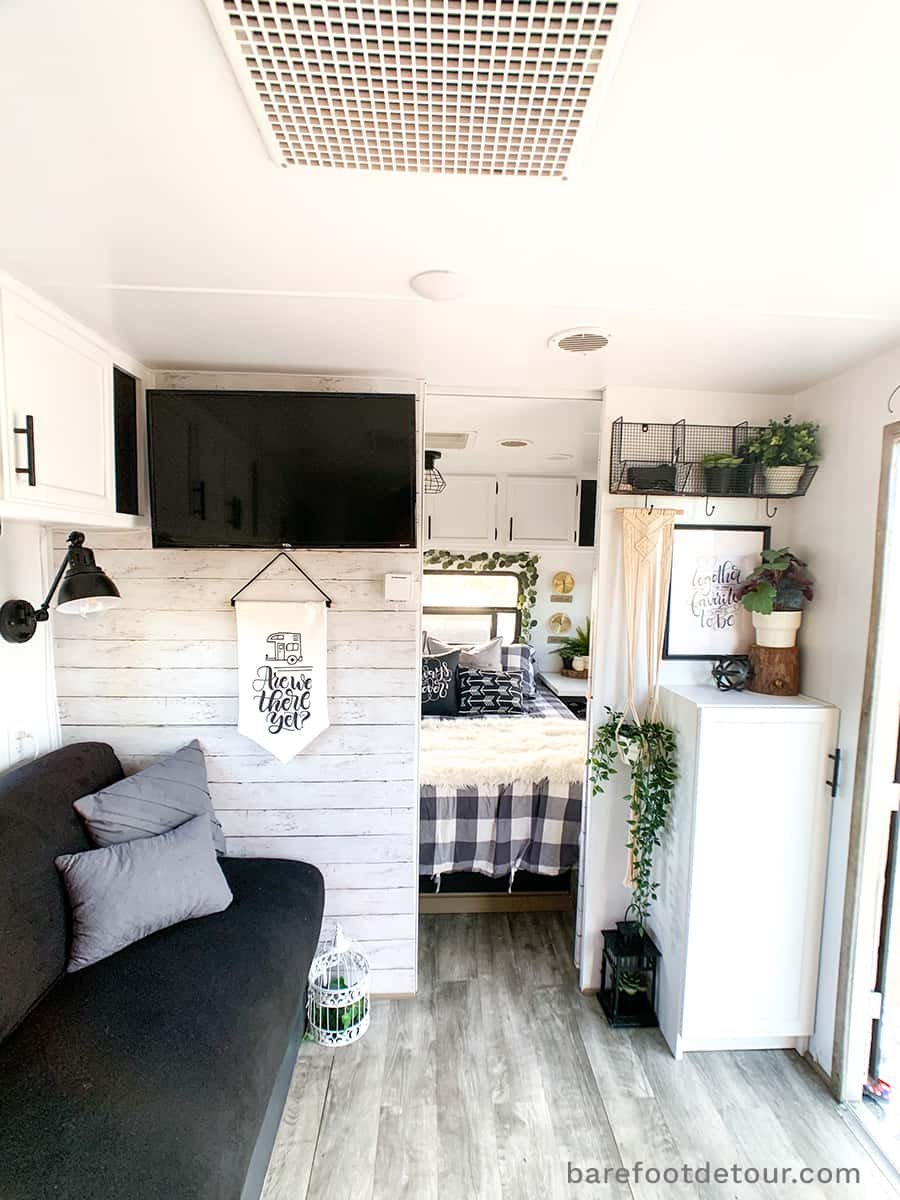
18 – Make it homey!
I think that the most important point of renovating an RV, is to add all the details that will make YOU feel not only comfortable but as if you are in an extension of your house.
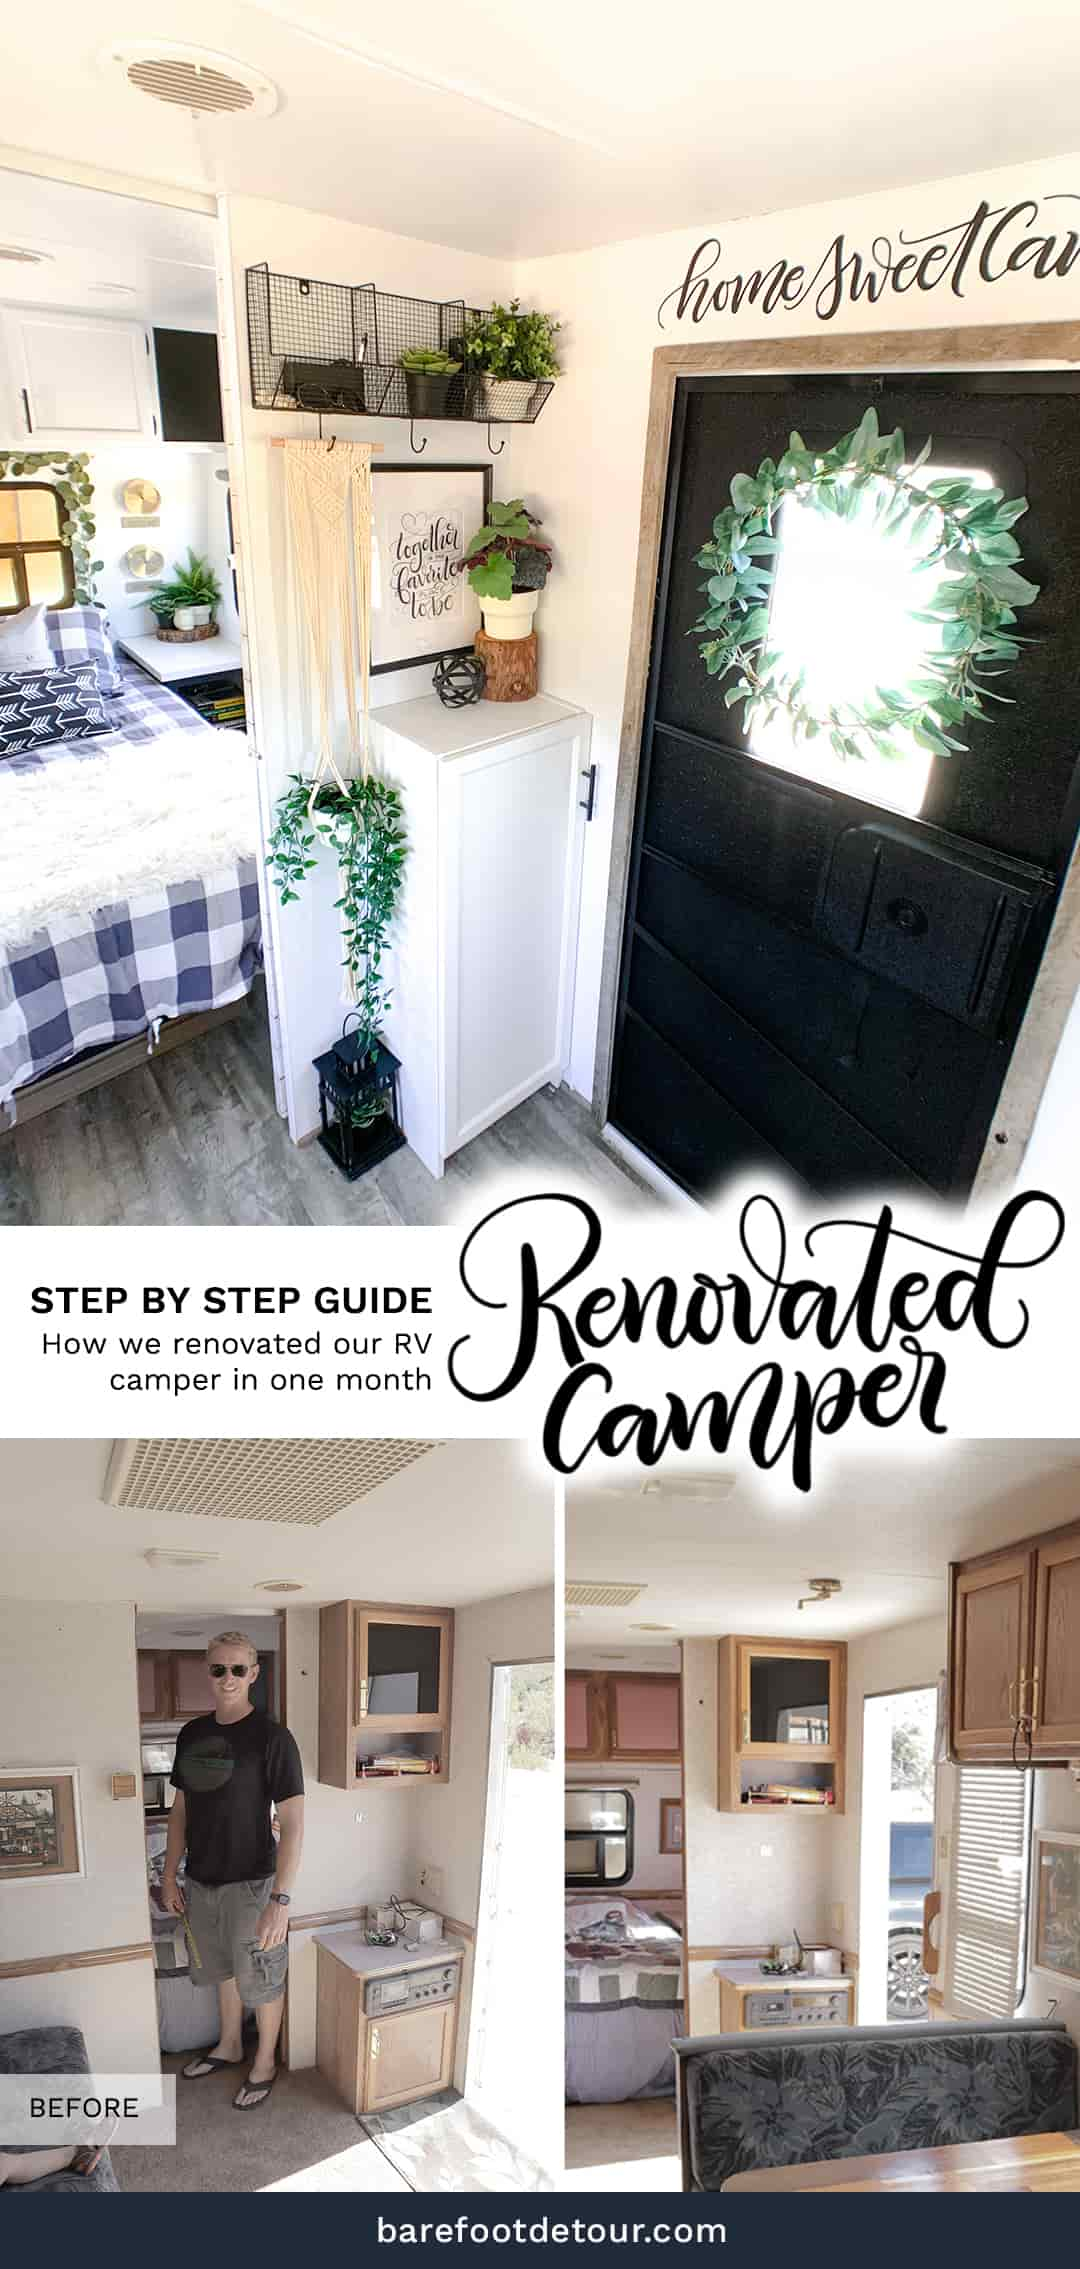
In our case, I really wanted to add details that were hand-drawn by me. So on top of the door, I added a vinyl piece that reads “home sweet camper ❤” and the great part is that cutting it is a pretty easy process, and installing that one was super simple. Just make sure you have a big enough transferring tape with a grid, or cut the bottom to align with the door.
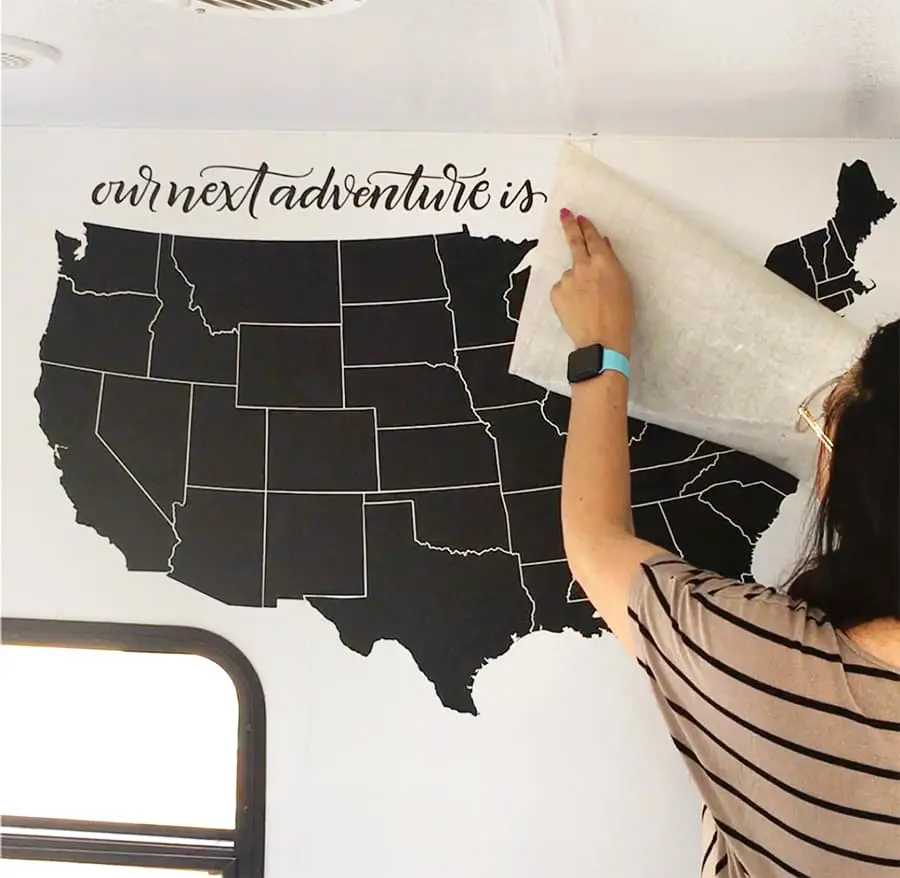
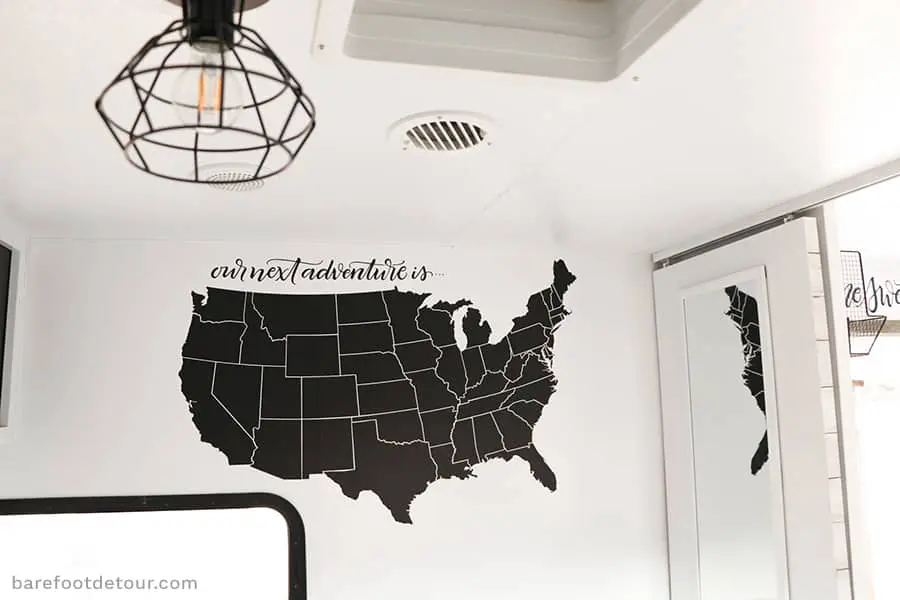
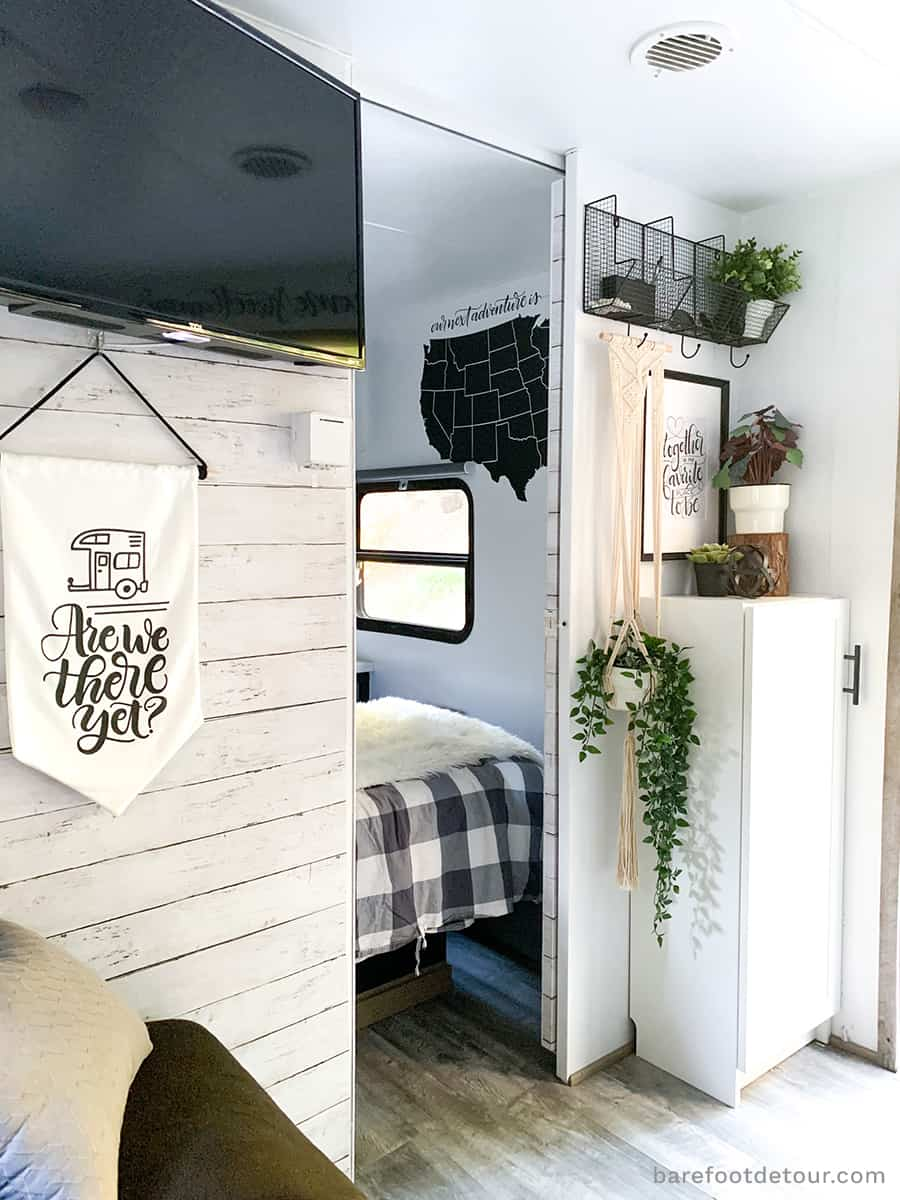
In our bedroom, I also added a vinyl decal that has a US map with an “Our next adventure is…” This one was a little more complicated because I had to cut and also apply it in different pieces, because the size I wanted was too big, but I added separations in the map between States so that it could be easier to cut separately.
If you have a cutting machine and would like to use the same files, you can find them on my Studio Website:


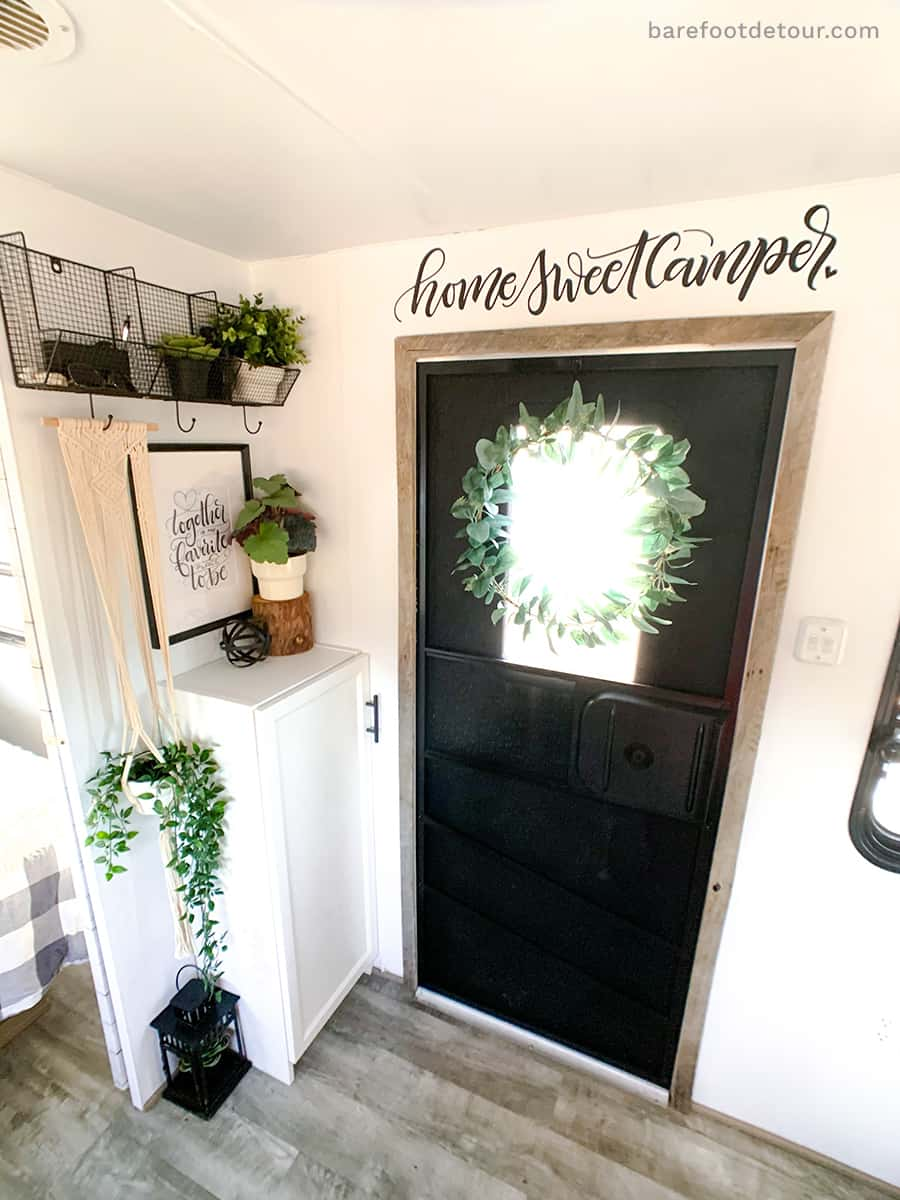
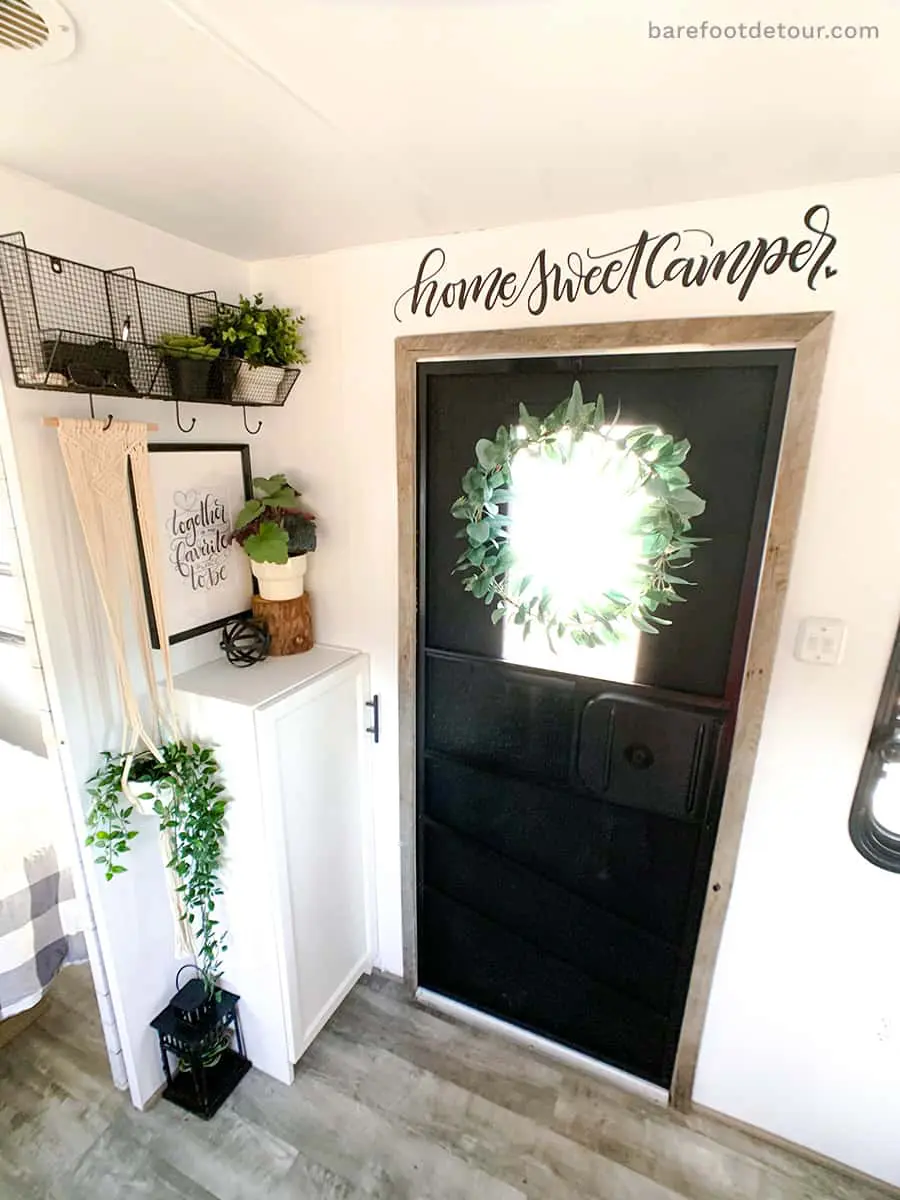
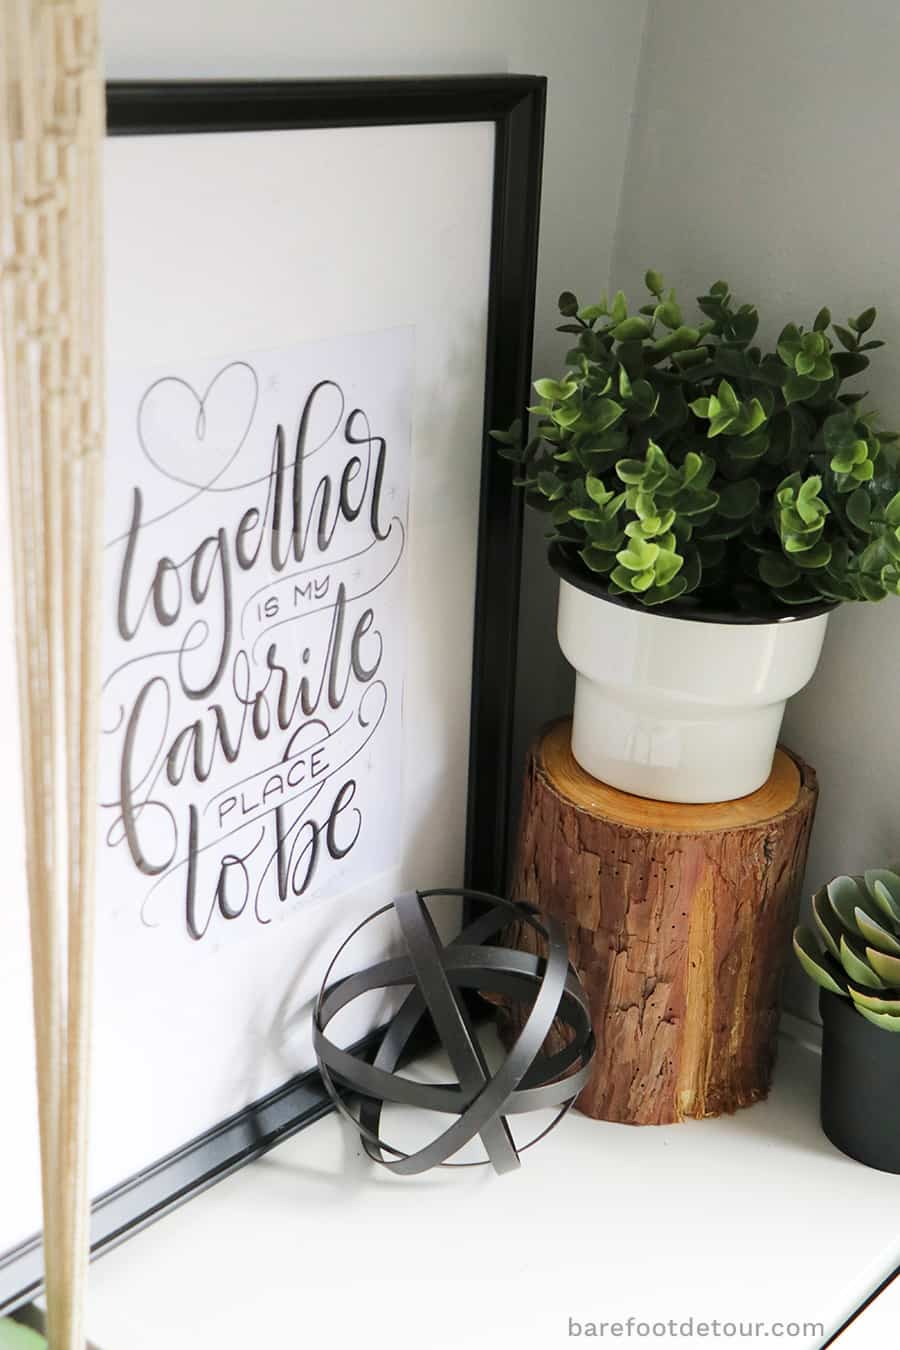
I also created a print for the entryway that reads “Together is my favorite place to be”


19 Updates after two years of use
After many, many stays in our camper, there are only a few things that we’ve updated that we plan to upgrade.
I wanted to address them here one by one so that I can explain myself better =] so the very first thing is:
Couch area sconces
While I loved the look of the first ones we had, the boys pulled them down countless times because they were a little low, this made them sag a little. So we upgraded them to these ones that have two sets of adapters, one in the bottom and one in the top, unlike the other ones that only had one at the top.
I love the new ones, and now they sit much higher, so my boys don’t even touch them (other than for turning on and off, of course)


Shiplap wallpaper
I have to make a note about this because I am going to change the wallpaper (shelve liner) I used for our accent walls. We store our camper in my husband’s family ranch in the high desert, so it gets HOT.

The shelf liner has shrunk because of this, and I was so sad! I did not know that this can happen with the heat, and I plan to switch to a temperature-safe wallpaper, like Loomwell. I have this dotted pattern and this one in the realm of possibilities.
Hanging solutions
While I still love all the solutions that we selected for the camper, there are some things that we have switched from 3M foam hangers to regular screws. Like for the basket next to our bed, since it holds relatively heavy items. We decided to just secure it, that way Kenny will not wake up with a basket in his head.

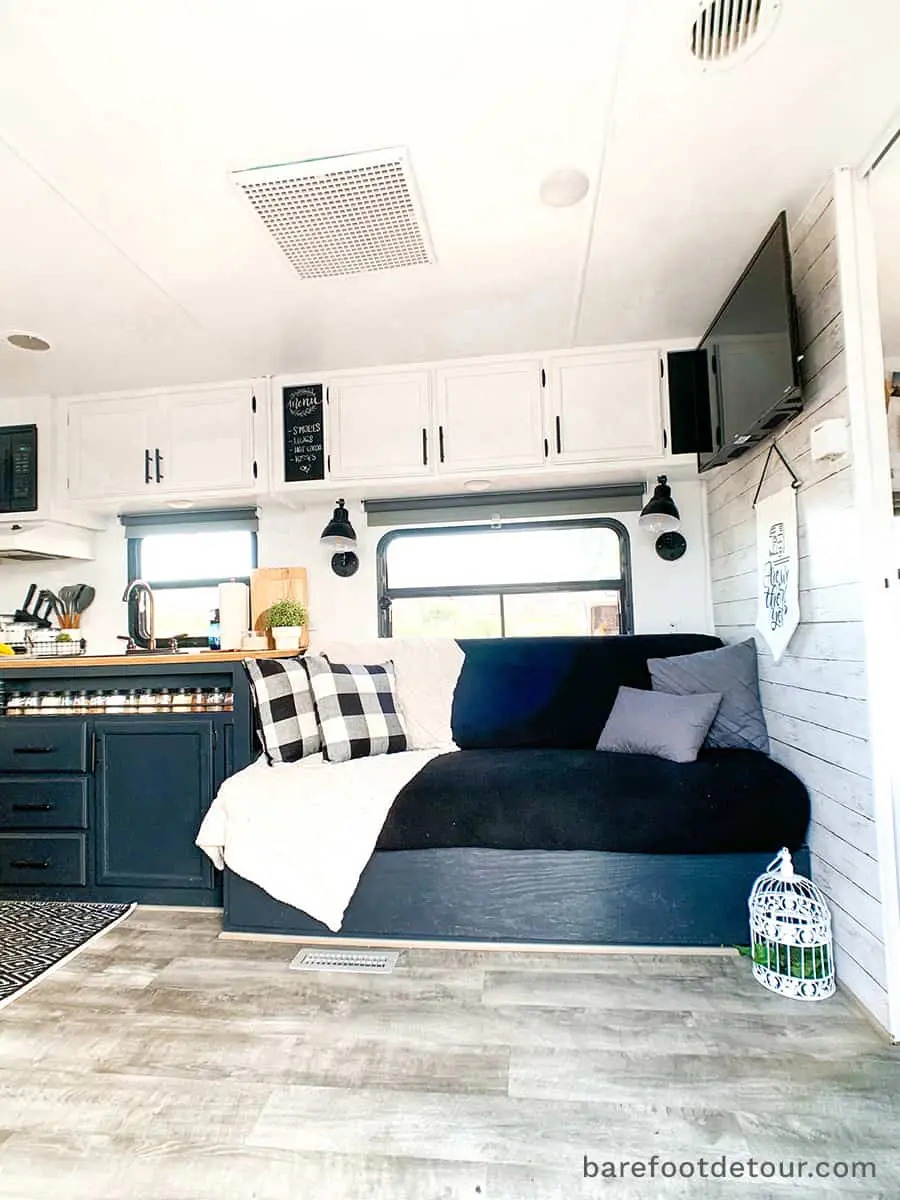
Couch cover
Since it’s summer, I decided to switch the super hairy couch cover that I made in Minky fabric, for something that does not get as hot.
I picked this one and used the same hooks I set up for my DIY cover to make sure the cover fits nice and tight.
I like that it’s so easy to switch, so I might get another color, so I can change the look every once in a while.

20 – RV renovation Resource list
What to know where I purchased all the things we used in our remodel? You can shop my pictures on this page I set up or check my list below, I’ve tried to include as many things as possible =]
- Prep: Liquid sander + orbital sander + wash walls
- Primer: This oil-based primer rocks!
- Paint: We used BEHR Night club for everything that was dark and BEHR Silent White for everything light
- Flooring: We used one from Home Depot, but I am not too happy with how it expanded. We are planning on using this one or this one for our next restoration.
- Spray paint: We used spray paint for plastic and regular Rustoleum all material for the hinges.
- Shiplap wallpaper: I used this one, but it shrank a little with the hot temperatures in the summer 🙁
- Bathroom wallpaper: For our accent wall, I used this shelve liner from Target
- Peel and stick Backsplash: we used Smart tile subway Tiles in full white
- Kitchen Countertop + Table: We used this desk from Ikea
- Black sink: This is one of my favorite kitchen items!
- Oil-bronzed pulls: These fit the holes of our old ones perfectly, but measure before you buy!
- Light fixtures: We recently upgraded our couch are sconces to these, I love that they have integrated switches; just make sure you add 12V light bulbs.
- LED ceiling lights: These are the ones we use all around our camper; they are amazing, bright, and safe, and they look way better than the old ones.
- Roll-blinds blackouts: We purchased the blackout blinds from Ikea, but they no longer carry those exact same ones. We were lucky to find them when they were going to be discontinued, so they were about 40% off. I did find other options like these, and these that are very similar.
- Mattresses: We recommend checking Bear RV mattresses and RV Mattress by Brooklyn Bedding for the best RV mattresses available!
- Wall mesh organizer: I used this wall grid panel (spray painted in white) and reassembled it lengthwise so it would fit the space better.
- Bedside basket: I used this one and attached it with 3M strips first, then upgraded to screws.
- Window greenery garland: I got it from Ikea, but it was a seasonal item, this one is super similar, just a little shorter.
- Always and forever pillow: Find it here, and you can also check all my other designs here; choose any color background you want!
- Master bedding: Ours is from Ikea, but I have not seen it anymore. This one is very similar (I bought it for our bricks-and-sticks home).
- Bunk bed bedding: They are the same ones from Ikea (they have different patterns per side), but I found this one that is similar; and use it in our brick and stick home, along with the buffalo plaid one)
- Log pillows: I love these; they took a super long time to arrive, but they are adorable!
- CMK letters: These are the boy’s initials (they all have the same initials). I just purchased cardboard letters from a craft store and painted them with black spray paint and hung them with poster strips.
- Smart TV: We have this 28″ smart TV, it was a perfect size! And we mounted it with this thing, but bolted it through the wall (I used the backs to hold blankets), and we changed the plug cable to this white one.
- Entrance mesh organizer: We purchased ours in the same section of Target, and since then, has been discontinued, but I found a similar one here.
- Entrance white cabinet: We purchased a combination from Ikea; this is this Billy box and this Oxberg door together with one of these pulls.
- “Together is my favorite place to be” print: I drew this, and you can buy a copy in different sizes via Zazzle
- Behind-stove storage: This basket, with these metal and plastic containers + these wooden-handle utensils + this Ikea knife block (without the base), and a couple of faux cacti.
- Melamine dinnerware: We purchased a set very similar to this one from Target.
- Melamine cups and wine glasses: I love these cups and also these wine glasses because Mama needs her wine!
- Kitchen rug: I love this one because it washes so well!
- Refrigerator notepad: List-maker gonna list notepad from my shop
- Copper mugs and hanger: We purchased these and love them for making mescal mules. We used this Ikea rod to hang them. I also found this one at Target that is super similar.
- Hoop succulent DIY: I used regular embroidery hoops, placed them on top of a silicone placemat, and hot-glued small rocks for the bottom and faux succulents in the middle
- Triangular planter set: I got these and added a few faux succulents.
- Bathroom towel holder: I used this one.
- Shower curtain: I selected this Boho-inspired one from Amazon.
- Outdoor rug: I love this black and white pattern.

Wrapping thing up!
I hope this post encourages you to renovate your RV or to just tackle a small area in your camper.
We are all for small steps, so if you feel overwhelmed, just start with one area and move from there on =]
And share this with anyone that you think could use help with a remodel! Contact us if you have any questions! We love staying in touch =]
Want to save this post for later? Just pin any of the images below =]


Happy remodeling!


Daphne
Sunday 6th of October 2024
Love everything you did, can you tell me the source of the spice jars and did you use a cricut to make the labels?
Joy Kelley
Saturday 12th of October 2024
Hello! We used spice jars from Ikea, I am not sure if they still have these exact same ones, but I did see similar ones on Amazon =] I just used a white paint marker to write on them, but a cricut machine would be a great way to add the names!
Bertha Garcia
Tuesday 20th of August 2024
Hello I absolutely love it. You just show me anything as possible, but I don’t know how to go about it but thank you for your information and would you shared it with us now I have an idea exactly of what I want and looking for I’m going to be moving Out of a four bedroom house into a trailer motorhome not sure yet but thank you thank you thank you many blessings on your way
Merri jones
Tuesday 1st of August 2023
This is amazing! We have a very similar camper and are wanting to Reno for our family travels. Thank you so much for taking the time to share all of the info, advice, links, etc! That is so helpful and I appreciate all the time it will save me as a mom who otherwise might not be able to have the time to embark on what is usually a very overwhelming project like this. Thank you!!!
Ps did you happen to find any covers for the banquet cushions that were already complete and did not require sewing? I am trying to avoid the sewing but have not been able to find other covers. Thanks.
Joy Kelley
Tuesday 22nd of August 2023
Hi Merri! It makes me so happy that this post helped you! =]
I actually bought covers for our 5th wheel and while the fabric is not as good as the fabric I purchased for our dinette, it's a solid option if you would rather not sew them! I used covers and made sure to add clips to keep tight in the covers. Here are the links: - covers: https://amzn.to/3sshBHD - clips: https://amzn.to/3Z0YqkN
I hope this helps!
Beth
Sunday 4th of December 2022
Hiya! Do you remember where you got the black s-hook holding the towel on the wall in the bedroom? Thanks!
Joy Kelley
Friday 31st of March 2023
Hi Beth! I purchased them from Target in 2020, they were on the sale rack, and I could not find them on their website, I'm sorry!
Lisa
Wednesday 31st of August 2022
Hi! Your renovation has been an inspiration for my hubby and I. We have the exact same trailer and finally took the plunge to update it. One issue we have run into is changing the lights by the sofa. I chose similar farmhouse style sconce lights and LED 12v Edison bulbs. They came with cords but my Hubby hardwired them in for a cleaner look. When we turn them on they lit up then "burned out" immediately? Are we missing something obvious in the install? My hubby is a mechanic and has wired a lot of different lighting etc. but not in the camper. Any thoughts?